
Float Concrete
From How to Pour a Concrete Landing Pad for Deck Stairs · Step 7 of 10 · Video by QUIKRETE
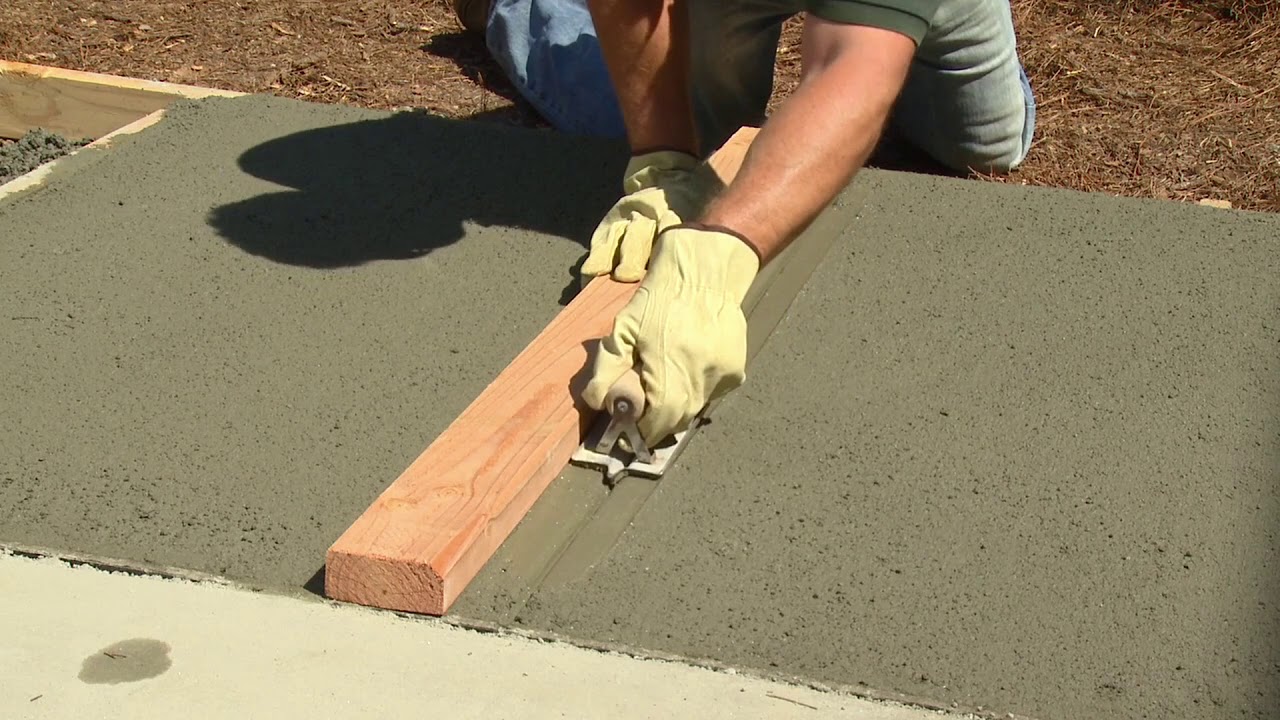
Showing 1:15–1:29 of the source video. Watch the full video with every moment.
What happens in this clip
Once the concrete has lost its watery sheen and appears dull, it's time to float the surface. Use a wood float in an arcing or sweeping motion across the entire slab. This process further smooths the concrete, pushes down any larger aggregate particles, and brings a layer of cement paste (known as 'cream') to the surface, which is essential for a durable finish.
Goal: Smooth the surface and prepare for finishing
What's used
Tools
- Wood Float
About the full video
This project provides a detailed guide on how to pour and finish concrete slabs for various outdoor applications like sidewalks, patios, or floors. It covers essential steps from preparing the sub-base and setting up forms, to pouring, leveling, floating, broom finishing, cutting control joints, edging, and finally, proper curing techniques to ensure a durable and aesthetically pleasing concrete surface.
Step 7 of 10: Float the Concrete
After screeding, wait until the concrete has lost its initial sheen (the bleed water has evaporated). Then, using a magnesium or wood float, sweep the surface in wide, overlapping arcs. This action embeds larger aggregate, smooths out imperfections left by screeding, and brings a layer of cement paste (cream) to the surface, which is essential for final finishing.
Every video in How to Pour a Concrete Landing Pad for Deck Stairs
Step 1: Excavate Area
- 13:17–15:33 Prepare Stair Base and Pour Concrete Pad
- 0:04–0:15 Site Preparation and Trench Digging
- 4:20–8:36 Prepare & Pour Concrete Pad
Step 2: Install Formwork
- 2:04–2:33 Build and Position Concrete Form
- 0:33–0:47 Formwork Installation
- 0:00–0:34 Lay Out and Assemble Initial Form Boards
Step 3: Add and Compact Gravel Base
- 2:21–2:33 Add & Compact Basecourse
- 3:15–4:05 Lay and Compact Gravel Base
- 0:20–0:38 Prepare Gravel Base
Step 4: Place Rebar or Wire Mesh
- 2:45–3:06 Add Steel Reinforcement (Rebar)
- 1:30–1:40 Add Wire Mesh Reinforcement
- 5:41–6:46 Rebar Placement for Reinforcement
Step 5: Mix and Pour Concrete
- 0:30–0:42 Pour and Level Concrete
- 3:10–3:41 Pour and Screed Concrete
- 1:58–2:31 Mix and Pour Concrete
Step 6: Screed the Concrete
- 0:04–0:13 Screed the Concrete
- 0:24–1:01 Screed the Concrete Surface
- 0:17–0:45 Screed the Concrete Surface
Step 7: Float the Concrete
- 0:16–0:25 Float the Concrete Surface
- 0:44–0:46 Hand Float Concrete Surface
- 1:15–1:29 Float Concrete (this video)
Step 8: Finish the Concrete
- 0:07–0:11 Trowel for Smooth Concrete Finish
- 10:04–11:22 Final Troweling and Finishing
- 3:30–4:49 Concrete Floating and Troweling
Step 9: Cure the Concrete
- 2:08–2:39 Cure Concrete
- 0:57–0:59 Cure Concrete and Remove Forms
- 5:50–6:12 Cure the Concrete
Step 10: Remove Formwork
- 8:43–10:04 Remove Form and Backfill
- 4:03–4:08 Remove Formwork
- 0:52–0:54 Remove Formwork
How to Pour a Concrete Landing Pad for Deck Stairs
This project involves creating a stable and level concrete landing pad at the base of deck stairs. The process includes excavating the area, building a form, and pouring and finishing the concrete. This pad provides a safe and durable surface for accessing the deck stairs.
Read the full guide Browse all guides
Planning this project? Shop Oak Valley Designs.

Subscribe for exclusive updates
Be the first to know about promotions, new products, and sales.