
Install Handrail Cap and Final Brackets
From How to Install a Handrail on Outdoor Concrete Steps · Step 7 of 7 · Video by Mike Haduck Masonry
Showing 12:04–13:20 of the source video. Watch the full video with every moment.
What happens in this clip
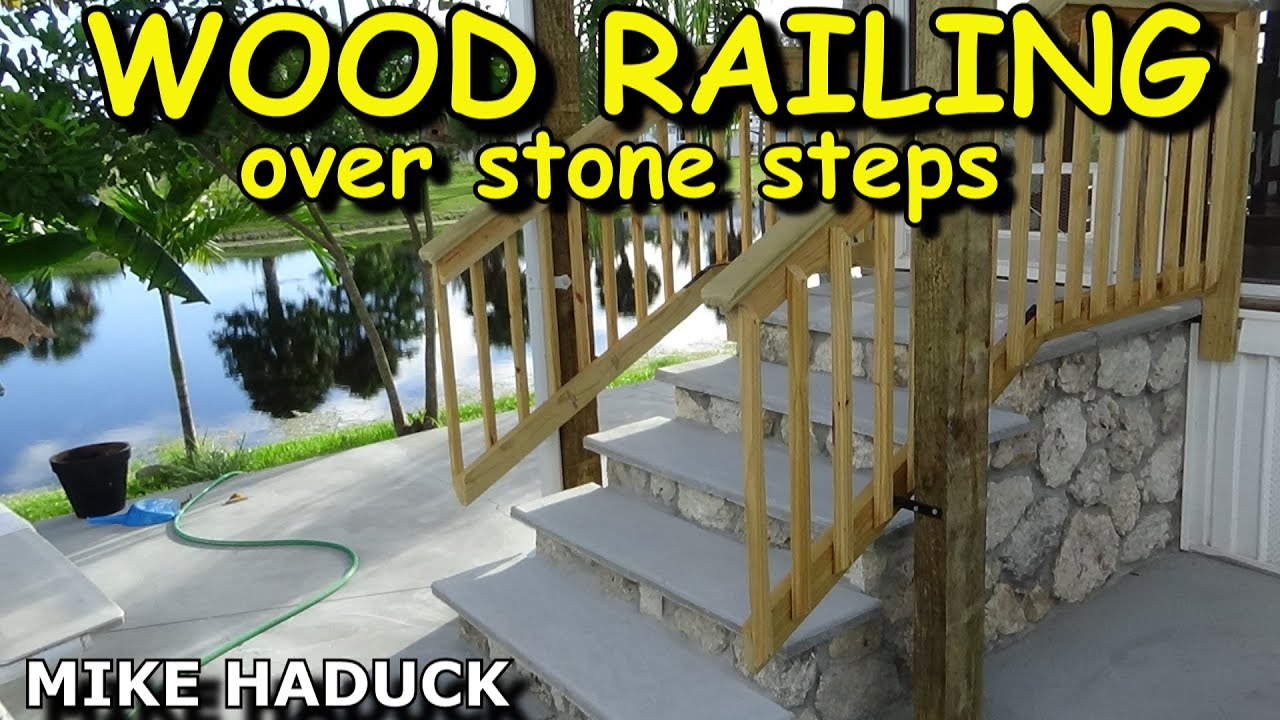
Position the pre-fabricated handrail cap directly over the assembled top railing section. Ensure it fits snugly and is aligned properly. Secure the handrail cap using appropriate fasteners (e.g., finishing nails or screws) that won't be visible. Finally, attach L-shaped brackets to the top and bottom corners of the railing sections where they meet the existing support posts. Drill pilot holes and secure these brackets with screws, providing robust lateral stability and completing the installation of the railing system.
Goal: Place the pre-fabricated handrail cap over the top railing and secure it. Then, install L-brackets to fasten the entire railing section to the existing posts.
What's used
Tools
- Cordless Drill
- Drill Bits
- Handrail Cap
- L-Brackets
- Screws
About the full video
This project guides you through installing custom-built wood baluster railings for a deck stoop and steps. It covers designing the railing sections, cutting lumber to custom angles, assembling the baluster panels, replacing a rotten support post, and securely fastening the entire railing system to the structure, ensuring code compliance and a clean aesthetic.
What's said in this clip
tightened that up good. Look it. Okay, now comes the part where I'm putting this handrailing on. See, I kind of bought it and it fits right over the top like that. Okay. Hey, when I'm doing my angles, when I'm doing my angles, I could always use a a flat file. Keep going until I got it. Or you got a lot of money, high flute. Now, we're going to talk about the way I'm going to do this. This was the old system. They had that down there and they drag a bolt down and they put a bolt down and it held like that and then they put this metal thing on top. Problem is that's all rots away. So what I did is I put that plastic piece down top and I'm not getting any water here anyway because now it's under cover. And then I'm going to drill down on the sides. And when you drill down it's like Lewis pins. Don't drill straight down. You drill at an angle. And when you did old stone work, they put the thing like this in a chain that would lift the stone up. So I was always taught, never
Automatically transcribed from the source video.
Step 7 of 7: Install End Caps or Returns (if applicable)
If your design includes end caps or returns for the handrail, install them now. Clean the ends of the handrail and the inside of the cap or return. Apply adhesive if recommended by the manufacturer, or use small screws for a mechanical fastening. Ensure the cap or return fits snugly and is aligned with the handrail. Wipe away any excess adhesive immediately.
Every video in How to Install a Handrail on Outdoor Concrete Steps
Step 1: Determine Handrail Placement and Height
Step 2: Drill Pilot Holes for Post Anchors
- 0:31–0:38 Drill Holes for Anchors
- 0:00–0:02 Drill Anchor Hole in Concrete
- 0:29–1:13 Drill Anchor Holes
Step 3: Install Concrete Anchors
- 3:24–4:36 Install Wedge Anchors
- 0:13–0:18 Position Anchor and Insert Wedge Anchor Bolt
- 0:21 Install Concrete Anchors
Step 4: Attach Handrail Posts to Anchors
- 0:42–0:52 Secure Post Bracket
- 1:16–1:33 Final Mounting and Securing the Handrail
- 0:45–0:51 Install Handrail Posts
Step 5: Measure and Cut Handrail Section
- 0:24–0:39 Measure and Cut Rails
- 0:00–0:43 Measure and Cut Handrail
- 2:44–3:05 Cut and Fit Handrail
Step 6: Attach Handrail to Posts
- 2:11–2:39 Secure Handrail to End Brackets
- 7:17–9:36 Install Handrail and Brackets
- 2:28–2:44 Install Brackets and Mount Handrail
Step 7: Install End Caps or Returns (if applicable)
- 12:04–13:20 Install Handrail Cap and Final Brackets (this video)
- 7:35–7:53 Finish with End Caps and Sticker Removal
- 3:21–3:35 Attach Mitered Returns
Questions about How to Install a Handrail on Outdoor Concrete Steps
What essential safety equipment should I use when drilling into concrete for handrail anchors?
Always wear safety glasses to protect your eyes from flying debris and dust, and hearing protection for the noise of the hammer drill. A dust mask is crucial to avoid inhaling concrete dust, which can be harmful. Additionally, sturdy work gloves protect your hands during drilling and handling materials.
Why is a hammer drill necessary for concrete, and can I use a regular drill instead?
A hammer drill combines a rotating action with a rapid percussive (hammering) motion, specifically designed to break through hard materials like concrete efficiently. A regular drill will struggle immensely and likely overheat or fail to make sufficient progress. Using the proper hammer drill with masonry bits is essential for effective and secure anchor installation.
What are common mistakes beginners make when installing concrete anchors, and how can I avoid them?
A common mistake is not thoroughly cleaning the drilled holes before inserting anchors; concrete dust can prevent the anchor from expanding properly. Ensure you drill to the exact depth and diameter specified by the anchor manufacturer. Also, avoid over-tightening wedge anchors, as this can crack the concrete or strip the anchor threads.
How do I choose the best materials for an outdoor handrail to ensure durability and longevity?
For outdoor handrails, prioritize materials that are resistant to rust, corrosion, and weathering. Excellent choices include stainless steel, aluminum, and galvanized steel, as specified in this project. Using weather-resistant screws and hardware is equally important to maintain the handrail's structural integrity over time.
How can I ensure my handrail height and placement meet local building codes and provide optimal safety?
Handrail height is typically between 34 and 38 inches above the stair nosing, but always verify specific requirements with your local building department, as codes vary. Use a level and measuring tape to meticulously mark your post locations and ensure consistent height along the entire run. Proper spacing of posts also contributes to stability and safety.
Is this project truly beginner-friendly, and what's a realistic expectation for time and cost?
While rated beginner, operating a hammer drill and working with concrete anchors might be new skills requiring patience. The estimated 5 hours is achievable with preparation, but budget extra time for learning. Costs can vary; the specified high-quality materials suggest a moderate investment, primarily for the handrail kit and specialized tools like the hammer drill.
What should I do if my newly installed handrail feels wobbly or insecure?
First, re-check the tightness of all anchors in the concrete, ensuring they are properly expanded. Next, verify that the handrail posts are securely attached to the anchors and that the handrail itself is firmly fastened to the posts and brackets. If the wobble persists, consider if additional posts or stronger anchors are needed, or consult a professional.
How to Install a Handrail on Outdoor Concrete Steps
Install a handrail on outdoor concrete steps to improve safety and accessibility. This involves selecting appropriate materials, securely mounting the handrail posts to the concrete, and attaching the handrail itself.
Read the full guide Browse all guides
Planning this project? Shop Oak Valley Designs.

Subscribe for exclusive updates
Be the first to know about promotions, new products, and sales.