
Trim Excess Carpet and Complete Installation
From How to Install Carpet Treads on Stairs with an Open Side · Step 6 of 6 · Video by The Home Improvements Channel UK
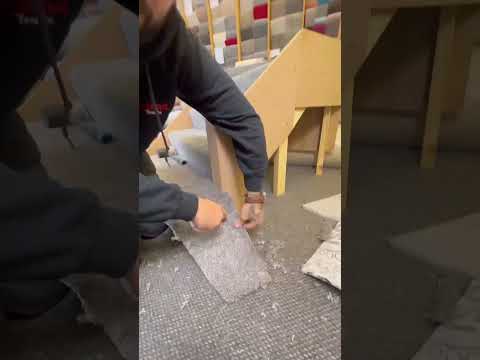
Showing 0:09–0:56 of the source video. Watch the full video with every moment.
What happens in this clip
To achieve a professional and tidy appearance, any excess carpet material extending beyond the desired dimensions of the stair must be trimmed. The installer uses a sharp utility knife or a dedicated carpet knife to make precise cuts along the edges of the stair, such as against the wall or banister posts. Additionally, scissors are seen being used for finer trimming of corners, irregular shapes, or to cut away any protective or backing materials (like bubble wrap). This step ensures that the carpet fits perfectly, eliminating frayed edges and providing a clean, finished look to the installed stairs. This entire process of positioning, securing, and trimming is then repeated for each subsequent stair until the entire staircase is carpeted.
Goal: Achieve a clean, professional finish for the stair carpet installation
What's used
Tools
- Carpet Scraper/Pry Tool
- Sturdy flat-head screwdriver
- Scissors
- cutting corners
- or removing protective packaging materials.
- Utility Knife
- Box cutter (with a very sharp blade)
Materials
- Stair Carpet
About the full video
This project provides a visual guide on how to install carpet on stairs, focusing on the practical steps of positioning, securing with staples, and trimming the carpet for a clean and professional finish on each stair. The video demonstrates the repetitive process required to uniformly carpet a staircase.
What's said in this clip
where I went wrong but I can write a song [Music] I don't think you're right for him now she be standing next to me [Music]
Automatically transcribed from the source video.
Step 6 of 6: Trim Excess Carpet
Once the adhesive has set, inspect the edges of the installed carpet treads. Carefully use a sharp utility knife to trim away any small pieces of excess carpet material that may have squeezed out or are protruding. Pay close attention to the open side to ensure a smooth, finished edge.
Every video in How to Install Carpet Treads on Stairs with an Open Side
Step 1: Clean Stair Treads
- 0:09–0:45 Prepare and Clean Stair Treads
- 0:34–0:40 Clean the Stairs
- 0:18–0:31 Clean the Stairs
Step 2: Measure and Mark Carpet Treads
- 0:12–0:57 Measure and Cut Carpet Tread
- 7:20–9:07 Measure and Cut Carpet
- 0:16–0:27 Measure and Cut Carpet Sections
Step 3: Cut Carpet Treads
- 8:08–9:23 Cut Carpet Pieces
- 0:12–0:57 Measure and Cut Carpet Tread
- 0:37–0:59 Measure and Cut Carpet
Step 4: Apply Adhesive
- 0:05–0:06 Apply Adhesive to Treads
- 0:34–0:46 Apply Carpet Adhesive to Stairs
- 0:33–0:39 Apply Adhesive and Lay First Pieces
Step 5: Install Carpet Treads
- 0:04–0:06 Install Carpet Treads
- 1:16–2:09 Install Carpet Treads with Adhesive
- 0:11–0:43 Install Remaining Carpet Stair Treads
Step 6: Trim Excess Carpet
- 1:28–2:59 Trim and Finish Edges
- 0:09–0:56 Trim Excess Carpet and Complete Installation (this video)
- 18:37–22:17 Trim and Tuck Side Edges
Questions about How to Install Carpet Treads on Stairs with an Open Side
How do I ensure a neat, professional finish on the carpet tread edge facing the open side of the stairs?
Achieving a clean edge on the open side is key. Measure and cut meticulously, ensuring the tread ends exactly at the edge or slightly wraps underneath if the tread material allows. You may need to use a strong spray adhesive or a thin bead of contact cement along that specific edge to prevent fraying and ensure it stays perfectly in place.
What type of adhesive should I use to prevent the carpet treads from slipping, especially on open-sided stairs?
For maximum security, especially on stairs, use a high-quality carpet adhesive that is designed for permanent installation or strong, double-sided carpet tape. Ensure the adhesive is compatible with both your stair material (wood, laminate) and the carpet tread backing. Apply it evenly to cover the entire tread surface for consistent grip.
What are the most common mistakes beginners make when installing carpet treads on open-sided stairs?
A common mistake is imprecise cutting, leading to uneven treads or gaps, particularly noticeable on the open side. Another is not thoroughly cleaning the stairs beforehand, which compromises adhesive bond. Also, rushing the placement can result in crooked treads or trapped air bubbles, so take your time with alignment.
Is it really necessary to clean the stair treads so thoroughly before installation?
Yes, thorough cleaning is absolutely critical for proper adhesion. Any dust, dirt, wax, or debris will act as a barrier, preventing the adhesive from bonding securely to the stair surface. This can lead to treads lifting, shifting, or becoming a tripping hazard over time, so ensure they are spotless and dry.
Are there any alternatives to permanent adhesive for attaching carpet treads, especially if I might want to remove them later?
Yes, high-quality double-sided carpet tape offers a strong hold that is often easier to remove than permanent adhesive, making it a good option for temporary or renter-friendly solutions. Some treads come with built-in non-slip backing or can be secured with specialized grip strips, but always test for sufficient stability before relying on these methods.
What safety precautions should I take when using a carpet knife and adhesive on stairs?
Always use a sharp carpet knife with extreme caution, cutting away from your body and keeping fingers clear of the blade path. Wear gloves when handling adhesives to protect your skin and ensure adequate ventilation in your workspace. Work slowly and maintain good footing on the stairs to prevent falls during installation.
How to Install Carpet Treads on Stairs with an Open Side
A high-level outline for installing carpet treads on stairs with an open side. This involves preparing the stairs, cutting the carpet treads to size, and securely attaching them to the stairs, ensuring proper fit and adhesion, especially on the open side where additional care may be needed for a clean finish.
Read the full guide Browse all guides
Planning this project? Shop Oak Valley Designs.

Subscribe for exclusive updates
Be the first to know about promotions, new products, and sales.