

How to Tension and Adjust Stair Cable Railing
About This Guide
This project outlines the steps to properly tension and adjust a cable railing system on a staircase, ensuring safety and a clean aesthetic.
Tools & Materials
VEVOR Stainless Steel Cable Railing 1/8 in. x 100 ft. Wire Rope 1x19 Strands 316 Marine Grade for Deck Rail Balusters Stair GSS1X19-3.2MM30.5V0
VEVOR 51 Pack Cable Railing Swage Threaded Stud Tension End Fitting Terminal for 1/8 in. Deck Cable Railing Stainless Steel
VEVOR Stainless Steel Cable Railing 1/8 in. x 100 ft. Wire Rope 1x19 Strands 316 Marine Grade for Deck Rail Balusters Stair GSS1X19-3.2MM30.5V0
VEVOR 51 Pack Cable Railing Swage Threaded Stud Tension End Fitting Terminal for 1/8 in. Deck Cable Railing Stainless Steel
Steps
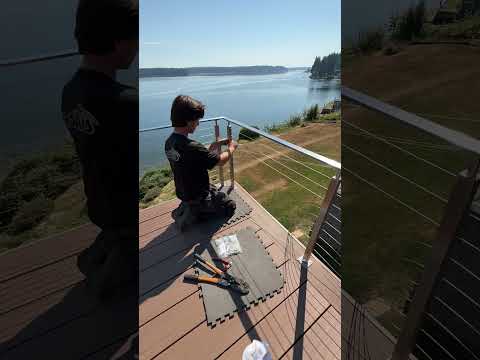
Initial Cable Engagement
Begin by carefully threading the stainless steel cable through the designated holes or channels in the starting post. Ensure the cable runs smoothly without kinks or sharp bends. Continue guiding the cable through each subsequent intermediate post, maintaining a consistent path along the staircase. Leave approximately 6-12 inches of extra cable at both the starting and ending posts to facilitate tensioning and secure attachment. This initial slack is crucial for making adjustments later.
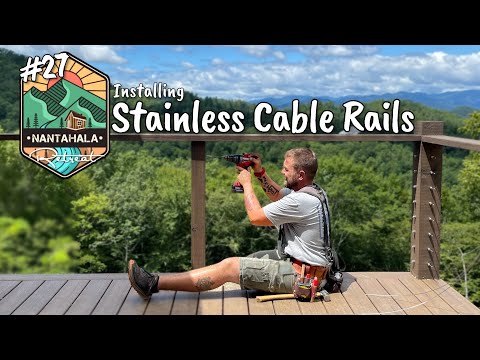
Attach Tensioning Fitting to First Cable End
At the starting post, take the slackened end of the cable and attach a tensioning fitting. If using a swage fitting, position it onto the cable and use a swaging tool to permanently crimp it in place. If using a threaded terminal, follow the manufacturer's instructions for securing it, which may involve a specific crimping method or adhesive. Ensure the fitting is firmly attached and aligned correctly with the cable's direction.

Install Tensioning Device at Opposite End
At the opposite end of the cable run (the ending post), install the tensioning mechanism. This could be a turnbuckle, which screws into a fixed point and allows for adjustment by rotating its body, or a threaded rod that passes through the post and is secured with nuts. Ensure the tensioning device is securely anchored to the post or an appropriate structural support. Leave the device in a neutral or slightly loosened state initially.
Initial Cable Tensioning
Using the installed tensioning device (turnbuckle or nuts on the threaded rod), begin to apply tension to the cable. Gradually tighten the device, observing the cable's tautness. The goal is to remove significant slack, making the cable firm to the touch without causing excessive deflection or stress on the posts. Aim for a slight give when pressed, indicating adequate tension without over-tightening.

Check for Sag and Vibration
Once initial tension is applied, gently push or pluck the cable at its midpoint. A properly tensioned cable should have minimal sag and a high-pitched 'ping' when plucked, indicating it is firm. If there is significant sagging or a dull thud, additional tension is required. Conversely, if the cable feels extremely rigid and seems to be pulling excessively on the posts, it may be over-tensioned.
Fine-Tuning Tension
Based on the sag and vibration checks, make small, incremental adjustments to the tensioning devices. Tighten or loosen as needed to achieve a consistent and appropriate level of tautness across all cables in the system. Aim for a tension that provides a solid feel without causing undue stress on the posts. Refer to manufacturer recommendations or local building codes for specific tensioning guidelines if available.
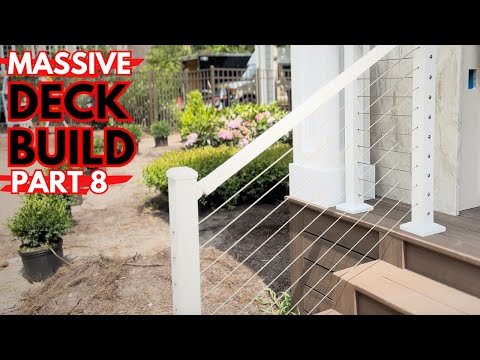
Secure Tensioning Device
Once the desired tension is achieved for each cable, secure the tensioning device to prevent it from backing off due to vibrations or environmental changes. If using a turnbuckle, some models come with locking nuts or mechanisms. For threaded rods, ensure the nuts are tightened firmly against the post or any locking washer. Consider using thread-locking compound for added security, especially in outdoor or high-vibration environments.

Final Inspection and Trim Excess Cable
Walk the length of the cable railing system, visually inspecting each cable, fitting, and tensioning device for proper installation, alignment, and security. Ensure there are no frayed ends or sharp protrusions. Once satisfied with the tension and security, use a cable cutter to trim any excess cable extending beyond the tensioning fitting at the starting post. Leave a small amount of cable, typically 1/2 to 1 inch, beyond the fitting for aesthetic reasons or future adjustments.
Questions about your project or which product fits? Oak Valley Designs's team is happy to help. Mon–Fri 9–5 ET
Related Guides
See All



Subscribe for exclusive updates
Be the first to know about promotions, new products, and sales.