
Prepare Specialized Squeak Eliminating Screw Kit
From How to Use a Squeak-Repair Kit on Carpeted Stairs and Floors · Step 2 of 6 · Video by This Old House
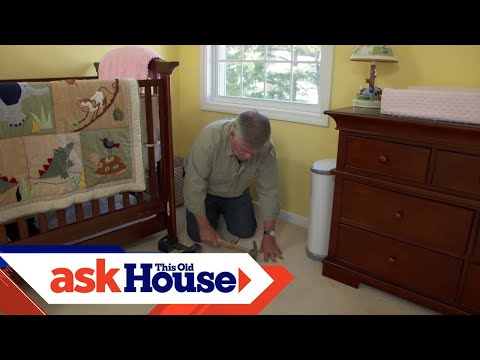
Showing 2:56–3:11 of the source video. Watch the full video with every moment.
What happens in this clip
Before fastening, familiarize yourself with the specialized squeak-eliminating screw kit. The kit typically includes a tripod guide, specialized screws, and a driver bit. The tripod guide is designed to center the screw over the joist and prevent carpet damage. The screws are engineered to drive through the subfloor and joist, and the driver bit stops the screw at the correct depth, then allows the screw head to be easily broken off just below the carpet surface, leaving no visible hardware.
Goal: Understand and prepare the tools for subfloor fastening.
What's used
Tools
- Cordless Drill DeWalt
- Specialized Driver Bit Unknown (part of kit)
- Squeak-Eliminating Screws Unknown (common kits: Squeak-No-More)
- Tripod Guide Unknown (part of kit)
About the full video
This project guides you through the process of eliminating squeaks from carpeted floors by securely reattaching the subfloor to the floor joists. It demonstrates how to locate joists through carpet using sound and a pilot screw, mark their lines, and then use a specialized screw kit that drives screws through the carpet and subfloor, breaking off the head beneath the carpet surface, to permanently quiet the floor without removing the carpeting.
Step 2 of 6: Prepare the Squeak Repair Kit
Most squeak repair kits contain specialized screws designed to bridge the gap between carpet and subfloor, and often include a drill bit sized for these screws. Familiarize yourself with all the parts included in your specific kit and carefully review the manufacturer's instructions. This ensures you understand how each component is intended to be used.
Every video in How to Use a Squeak-Repair Kit on Carpeted Stairs and Floors
Step 1: Identify Squeak Location
- 0:00–0:17 Identify Squeak Location
- 0:00–0:09 Locate the Squeak
- 0:00–0:30 Locate Squeak and Assess Access
Step 2: Prepare the Squeak Repair Kit
- 1:00–1:37 Gather Squeak Repair Kit and Drill
- 0:13–0:54 Inspect the Squeak No More Kit Components
- 2:56–3:11 Prepare Specialized Squeak Eliminating Screw Kit (this video)
Step 3: Drill Pilot Holes
- 0:15–0:24 Drill a Pilot Hole
- 4:17–5:45 Fix from Above: Use Trim Head Screws
- 4:08–4:43 Pre-Drill Pilot Holes
Step 4: Install Repair Screws
- 1:25–3:50 Install Specialized Repair Screws
- 2:56–3:28 Install Breakaway Repair Screws
- 2:48–3:49 Drive and Snap Off the Screw
Step 5: Break Off Screw Heads (if applicable)
- 3:48–4:38 Break Off the Screw Head
- 4:49–5:22 Snap Off Screw Heads
- 3:50–4:00 Break Off Screw Heads
Step 6: Test the Repaired Area
- 8:01–8:29 Test Repaired Floor
- 3:57–4:25 Repeat for All Squeaky Areas
- 0:38–0:48 Confirm Repair and Concealment
How to Use a Squeak-Repair Kit on Carpeted Stairs and Floors
Outline for using a squeak-repair kit on carpeted stairs and floors to eliminate annoying squeaking sounds.
Read the full guide Browse all guides
Planning this project? Shop Oak Valley Designs.

Subscribe for exclusive updates
Be the first to know about promotions, new products, and sales.