

How to Replace a Flush-Mount Ceiling Light on a Stair Landing
About This Guide
Outline for replacing a flush-mount ceiling light fixture on a stair landing, covering safety precautions, fixture removal, new fixture installation, and testing.
Tools & Materials
IDEAL SECURITY Ladder-Aide Pro For Type 1AA Ladders - The Safe and Easy Way to Work on Stairs
IDEAL SECURITY Ladder-Aide Pro For Type 1AA Ladders - The Safe and Easy Way to Work on Stairs
Steps


Remove the old light fixture
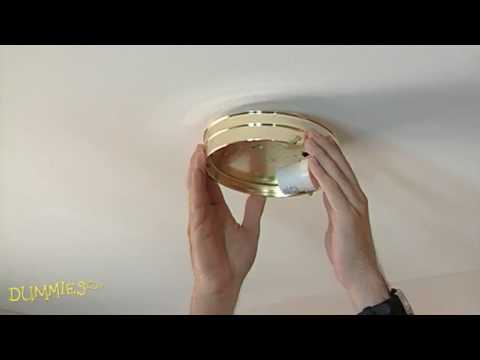
Once power is confirmed off, inspect how the current fixture is attached. Most flush-mount fixtures are held by screws, clips, or a threaded center nut. Remove any decorative covers or shades. Unscrew or unclip the fixture from the mounting bracket. Support the fixture as you disconnect the wiring. Remove wire nuts connecting the fixture wires to the house wiring, and carefully separate the wires.

Wire the new light fixture
Match the wires from the new fixture to the wires from the ceiling electrical box. Typically, black (hot) connects to black, white (neutral) connects to white, and green or bare copper (ground) connects to green or bare copper. Secure each connection by twisting a wire nut tightly onto the joined wires. Ensure no bare wire is exposed.
Mount the new fixture and attach covers
Carefully tuck the wired connections into the electrical box. Align the new fixture with the mounting bracket and secure it according to the manufacturer's instructions. This usually involves screws or a twist-lock mechanism. Once the fixture is securely mounted, attach any decorative covers, shades, or diffusers.
Questions about your project or which product fits? Oak Valley Designs's team is happy to help. Mon–Fri 9–5 ET
Related Guides
See All
How to Install a Motion-Sensor Light Switch in a Stairway

How to Wire a 3-way Switch for Stair Lights at the Top and Bottom

How to Cut and Join LED Strip Lights Around Stair Corners

How to Replace a Light Fixture over a Two-Story Stairwell

Subscribe for exclusive updates
Be the first to know about promotions, new products, and sales.