

How to Install a Pet Gate at the Bottom of Stairs
About This Guide
Outline for installing a pet gate at the bottom of stairs, focusing on secure mounting and ensuring safety for pets and children.
Tools & Materials
Steps
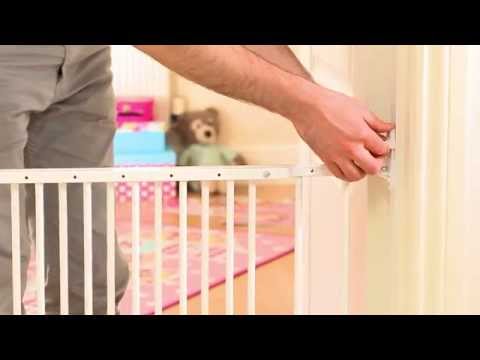
Select Gate Type and Location
Select a pet gate that is specifically designed for use at the bottom of stairs. Hardware-mounted gates are generally recommended for stairways for maximum safety, as pressure-mounted gates can pose a risk if dislodged. Measure the width of the stair opening at the bottom to ensure the chosen gate will fit snugly. Check the gate's specifications for maximum and minimum opening widths it can accommodate. Prioritize gates that meet current safety standards for child and pet safety. Ensure the gate itself is sturdy and does not have small parts that could be a choking hazard for young children or pets.

Mark Mounting Positions
Place the pet gate in the desired position at the bottom of the stairs. Use a spirit level to ensure the gate is perfectly vertical and horizontal. If mounting to a wall, identify the studs for the most secure installation. If mounting to banister posts, ensure they are sturdy and capable of supporting the gate. Carefully mark the precise locations where the mounting brackets or hinges will be attached to the wall or post. Double-check these marks for accuracy and ensure they are level and plumb.

Install Mounting Hardware
Following the gate manufacturer's instructions, drill pilot holes at each marked location. The size of the pilot hole should be slightly smaller than the diameter of the screws provided. If mounting to a stud, ensure the screw penetrates well into the stud. If using drywall anchors, install them according to their specific instructions. Once pilot holes are drilled (and anchors installed if needed), align the mounting brackets or hinges with the holes and drive the screws firmly to secure them to the surface. Ensure all hardware is tightly fastened.

Attach Gate to Hardware
Carefully lift the gate and align its corresponding attachment points (e.g., hinge slots, latch mechanisms) with the previously installed wall brackets or posts. Follow the specific instructions provided with your gate model for attaching it. This may involve sliding pins, clicking latches into place, or screwing the gate frame to hinges. Once attached, test the gate by opening and closing it to ensure it moves smoothly without binding. Verify that the latch engages securely and can be easily operated by an adult but is difficult for pets or young children to open.
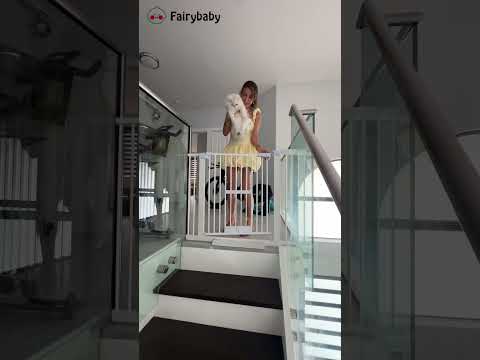
Adjust and Test Latch Mechanism
Once the gate is hung, make any necessary minor adjustments to ensure it sits perfectly square and closes flush against the frame or post. Operate the latch several times to ensure it is easy to use for adults but secure enough to contain pets and small children. Gently push and pull on the gate to confirm it is stable and securely attached to the mounting hardware. There should be minimal movement or play. Re-check that the latch engages fully and holds the gate closed effectively.
Questions about your project or which product fits? Oak Valley Designs's team is happy to help. Mon–Fri 9–5 ET
Related Guides
See All



Subscribe for exclusive updates
Be the first to know about promotions, new products, and sales.