

How to Find Studs and Set the Right Handrail Height
About This Guide
This project outlines the steps to locate wall studs and determine the correct height for installing a handrail, ensuring safety and code compliance for stairways and accessible routes.
Tools & Materials
Steps
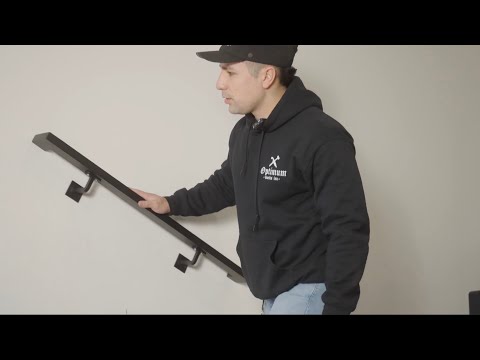
Determine Handrail Height
Using a tape measure, locate the desired height for the handrail. A common standard is to place the top of the handrail 34 inches above the slope or nosing of the stair. Measure this height at several points along the staircase to ensure consistency. Mark these points lightly with a pencil.


Mark Support Bracket Locations
Hold a handrail bracket against the wall at the desired height, ensuring it is centered over a marked stud centerline. Use a pencil to mark the screw hole locations through the bracket onto the wall. For longer runs, use a level to ensure brackets are vertically aligned.


Attach Support Brackets
Place each handrail bracket over the pre-drilled pilot holes. Insert the appropriate screws (typically lag screws or wood screws designed for structural support) through the bracket and into the pilot holes. Tighten the screws firmly with a drill or wrench until the bracket is snug against the wall and securely engaged with the stud. Do not overtighten, which can strip the wood or damage the drywall.
Questions about your project or which product fits? Oak Valley Designs's team is happy to help. Mon–Fri 9–5 ET
Related Guides
See All



Subscribe for exclusive updates
Be the first to know about promotions, new products, and sales.