
Test Suspected Decayed Areas
From How to Check Stairs for Rot or Damage Before Covering Them · Step 2 of 5 · Video by International Association of Certified Home Inspectors (InterNACHI)
Showing 0:35–0:51 of the source video. Watch the full video with every moment.
What happens in this clip
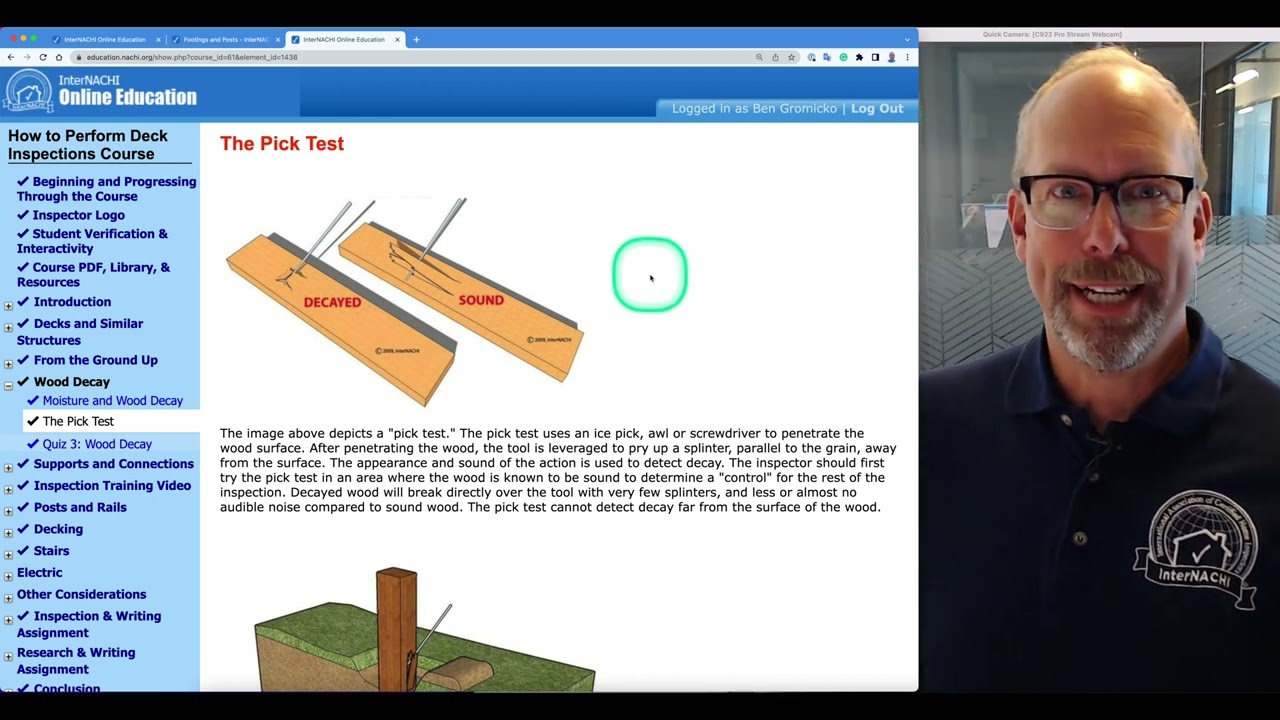
Once you have established a control, apply the same pick test technique to areas of the wooden structure suspected of decay. Penetrate the wood surface with the tool and pry up a splinter. Decayed wood will typically break directly over the tool with very few splinters, or splinter much less easily, and produce little to no audible noise compared to the sound wood control. This difference in resistance and splintering indicates the presence of decay. The video notes that this test is effective for surface decay but may not detect decay far from the surface.
Goal: Identify decayed wood sections
What's used
Tools
- Awl
- Deck (Suspected Decay Areas)
- Ice Pick
- Screwdriver
About the full video
This instructional video explains 'The Pick Test,' a simple yet effective DIY method for inspecting wooden structures, particularly decks, to detect early signs of decay. It involves using a sharp, rigid tool to penetrate the wood surface and pry up splinters, distinguishing between sound and decayed wood based on resistance, splintering, and sound. The process also highlights the importance of checking areas below grade level where decay is common.
Step 2 of 5: Probe for Soft Spots and Rot
After the visual inspection, systematically probe the surfaces of the treads, risers, and the visible portions of the stringers. Insert the tip of a sturdy screwdriver or an awl into the wood and apply moderate pressure. Move the probe in short increments. Listen for any unusual sounds like crunching or squishing, which can signal decay. Feel for any areas that feel soft, spongy, or give way easily under pressure. If the probe penetrates the wood with little resistance, it's a strong indication of rot or significant damage. Pay special attention to areas near the nosing of the treads and where the stringers meet the treads.
Every video in How to Check Stairs for Rot or Damage Before Covering Them
Step 1: Inspect Treads and Risers for Surface Damage
- 0:00–0:53 Assess Damage & Prepare for Repair
- 1:02–1:35 Visually Inspect for Staircase Wear and Damage
Step 2: Probe for Soft Spots and Rot
- 3:55–4:18 Inspect for Rot and Soft Spots
- 0:35–0:51 Test Suspected Decayed Areas (this video)
- 0:00–0:53 Assess Damage & Prepare for Repair
Step 3: Check Stringer Integrity
- 3:26–4:07 Prioritize Maintenance and Safety
- 0:54–1:40 Identify Stringer Cracks
- 0:05–0:14 Identify and Assess Damage
Step 4: Assess Fastener Security
- 0:00–0:53 Assess Damage & Prepare for Repair
- 3:26–4:07 Prioritize Maintenance and Safety
- 0:12–0:14 Final Test and Inspection
Step 5: Test for Stability and Squeaks
- 0:12–0:14 Final Test and Inspection
- 4:28–5:00 Test the Repaired Stairs
- 3:29–3:39 Eliminate Squeaks from Treads
How to Check Stairs for Rot or Damage Before Covering Them
A high-level outline for a DIY project to inspect stairs for rot or damage before covering them. This involves visual inspection, probing for softness, checking for structural integrity, and assessing the condition of treads, risers, and stringers.
Read the full guide Browse all guides
Planning this project? Shop Oak Valley Designs.

Subscribe for exclusive updates
Be the first to know about promotions, new products, and sales.