
How To Install a Motion Sensor Light Switch to Turn the Lights On/Off Automatically | Lutron Maestro
Video by How To Home · 2 moments used in Oak Valley Designs's DIY guides · 8:48 long
Moments in this video
- 3:28–3:58 Connect Ground Wires
From How to Install a Motion-Sensor Light Switch in a Stairway, Step 5: Connect Ground Wire
Take the bare copper ground wire coming from the wall box and the silver-looking ground wire from the motion sensor switch. Twist these two wires together firmly. Once twisted, secure them tightly with a yellow wire nut. Ensure the connection is snug by gently tugging on the wires.
- 7:43–7:51 Install Wall Plate
From How to Install a Motion-Sensor Light Switch in a Stairway, Step 7: Install the Cover Plate
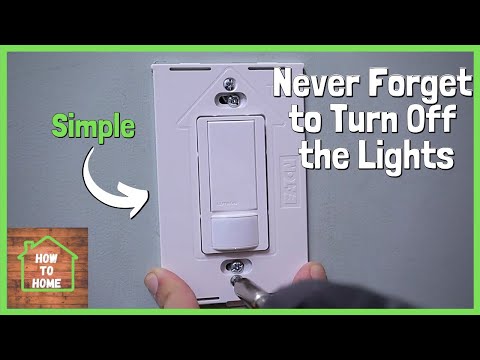
Finally, install the decorative wall plate over the new motion sensor light switch. Screw the wall plate onto the electrical box using the provided screws and then snap the decorative cover plate into place for a clean, finished look.
The guide that use this video
Transcript
0:02 what's up guys adam here again and in this video i'm going to be talking about how to install a motion sensor light switch and the reason i'm going to be installing one of these light switches today is because i have a couple rooms in my house one in particular where it seems as though i'm the only one that's strong enough to turn the switch off so that light is staying on for extended amounts of time and therefore just wasting electricity so the way these switches work is basically you can have them set different ways but for the most part the way they work is when you enter a room they will turn on the light or lights automatically and then after a set amount of time again you can change that as well after a set amount of time it will automatically turn the lights off so you don't have to worry about whether or not lights are being left on they will
0:50 automatically turn off after that set amount of time so if you have kids or you have your well no we'll just leave it as your kids if you have kids that are leaving all of your lights on or specific ones then you may want to look into installing one of these motion sensor light switches so let's go ahead and jump right in so the first thing we need to do before we get started on anything with a switch is go out to your circuit breakers and turn off the circuit breaker that is supplying the power to the switch that you're going to be replacing and then after you've turned off the circuit breaker then you need to check to make sure that the power is in fact off now we know that the power is off we can remove the switch from the wall
1:40 now we can start removing all these wires from the terminals now in this particular installation we don't need to know which one of these wires is line and load it's not going to matter we're just going to hook them up but in a lot of switches that are like this you do need to know which one is line which is bringing the power in and which one is load if you ever are doing an installation like that you can figure out which one of these is lined by before the electricity is turned off and the switch is in the off position you can use a multimeter and figure out which one of these terminals has electricity going to it and that'll let you know your line but again for this installation we don't need to know that so go ahead and start removing all of these wires
2:31 all right so before i get started with installing this i just wanted to quickly go over some of the wiring on the switch so the silver looking wire is going to be our ground these two blacks are going to be our hot wires and then this green wire down here usually green means ground and if you don't have a neutral wire this is going to get installed wire nutted together with this ground wire up on top those would be put together and then wired and connected to the ground wire coming from the wall but if you have a neutral wire which in this case i have a neutral wire what we're going to do is this is actually going to get connected to the neutral wire so we'll go ahead and remove this green sleeve off of this wire and then that way we know that this is
3:17 actually going to get hooked up to the neutral but again if you don't have a neutral wire this and the ground are going to be wired together with the ground wire okay so now that we've got all of our wires straightened out let's go ahead and start with installing the ground wires on this switch so you're just going to take your ground wire coming off the switch and start wrapping it around that ground wire coming out of the wall that bare copper wire and then just put a wire nut on top and tighten it down so you can see that it's starting to twist here that's usually a pretty good indication that they're well wrapped together so now we're going to install this white neutral wire and as you can see there's no white wire
4:03 coming out of the box this is very standard for light switches all of your white neutral wires most of the time are going to be all wired together bundled together with a wire nut in the back of the switch box so we just need to pull that bundle out which here it is and then just remove the wire nut from the bundle of neutral wires take your neutral wire from the switch and then just start wrapping it around with those other neutral wires and then you can take your wire nut and put it back on and twist them all together now you can push those neutral wires back to the back of the box where they were
4:49 so now that brings us to our black hot wires and we're just going to do the same thing wrap the wire start wrapping the wire around put a wire nut on and just tighten them both down again it doesn't matter which black wire connects to what hot wire for this particular switch so just connect both of them to the hot wires coming out of the box also make sure that as you're tightening your wire nuts onto your wiring just give them a tug to make sure that none of the wires will come out so now all of the wiring is connected so we can push all the wiring into the back of the box and then we can screw the light switch itself down onto the top of the box
5:36 [Music] so now the switch is tightened down into place now you can go ahead and turn the power back on to the switch so now the power is back on before we put a cover on this to make this look all nice we're going to be able to get to this button that's over here on the right side to program this and we're going to do that by programming the timeout time whether or not you want this switch to turn on automatically or manually and then turn off automatically and then of course the advanced settings as to how sensitive this is to motion and all the instructions are going to be included in your box it's basically going to be done by pushing down specific buttons for a certain amount of time and then this light right here will flash to let you know what setting it's
6:22 on so let's start out with timeout time i want to be set to five minutes which this will flash three times then so we're going to hold this button down here okay so there it flashed the third time which means it's on setting three and this is now going to time out after there's been no motion after five minutes so now we're going to adjust the sensor mode and this is going to be whether you want this to automatically turn on with motion or if you want to manually turn it on and then it will automatically turn off once there hasn't been any motion which is the option i would like so this button over here on the right side we're going to push this down and we want it to get to where it shows two flashes in my case
7:13 and there's the second flash and then the last option is going to be how sensitive this is going to be to motion i want it to be on a low sensitivity because it's right by the door where you walk in so it's going to be able to pick up any motion that's in this very small room so i'm going to put it on low which is just one flash but if you want it on high it would be two flashes so you have to hold down both of these buttons at the same time and there's one flash so it is set to low sensitivity all right guys that's pretty much all there is to installing one of these motion sensor switches as you saw really easy to do and maybe this is the solution that you needed
7:59 in order to make sure that your lights are being turned off and save you some money on your electrical bill so i hope that you found this video to be helpful and maybe you learned something new and if you did please let me know by leaving a comment down in the comment section and also giving the video a thumbs up and of course if you have any questions you can leave those down in the comments as well and if you like how to's and do yourself type videos for around the home like we did here today i do a bunch of videos on new projects and also videos on repairs and maintenance for around your home and i have a bunch of videos that i've already done in the past you can go check out now so consider hitting that red subscribe button and i hope to see you in the next video
8:47 [Music] you
Automatically transcribed from the source video.
More from the Oak Valley Designs DIY Hub
Read the guide Browse all guides
Planning this project? Shop Oak Valley Designs.

Subscribe for exclusive updates
Be the first to know about promotions, new products, and sales.