
How to Install a Deck Railing - DIY Network
Video by DIY Network · 2 moments used in Oak Valley Designs's DIY guides · 2:06 long
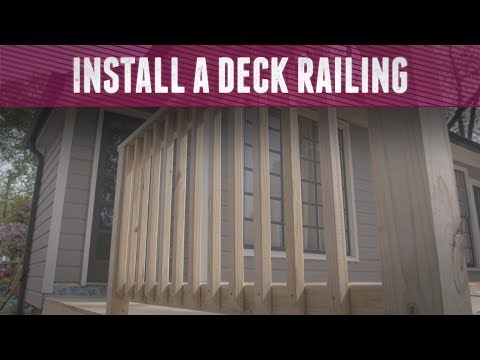
Moments in this video
- 0:51–1:08 Install Top and Bottom Rails
From How to Install a Deck Stair Railing, Step 3: Install Top and Bottom Rails
Now, prepare and install the top and bottom rails that will run horizontally between the posts. First, measure the distance between the installed posts to determine the length needed for these rails. Use a miter saw to cut the rail pieces to size. To ensure even installation, use small wood blocks as spacers to set the desired height for the bottom rail. Nail the bottom rail in place first, then attach the top rail, making sure it is flush with the top of the posts.
- 1:10–1:35 Install Balusters
From How to Install a Deck Stair Railing, Step 4: Install Balusters (Spindles)
Next, you'll install the balusters, which are the vertical pieces between the top and bottom rails. These are typically made from 2x2 lumber and can be bought pre-cut. The number of balusters and their spacing depend on the size of the balusters and the distance between your posts. Code generally requires a gap of no more than 4 inches for safety. Once you've determined your spacing, mark the locations on the rails, and then nail the balusters to both the top and bottom railings.
The guide that use this video
Transcript
0:07 [Music] generally any deck raised 30 inches above grade is required by code to have a railing what you know what you need you should make sure you know exactly how to install your railing properly start with four by four pressure-treated posts and cut them to the proper height there's a couple of ways to attach the post to the deck and one popular way is to not suppose so they can sit securely on top of the deck to do this mark and measure for the not choosing a framing square cut out the notch and then mark and measure for the hardware pre-drill the holes using a countersink bit set the posts in place checking to make sure they're plumb and attach them to the deck using head lock screws the next step is to add the top and bottom rails
0:53 to pieces that run horizontally between the posts measure the distance between them and cut these pieces to size to install these evenly use spacers to set the height and nail the bottom rail in place first then attach the top rail making sure it's flush with the top of the posts now you're ready for the balusters which are the pieces that run vertically between the top and bottom rails these are generally made from two by twos that can be bought pre-cut how many balusters you need and how to space them out evenly depends on the size of the balusters and the distance between your posts once you have your spacing mark nail the balusters to the top and bottom railings once all of your railing sections are securely fastened you can
1:39 add a railing cap if your design calls for them railing caps or cap rails sit on the top rail to create a small ledge and a nice finished look with these steps you can have a new railing built in no time just be sure to check your railing annually and repair any rusty hardware or software this will help keep your deck railing looking its best and ensure it's totally safe
Automatically transcribed from the source video.
More from the Oak Valley Designs DIY Hub
Read the guide Browse all guides
Planning this project? Shop Oak Valley Designs.

Subscribe for exclusive updates
Be the first to know about promotions, new products, and sales.