
Cure and Protect the Repaired Area
From How to Repair a Chipped Concrete Step Edge · Step 6 of 6 · Video by QUIKRETE
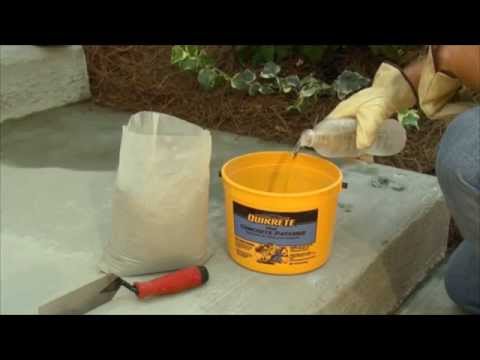
Showing 0:37–0:46 of the source video. Watch the full video with every moment.
What happens in this clip
Once the concrete patch is applied and smoothed, it needs adequate time to cure and harden. Protect the repaired area from any foot traffic for at least 24 hours. If the repaired area is in a location with vehicle traffic, it must be protected for a minimum of three days to achieve its full strength and prevent damage. Ensure the patch is protected from extreme weather conditions like heavy rain or freezing temperatures during the curing process.
Goal: Allow the concrete patch to cure properly and achieve full strength
About the full video
This project demonstrates how to repair chipped, spalled, or damaged concrete surfaces using Quikrete Vinyl Concrete Patcher. The process involves preparing the damaged area by removing loose material, mixing the patching compound with water, applying it to the repair site, and smoothing it to match the surrounding concrete. The video also emphasizes the importance of proper curing and protection of the repaired area to ensure durability.
Step 6 of 6: Cure the Repair
Protect the repaired area from direct sunlight, extreme temperatures, and heavy traffic while it cures. Some products may require misting with water periodically to ensure proper curing, while others should be kept dry. Refer to the product packaging for specific curing times and methods. Avoid walking on or applying any load to the repaired step until the full cure time has elapsed.
Every video in How to Repair a Chipped Concrete Step Edge
Step 1: Clean the Chipped Area
- 0:12–0:55 Clean and Prepare the Damaged Area
- 0:46–1:13 Clean Out Debris and Loose Chunks
- 1:36–3:50 Clean Out Loose Concrete and Debris
Step 2: Undercut the Edge (if necessary)
- 0:46–1:13 Clean Out Debris and Loose Chunks
- 1:36–3:50 Clean Out Loose Concrete and Debris
- 0:43–1:02 Prepare Damaged Concrete and Install Forms
Step 3: Mix the Concrete Repair Compound
- 0:39–0:49 Mix Patching Cement
- 1:41–1:54 Mix Concrete Patching Compound
- 1:03–2:18 Mix the Concrete Patcher
Step 4: Apply the Repair Compound
- 1:55–2:11 Apply Concrete Patch to Chips
- 1:15–4:04 Apply Two-Part Epoxy Filler
- 1:32–1:46 Fill Damaged Areas
Step 5: Shape and Finish the Surface
- 3:40–5:58 Smooth and Finish Concrete Step Repair
- 0:52–1:02 Smooth and Finish Concrete Patch
- 3:15–5:02 Shape and Texture the Patch
Step 6: Cure the Repair
- 0:37–0:46 Cure and Protect the Repaired Area (this video)
- 0:28–0:29 Allow Compound to Cure
- 11:58–12:06 Cure and Protect Repaired Steps
How to Repair a Chipped Concrete Step Edge
This project outlines the steps to repair a chipped edge on a concrete step, restoring its appearance and preventing further damage. It involves cleaning the area, applying a suitable concrete repair compound, and finishing the surface.
Read the full guide Browse all guides
Planning this project? Shop Oak Valley Designs.

Subscribe for exclusive updates
Be the first to know about promotions, new products, and sales.