
Remove Old Light Fixture Glass Cover and Bulbs
From How to Remove a Ceiling Light Cover to Change the Bulbs · Step 2 of 7 · Video by DIY with Michael Borders
Showing 1:50–2:38 of the source video. Watch the full video with every moment.
What happens in this clip
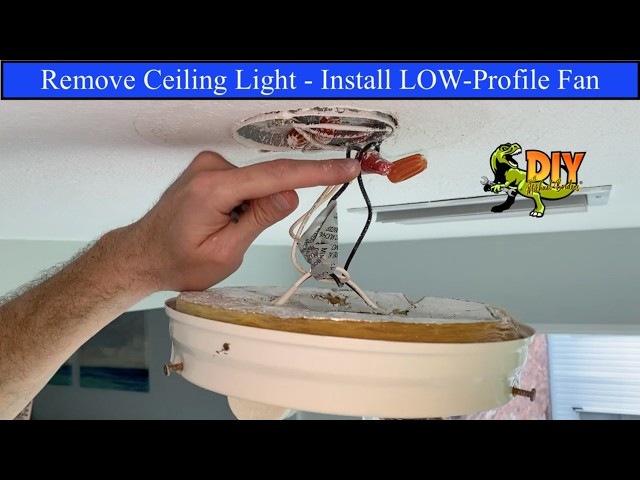
Carefully remove the glass cover from the old ceiling light fixture. This is typically secured by three small screws located around the rim of the base. In this case, only two screws were present. Support the glass cover with one hand while simultaneously unscrewing or unthreading the screws counter-clockwise. Once the screws are loose, gently lower the glass cover and set it aside. Next, carefully twist the light bulbs counter-clockwise to remove them from their sockets. Place the bulbs in a safe location.
Goal: Remove the old light fixture's glass cover and bulbs
What's used
Tools
- Old Ceiling Light Fixture
- Small Screws
About the full video
This project provides detailed instructions on how to safely remove an old ceiling light fixture and install a new low-profile LED ceiling fan with remote control. The process covers essential safety steps, proper wire disconnection and connection, mounting the fan bracket, and testing the new fixture's functionality.
What's said in this clip
that switch back off. Coming up to the ceiling light, we've got a large piece of glass that secures into the light base that secures to the ceiling alongside of the base, you should have three little screws. In our case, we only have two. One's missing on the backside. And with one hand supporting the glass, you want to simultaneously unscrew or unthread counterclockwise these little screws. And you want to do it slow and carefully. And once you unscrew those, you can carefully lower that glass. And we did just that. The glass has been removed to a closer view now to the threaded screws. And again, just go slow. Be careful. Don't drop anything. From here, we need to remove those bulbs. And again, counterclockwise. Be careful. Do not drop these.
Automatically transcribed from the source video.
Step 2 of 7: Remove the light fixture cover
Observe how the current light cover is attached. Most covers are secured by screws, a twist-lock mechanism, or retaining clips. Unscrew any visible screws, or gently twist the cover counter-clockwise if it's a twist-lock type. If there are clips, press them to release the cover. Support the cover with one hand as you detach it to prevent it from falling.
Every video in How to Remove a Ceiling Light Cover to Change the Bulbs
Step 1: Turn off power to the light fixture
- 0:50–1:05 Turn Off Power at Circuit Breaker
- 0:47–0:52 Turn Off Power at Circuit Breaker
- 0:03–0:05 Shut Off Power to the Circuit
Step 2: Remove the light fixture cover
- 1:50–2:38 Remove Old Light Fixture Glass Cover and Bulbs (this video)
- 1:03–1:50 Remove Light Fixture Cover
- 0:17–0:23 Remove Light Bulb Cover and Bulbs
Step 3: Remove old light bulbs
- 0:34–0:50 Unscrew Old Bulb
- 1:50–2:05 Remove Light Bulbs
- 0:38–1:04 Remove the Old Bulb
Step 4: Install new light bulbs
- 1:15–1:30 Install New Light Bulb
- 1:04–1:12 Install the New Bulb
- 0:26–0:31 Install the New Light Bulb
Step 5: Reattach the light fixture cover
- 6:11–6:23 Replace the Fixture Cover
- 0:57–1:08 Reinstall Dome Light Cover
- 0:55–1:09 Install the Light Cover
Step 6: Restore power to the light fixture
- 10:35–10:39 Restore Power and Test the New Fixtures
- 2:59–3:02 Restore Power
- 2:11–2:21 Restore Power and Test
Step 7: Test the light fixture
- 9:22–9:55 Restore Power and Test
- 8:04–8:19 Restore Power and Test
- 2:47–2:52 Test New Light Fixture
How to Remove a Ceiling Light Cover to Change the Bulbs
Outline for removing a ceiling light cover to change bulbs.
Read the full guide Browse all guides
Planning this project? Shop Oak Valley Designs.

Subscribe for exclusive updates
Be the first to know about promotions, new products, and sales.