
Install Remaining Treads and Risers
From How to Install Treads on Stairs with a Mid-Stair Landing · Step 7 of 8 · Video by MatthiasWandel
Showing 3:28–6:52 of the source video. Watch the full video with every moment.
What happens in this clip
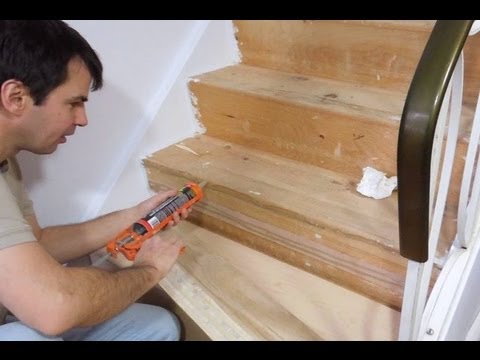
Continue the installation process for the remaining steps. For each step, apply construction adhesive to the existing step surface. Place the cut stair tread, ensuring a snug fit. Then, apply construction adhesive to the back of the prepared riser, and insert any necessary support wedges. Secure the riser with a nail gun. Repeat this pattern, working your way up the staircase. Pay close attention to alignment and ensure each piece is firmly set before moving to the next. The back edge of each tread will be covered by the next riser, so visible nails in that area are acceptable.
Goal: Complete the installation of all new stair treads and risers
What's used
Tools
- Caulk Gun
- Nail Gun Porter-Cable
- Brad nailer
Materials
- Bevel Cut Risers
- modified for fit.
- Construction Adhesive PL (Polyurethane)
- Gorilla Glue Construction Adhesive
- Finishing Nails
- New Stair Treads
- Scrap Wood Wedge
About the full video
This project provides a detailed guide on how to install pre-fabricated stair treads and risers onto an existing wooden staircase. The process involves precise measurement, cutting, and custom fitting of the risers to accommodate the new treads, followed by securing them with construction adhesive and a nail gun. The aim is to upgrade the appearance of a staircase by covering existing unfinished steps with new, decorative wood pieces.
Step 7 of 8: Install Risers (if applicable)
If your stairs have separate riser boards, install them now. Cut the riser material to fit snugly between the underside of the new tread and the top of the tread below. Secure the risers in place using construction adhesive and finishing nails or screws. Ensure the risers are flush and create a clean vertical line. This step may not be necessary if your stairs have integrated risers.
Every video in How to Install Treads on Stairs with a Mid-Stair Landing
Step 1: Assess Existing Stair Treads
- 0:00–0:13 Assess Existing Stairs and Planning
- 0:01–0:04 Remove Stair Covering
- 0:00–0:56 Assess and Remove Old Stair Treads
Step 2: Measure and Template Treads
- 0:55–1:13 Measure and Mark Tread and Nosing
- 0:57–1:16 Measure Treads and Mark Laminate
- 0:29–0:45 Mark and Cut New Stair Treads
Step 3: Cut New Stair Treads
- 1:16–2:13 Measure and Cut New Stair Treads
- 4:34–5:55 Measure and Cut Treads
- 2:07–2:42 Mark and Cut Your Treads
Step 4: Prepare Tread Surfaces
- 0:51–0:57 Strip Old Finish from Tread Surfaces
- 2:06–2:59 Sand Solid Oak Treads
- 0:33–0:39 Cut & Sand New Treads
Step 5: Test Fit New Treads
- 2:13–2:35 Test Fit and Adjust Treads
- 1:35–1:41 Dry Fit Tread and Nosing
- 19:07–19:52 Dry-Fit and Test Treads
Step 6: Apply Adhesive and Fasten Treads
- 2:32–3:28 Install First Tread and Riser
- 1:24–1:35 Apply Adhesive and Install Treads
- 9:53 Install New Treads
Step 7: Install Risers (if applicable)
- 1:24–2:00 Install Risers
- 0:04–0:08 Measure, Cut, and Install New Risers
- 3:28–6:52 Install Remaining Treads and Risers (this video)
Step 8: Fill Screw Holes and Finish
- 4:25–4:47 Fill Gaps and Nail Holes
- 5:31–6:06 Apply Finish & Clean Up
- 1:28–1:50 Clean Up and Finish
How to Install Treads on Stairs with a Mid-Stair Landing
This project outlines the process of installing treads on stairs that include a mid-stair landing. It covers preparation, measurement, cutting, and fastening of new treads to ensure a safe and aesthetically pleasing staircase.
Read the full guide Browse all guides
Planning this project? Shop Oak Valley Designs.

Subscribe for exclusive updates
Be the first to know about promotions, new products, and sales.