
New treads for old stairs
Video by MatthiasWandel · 2 moments used in Oak Valley Designs's DIY guides · 7:29 long
Moments in this video
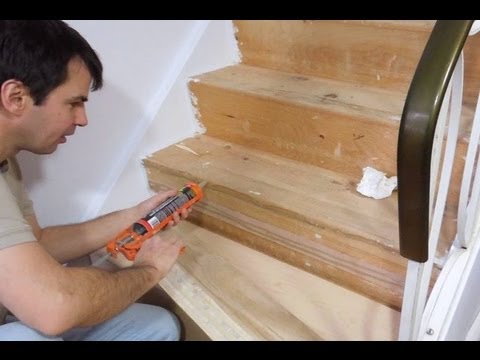
- 2:32–3:28 Install First Tread and Riser
From How to Install Treads on Stairs with a Mid-Stair Landing, Step 6: Apply Adhesive and Fasten Treads
Start installing from the bottom step. Apply construction adhesive generously to the existing stair tread. Place the first new stair tread securely on top of the existing tread. Then, apply a bead of construction adhesive along the top back edge of the newly installed tread and along the front edge of the existing step. Insert a small scrap wedge of wood behind the bottom edge of the new riser to provide additional support, ensuring it resists kicks. Apply construction adhesive to the back of the bevel-cut riser and secure it in place with a nail gun. Use finishing nails spaced evenly along the top and bottom edges. The construction adhesive provides the primary bond, while the nails hold the pieces in place until the adhesive cures.
- 3:28–6:52 Install Remaining Treads and Risers
From How to Install Treads on Stairs with a Mid-Stair Landing, Step 7: Install Risers (if applicable)
Continue the installation process for the remaining steps. For each step, apply construction adhesive to the existing step surface. Place the cut stair tread, ensuring a snug fit. Then, apply construction adhesive to the back of the prepared riser, and insert any necessary support wedges. Secure the riser with a nail gun. Repeat this pattern, working your way up the staircase. Pay close attention to alignment and ensure each piece is firmly set before moving to the next. The back edge of each tread will be covered by the next riser, so visible nails in that area are acceptable.
The guide that use this video
More from the Oak Valley Designs DIY Hub
Read the guide Browse all guides
Planning this project? Shop Oak Valley Designs.

Subscribe for exclusive updates
Be the first to know about promotions, new products, and sales.