
Remove Stair Covering
From How to Install Treads on Stairs with a Mid-Stair Landing · Step 1 of 8 · Video by SurewoodLNL
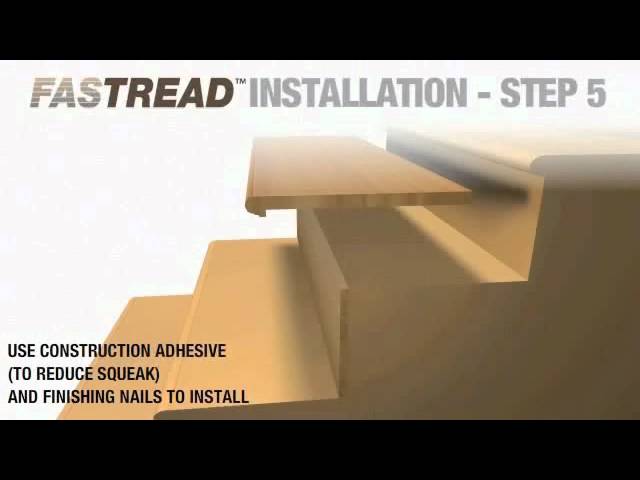
Showing 0:01–0:04 of the source video. Watch the full video with every moment.
What happens in this clip
Begin by removing any existing stair covering, such as carpet or vinyl. Ensure all remnants of old adhesive, fasteners, and debris are thoroughly cleared from the stair treads and risers. This step is crucial for creating a clean and stable base for the new FastTread components.
Goal: Prepare the existing stairs by removing all coverings and debris.
What's used
Tools
- Gloves
- Pliers
- Nail puller
- Pry Bar
- Flathead screwdriver (for small fasteners)
- padding
- or other floor coverings.
- Utility Knife
About the full video
This project details how to upgrade existing stairs using FastTread treads and risers. The process involves removing old stair coverings, cutting off the existing tread nosing to create a flush surface, and then installing new reversible risers and FastTread treads using construction adhesive and finishing nails. The method aims to make stair renovation fast and easy for DIY enthusiasts, requiring only basic carpentry skills.
Step 1 of 8: Assess Existing Stair Treads
Before installing new treads, carefully examine each existing stair tread. Look for signs of wear, rot, or structural damage. Ensure all previous coverings, such as carpet or linoleum, have been completely removed. Check for loose treads or risers and address any stability issues before proceeding. This assessment helps in planning the installation and identifying any necessary repairs to the underlying stair structure.
Every video in How to Install Treads on Stairs with a Mid-Stair Landing
Step 1: Assess Existing Stair Treads
- 0:00–0:13 Assess Existing Stairs and Planning
- 0:01–0:04 Remove Stair Covering (this video)
- 0:00–0:56 Assess and Remove Old Stair Treads
Step 2: Measure and Template Treads
- 0:55–1:13 Measure and Mark Tread and Nosing
- 0:57–1:16 Measure Treads and Mark Laminate
- 0:29–0:45 Mark and Cut New Stair Treads
Step 3: Cut New Stair Treads
- 1:16–2:13 Measure and Cut New Stair Treads
- 4:34–5:55 Measure and Cut Treads
- 2:07–2:42 Mark and Cut Your Treads
Step 4: Prepare Tread Surfaces
- 0:51–0:57 Strip Old Finish from Tread Surfaces
- 2:06–2:59 Sand Solid Oak Treads
- 0:33–0:39 Cut & Sand New Treads
Step 5: Test Fit New Treads
- 2:13–2:35 Test Fit and Adjust Treads
- 1:35–1:41 Dry Fit Tread and Nosing
- 19:07–19:52 Dry-Fit and Test Treads
Step 6: Apply Adhesive and Fasten Treads
- 2:32–3:28 Install First Tread and Riser
- 1:24–1:35 Apply Adhesive and Install Treads
- 9:53 Install New Treads
Step 7: Install Risers (if applicable)
- 1:24–2:00 Install Risers
- 0:04–0:08 Measure, Cut, and Install New Risers
- 3:28–6:52 Install Remaining Treads and Risers
Step 8: Fill Screw Holes and Finish
- 4:25–4:47 Fill Gaps and Nail Holes
- 5:31–6:06 Apply Finish & Clean Up
- 1:28–1:50 Clean Up and Finish
How to Install Treads on Stairs with a Mid-Stair Landing
This project outlines the process of installing treads on stairs that include a mid-stair landing. It covers preparation, measurement, cutting, and fastening of new treads to ensure a safe and aesthetically pleasing staircase.
Read the full guide Browse all guides
Planning this project? Shop Oak Valley Designs.

Subscribe for exclusive updates
Be the first to know about promotions, new products, and sales.