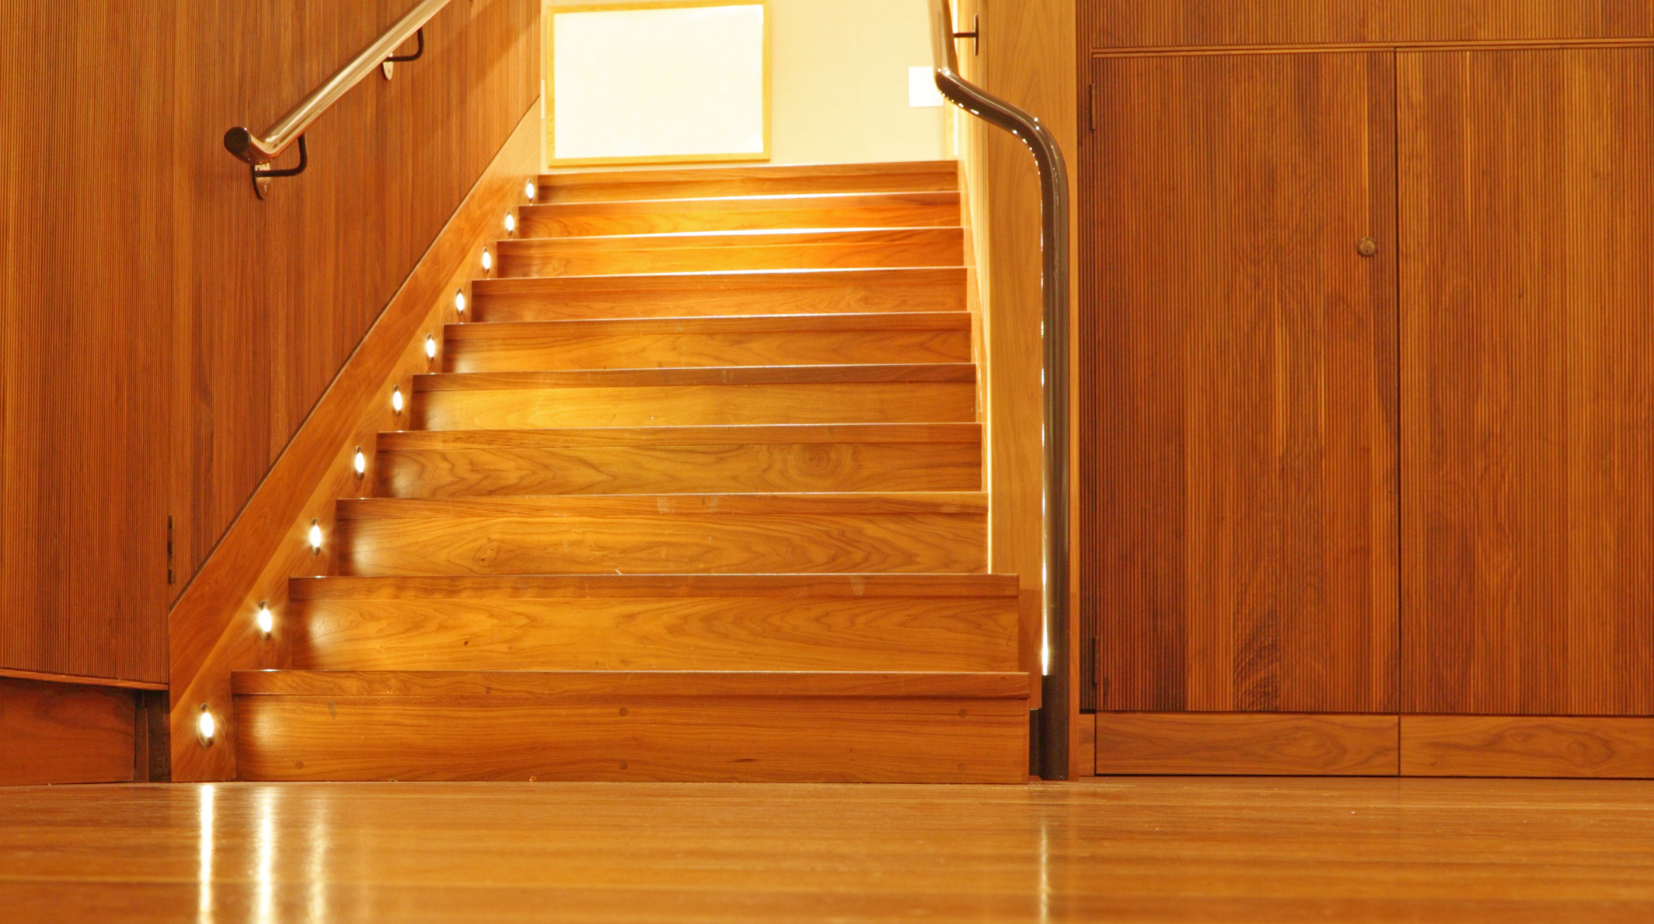
Want to upgrade your stairs without a full remodel?
The best way to stain stair treads is by sanding thoroughly, applying a test coat, then staining with even, smooth strokes in the direction of the grain—finishing with a protective sealant.
This method enhances the wood’s natural beauty while protecting against everyday wear.
In this guide, you’ll learn expert techniques, including how to stain around carpet stair treads for a clean, professional look.
Whether you're refreshing old stairs or tackling a new DIY project, this step-by-step approach ensures lasting results.
Keep reading to avoid common mistakes and achieve a polished, durable finish.
Why Staining Stair Treads Is Worth It
Staining your stair treads isn’t just about improving looks—it’s about protecting the investment you’ve made in your home.
Done right, a good stain:
-
Brings out the natural grain and character of the wood.
-
Enhances the warmth and charm of your staircase.
-
Adds a protective layer that resists scuffs, scratches, and wear.
-
Provides a cohesive look between floors, landings, or other wood elements.
If your stairs feel like an afterthought in your home, staining them can be one of the easiest, most effective ways to elevate the space.
Choosing a Stain That Works for Your Home
Before diving into the staining process, take a few minutes to consider your wood type, lighting, and color preferences.
Different woods absorb stain in different ways.
For example, if you're wondering how to stain oak stair treads, you'll want to know that oak tends to take stain evenly and richly, which makes it a popular choice.
Pine, on the other hand, may absorb stain unevenly unless properly treated.
Here are a few things to think about before you open that stain can:
-
Wood Type: Oak, pine, maple, or a pre-finished hardwood? Each has its own behavior.
-
Stain Color: Do you want a deep espresso tone, a neutral driftwood shade, or a natural, golden finish?
-
Finish Sheen: Matte offers a more modern, low-shine look. Glossy finishes highlight every detail but also show more wear over time.
To prevent surprises, always test your stain on a small, hidden area first.
A sample board or the underside of a tread works great for this.
The Right Way to Prepare Your Treads
Ask any woodworker, and they’ll tell you: great prep means great results.
Learning how to stain wood stairs starts with understanding the prep process.
No matter what kind of finish you want, if the surface isn’t ready, the stain won’t go on evenly—and it won’t last.
Here’s how to prep like a pro:
-
Remove any old finishes. Use a finish stripper or sanding method if needed.
-
Sand thoroughly. Start with a medium grit and finish with fine-grit sandpaper to get the surface smooth and clean.
-
Clean up dust and residue. Vacuum the treads and wipe them down with a damp microfiber cloth to remove any sanding dust.
-
Protect your surroundings. Use painter’s tape or drop cloths to shield walls, risers, or carpeted areas.
If your staircase has pre-installed carpet treads or is partially carpeted, take special care to tape off the carpet edge tightly.
Use a barrier or masking guard to prevent any stain from seeping into the fibers.
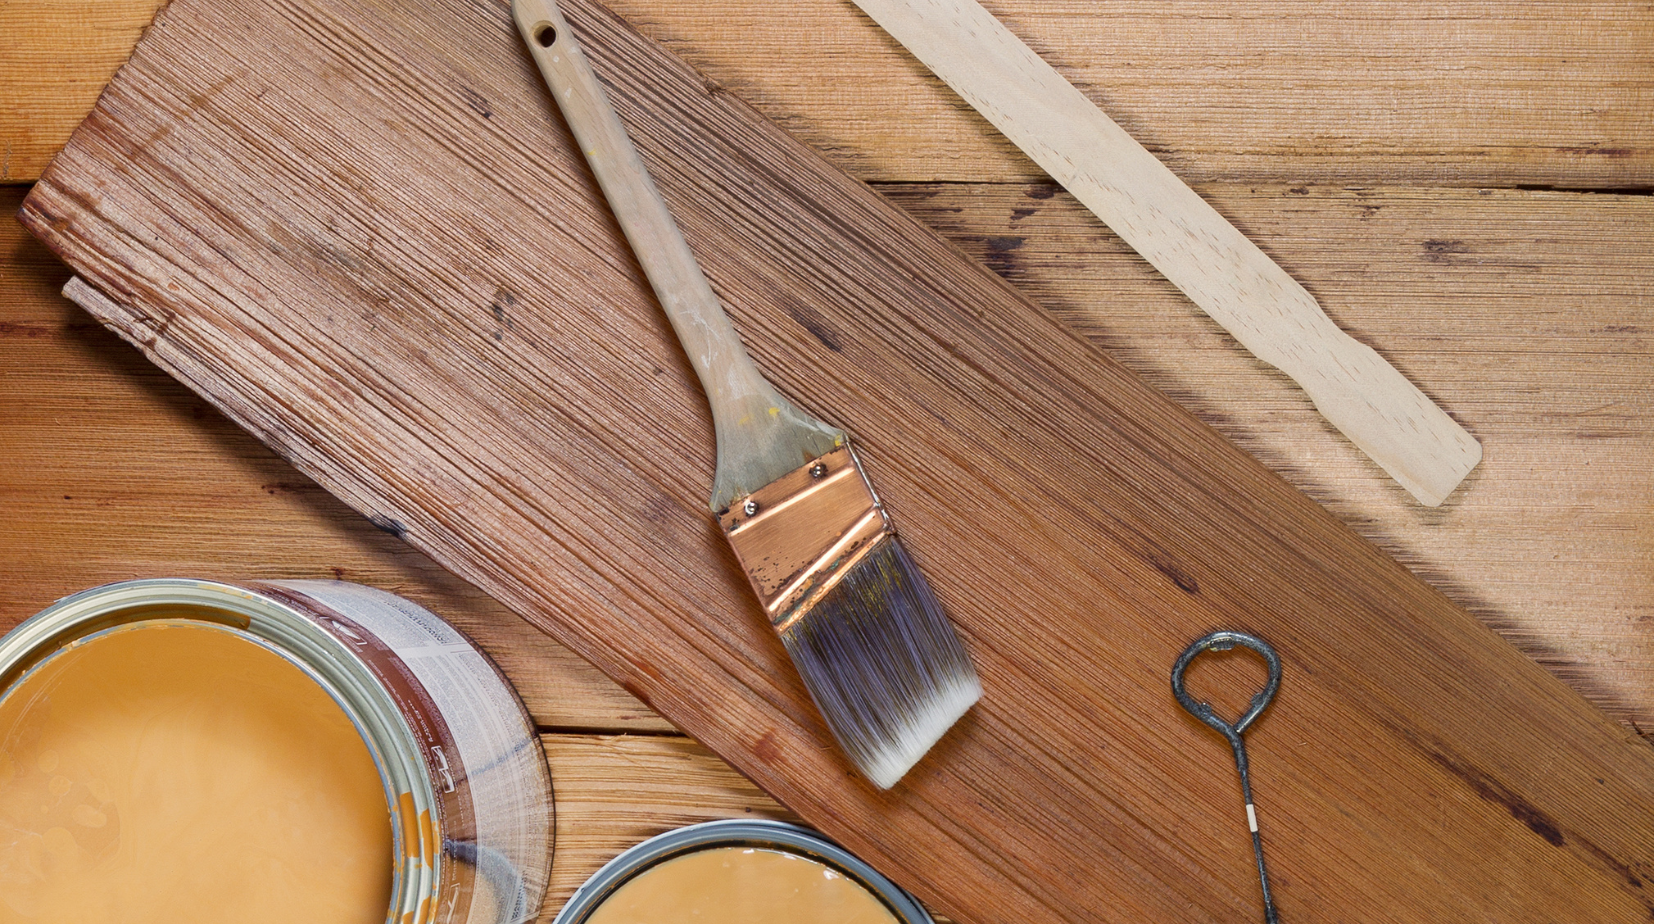
How to Apply Stain Like a Pro
Once everything is prepped and clean, it’s time for the fun part—staining.
When considering the best way to stain stair treads, it's important to remember that technique is just as crucial as the product itself.
A poor application can lead to streaks, blotches, or uneven coloring.
Follow these simple guidelines:
-
Use a brush or clean cloth. A foam brush or natural bristle brush works well for corners and detail work. A cloth gives you more control and a hand-rubbed look.
-
Apply with the grain. Always go in the same direction as the wood grain to enhance natural patterns.
-
Wipe off excess. After a few minutes, use a clean cloth to gently wipe off the extra stain. Don’t let puddles sit—they’ll dry sticky and uneven.
-
Let it dry. Always follow the drying times on your stain product. Some may take a few hours, others overnight.
If needed, you can apply a second coat to darken the tone.
Just make sure the first coat is fully dry.
Special Care: Staining Around Carpeted Treads
If your stair treads are surrounded by carpet—whether fully or partially—this part’s for you.
Staining around carpeted stair treads requires a steady hand and a bit of strategy.
Start by using painter’s tape to completely mask the edges of the carpet where they meet the wood.
Tuck a plastic sheet or protective edge guard under the carpet lip if possible.
Next, use a small angled brush to apply stain carefully along the edge.
Don’t rush this part—it’s worth taking your time.
Once the edge is complete, gently blend that stained area into the rest of the tread using the brush or a cloth.
The goal is to avoid visible “lines” where the carpeted area meets the wood.
Keep a dry cloth nearby to catch any drips immediately.
If stain does hit the carpet, blot (don’t rub) and consult a carpet-safe cleaner right away.
Don’t Skip the Protective Topcoat
The stain may give you the look you want—but the finish gives you durability.
Once your stain is fully dry, apply a clear protective topcoat to seal in color and prevent everyday wear.
Most homeowners use polyurethane, available in oil- or water-based formulas.
Here’s a breakdown:
-
Oil-based polyurethane gives a slightly amber tone, dries slower, and offers top-notch durability.
-
Water-based polyurethane is clear, dries quickly, and has a low odor—ideal for homes with pets or kids.
Apply your finish with a clean brush in long, smooth strokes.
Avoid overworking the product.
Let it dry completely between coats and lightly sand with a fine-grit sponge before the final coat for a buttery-smooth feel.
For high-traffic staircases, two or even three coats may be worth the effort.
Best Practices for Staining Oak Treads
If you're still wondering how to stain oak stair treads with the best results, here’s what sets oak apart:
-
It’s a hardwood, which means it’s durable but a little thirstier for stain than softer woods.
-
It accepts both oil- and water-based stains easily.
-
Oak’s open grain can highlight stain inconsistencies, so even application is key.
Prepping the surface is especially important with oak.
Be sure to sand evenly, test your stain choice, and avoid leaving excess stain behind.
The natural grain patterns will do a lot of the talking—your job is just to enhance, not overwhelm.
How to Stain Wood Stairs That Already Have a Finish
Staining previously finished stairs is possible—but only if you remove the old layer first.
Here’s how to stain wood stairs that already have a coating:
-
Use a finish remover or stripper to dissolve the top layer.
-
Scrape off the finish gently using a plastic scraper to avoid gouging the wood.
-
Sand everything down evenly, working your way up through finer grits.
-
Clean off all residue, and proceed with staining as if it’s a raw surface.
If you skip this step and apply stain over a finished surface, it likely won’t absorb and may just sit on top, leading to a patchy or sticky result.
Mistakes to Avoid When Staining Stairs
Here are a few common pitfalls that can ruin a stair-staining project—and how to dodge them:
-
Skipping the test patch. Always test before going all-in.
-
Not sanding enough. A rough or uneven surface leads to blotches.
-
Using too much stain. Over-application causes tackiness and smudges.
-
Rushing drying times. Stain needs time to cure—don’t shortcut it.
-
Forgetting to ventilate. Open windows and use fans for safe airflow.
Think of staining like cooking a good meal: follow the recipe, take your time, and pay attention to detail. It pays off.
Maintain Your Beautiful Finish
You’ve put in the work—now protect it with easy maintenance.
Here’s how to keep your stained stair treads looking fresh:
-
Dust weekly to prevent buildup that can scratch the finish.
-
Use a wood-safe cleaner for occasional deep cleans.
-
Add protective pads to furniture or decor that touches the stairs.
-
Touch up worn spots every year or two. A light sand and dab of stain can keep things looking new.
And don’t forget—just like floors, your stairs are part of your everyday life.
A little wear adds character, but regular care keeps things feeling polished and loved.
Stepping It Up
Staining your stair treads might feel like a small weekend project—but the impact it makes is big.
You don’t need a contractor or a full renovation.
Just a little patience, the right products, and a love for your home.
At Oak Valley Designs, we believe your stairs should be a source of pride, not a pain point.
With warmth, craftsmanship, and a bit of DIY spirit, you can create a staircase that’s safe, stylish, and designed to last.
Ready to step up your stair style with confidence?
We’re here to help.
-
Website: https://oakvalleydesigns.com/
-
Phone: 706.331.0315
-
Email: info@oakvalleydesigns.com
-
Address: 30 River Ct SW Bldg E Cartersville, Ga 30120