
Recessed Lighting Install with No Attic or Prior Wiring
Video by Fix This Build That · 1 moment used in Oak Valley Designs's DIY guides · 17:16 long
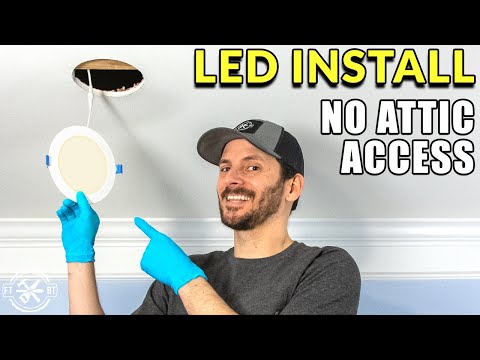
Moments in this video
- 4:23–4:40 Initial Electrical Assessment at Wall Switch
From Reading Nook Conversion, Step 3: Assess Electrical Needs
Locate the wall switch that currently controls the existing lamp outlet. As a crucial safety measure, always shut off power to the circuit at the main breaker panel before proceeding with any electrical work. Once power is confirmed off, use a screwdriver to carefully remove the switch plate and expose the wiring behind it. The goal is to determine if the electrical wires are running 'up and over' (which would simplify the new lighting installation) or 'down and over' (which might indicate a more complex wiring path).
The guide that use this video
Transcript
0:00 Today i'm going to take this room that has no lighting in it right now it's just got a switched lamp on it which really stinks i'm going to convert that into recessed lighting with leds and do it all without access from above. So this is a multi-function room in our house this room is about 14 by 14. And this standing lamp doesn't quite work for this space so i've been reduced to adding extra light by bringing in a work light from the shop come on guys this is just hideous i've got to get rid of this and the can lighting is gonna make it so that it's evenly lit and it looks great in here the first question that you're probably gonna have is how many lights do i put in the room and that was the one that i was asking myself and i am not an expert and so i went out and searched to find what the recommendations were so whenever i'm trying to lay out something in my house i like to bring it into sketchup the 3d modeling program
0:46 that i use and i'll draw the room and then i can see exactly what the layout's going to look like so let me show you and i started placing some of the lights using the recommendations that i saw online one of the more popular ones is to use half the ceiling height as the distance in between lights but that would put nine lights in that room and we're trying to do a workout room not a tanning salon but if you look at the light output needed per room you'll also see recommendations based on lumens and going with four or six seems like the right amount for this room so i'm gonna go four for symmetry's sake we could always add one in the middle if we need extra lighting so i'm gonna go ahead and start measuring and laying out the spots for the four lights and we'll see if that's enough in the end and see if i made the right decision but i think it'll be good all right so to locate this last light unfortunately i can't go off of a wall because the slanted wall extends past where i need to be to get that measurement so all i'll do is i'm going to measure my 39
1:34 inches off the wall on two points and then i can extend the line out do the same thing from the other side then i can cross them over at that point where they meet and that should be 39 inches off of the crown molding which will be 42 inches off of each wall for the last light the holes are all laid out and here's the light that i'm going to be using it is a six inch led light also known as a wafer light because of how thin it is and i'll talk more about this later but basically the beauty of these is that i don't have to worry about where the studs are so if you're using can lights like the larger style cam lights i would have had to make sure where my studs were and worry about that during the location but since i'm using these i don't so to cut the hole for that light i'm going to be using a hole saw this is a 6 in 3 8 of an inch i drilled a test hole in a piece of drywall just to make sure that the fit was there and that
2:22 the outside ring of the light would still cover it and the six and three-eighths is gonna work but it is very very dusty no matter what saw you use it is extremely dusty so to help keep down the dust because you guys know i hate dust i got this little bowl it's like a dust bowl and basically the uh little unit the hole saw goes into the bowl and then you chuck that up in your drill and this is flexible so when we push it up there all the dust will stay inside there this thing is awesome if you're drilling a bunch of lights believe me you'll thank me your spouse will thank you get one of these so i'm going to chuck up this little bad boy into the drill i'm just going right through the hole there and one thing to note is you want to run your drill on low on the one speed because with such a big saw you can get some grabbing and
3:12 kickback if you're in high speed and if you're using one that has the hooked teeth run it in reverse a great tip i picked up from my buddy jeff from diy home run of vision that is a great way to not have it grabbing and jumping all over the ceiling oh my gosh the first hole is done and a few things first of all this worked amazingly to catch all the dust but the hole saw was much more aggressive uh especially working over my head and when i started out i'll show a little replay it caught and i had my face up here and i'm lucky that this thing didn't spin around and smack me in the side of the face if you have a side handle that would be a great time to use it and keep your face below the drill because i almost got the old one two mike tyson straight off the ladder and that would have not been fun
4:02 although it probably would have been a funny clip but the last thing is look at this i'm right into one of the joists if i had a regular can light this space would not have worked but with the wafer light i should be able to make this one work let me go around and do the other holes now so i've got this switch here and it's going to the outlet that has the lamp on it so i've shut off the power make sure you shut off power before working with electricity and now i'm gonna take this off and see if the wires are running up and over or down and over if they're running up and over it's gonna make our life a lot easier but i'm almost certain they're running underneath i pulled the switch out and i looked up in there and the wires are actually going up which this could be a really good sign but i'm going to check the switch and confirm the wires for
4:50 which ones the power is coming in and going out of so turn the power back on to the switch and i'm going to use a non-contact voltage tester to see which ones are getting the power so coming into the switch you're going to just have two hot wires and i've got one that is looped around and that's a good sign that this is feeding in power because it's looping out and going to another circuit and then the red line coming out is going to that outlet and i can confirm that by using a voltage tester so the switch is off right now so this top side should not have any voltage and it doesn't the light stays green but if i go down to the bottom side so this has the voltage on it and as it goes through when i flip the switch to on it now transfers that to the top wire and one thing to note here make sure you get a good high quality voltage tester because i
5:37 had this little jobby which was maybe 10 or 12 bucks but it's kind of going everywhere around there so i did not trust this one uh this guy right here you know i can wave around there it's not picking it up i can put it right on the wire it's still not picking it up but when i put it straight onto the black wire it shows that so i feel a lot more comfortable using this one to make sure that i know exactly where the voltage is going all right you can see the french door here this is the hole that is closest to the switch so the switch is kind of right over in here so i'm going to look up there and see if i can actually see the wires because if i do that would be that would be amazing and a great way to do this is just to use your cell phone put it in video mode and turn the flash on and you can kind of monitor it from there okay
6:22 oh there is a wire right in here it is only a few feet over and i bet that is it so i'm going to get the voltage tester and we're going to check this out and confirm if that is the wire or not so we've got the light on the room on i'm going to stick this up there and we're going to see if it is detecting the voltage which we hope it is all right we've got it beeping go ahead and turn the light off no all right so that line apparently is not controlled by the switch which that's very confusing to me so i'm gonna have to think on this and figure it out but i was hoping we could tie right into that uh but maybe that's somehow the supply line coming off of it
7:09 all right so this is the thing you're gonna have to figure out when you're dealing with a switch is to make sure where all the power is going i realize the wire i was testing is a 14 3 romex and it has two hot conductors a red and a black the red wire comes off the switch and powers the top of the plug in the room and the black wire is constant power to the bottom of the plug causing the continued beeping no so after some research and weighing my options i've decided on a route what i'm gonna have to do is tap into the line that runs through the ceiling and what that's gonna do is kill the outlet on the wall so i'm gonna have to go back and address that later and i have floor trusses up there so i don't even have to drill to go through them i know i know tell me down in the comments how much uh you wish you had this situation i completely lucked out
7:54 but i'm gonna go ahead and run that wire through but for all of you who do have solid joists that you're going to have to drill through i'm going to show you exactly how i would have done it and the have that wire that i found up in mind and i was super lucky to have that and you'll probably have the switch on the inside i just taped this one up here for effect because i want to show you what i would have done what i was prepared to do before i found that wire so it's a bit hard to show inside so i want to give you a quick mock-up to explain exactly what was going on in there now i'm not a licensed electrician this is not advice for you or what to do this is just a demonstration of what i thought i was going to look at so basically imagine that this is the light switch in the front of the room and this is the switched outlet over on the other side of the room so we've got power that comes in from a wire down below and comes into the box and then it splits out to another
8:43 wire that goes up and across to the outlet that is switched now here's where the interesting part is so the way an outlet is set up is that they have these little tabs on here in between the screws on both the hot side as well as the neutral side and those are normally just there and they will transfer the power from one screw to the other and from one plug to the other but if you break the tab on the hot side what happens is it makes that two individual plugs so you can power one plug by constant power and one plug by the switched power so the way that's typically going to look is either you're going to have two 14 2 wires meaning a white and a black one going to the top which will be switched and one set going to the bottom which will be constant power and that's how it's set up right here or you're going to have the situation that i have which is a 14 3 wire which
9:29 has two hots which has a red hot which is on the switch in my situation and a black hot which is constant in that situation so if you do have two wires that's going to be a lot easier because all you have to do is disconnect the top one because you're going to be using that for the can lights so you can remove that wire and then use the constant power on the bottom put a new plug in that still has the tab intact and then you'll just have a constant power plugged and you'll be using the wire for the lights but in my situation i'm gonna have to cut the wire and i don't have any constant power left because i'm killing both the red and the black side of the wire at one time so i'm gonna have to run new wiring over to that plug to get it back into service after i'm done doing the lights but let me show you about drilling through this mock-up and how i would run the wires
10:16 now if i couldn't get access to the wire that was coming out of the switch then i would also have to address it there so in this mock-up the top hot lead is coming up to the top and i can tap into that but let's just say it was going down below and you couldn't see it or it was just going down below and you needed to run the wire up what i would have done is just take it off the hot lead from the top of this switch because that's the one that i just turned off over there so now this is the other end of the dead wire and then again cap that or pull that out get it out of the way because it'll no longer be in use and then run a new wire down so that's why i'd have to go from this light switch all the way to my first light in the series so over in the room i marked out some spots on the wall i would go in and make a hole at the top of the wall make a hole in the ceiling and that would allow me
11:05 to get into this bay and then to grab the wiring so then you can use something like an auger bit where spade bit that has a self drilling it's got a little screw auger head on it so it will pull it through they also make these really long flex bits so this is an auger flex bit and you can go all the way up into the wall so this is the one that i wanted to use make a hole and then you can slide this all the way up into the wall and go through the top plate so come in from underneath and go up now the thing is very important whenever you're drilling into walls and whether you're drilling up you're drilling through joists because you can also use this to drill through the joists once you get the holes in the wall you can come back in and go the other way with either this long auger bit or the other one you don't want to drill through any of that blind because of situations just like this you may have power up there in my ceiling you even saw some of
11:55 it i've got drain pipes i even have water lines in there so make sure you do exploratory holes so i would do that exploratory hole on the ceiling here and then as well in the wall as the wall use my camera phone and i would know if i was going to drill through here i would make sure that i was going to the back so that i wasn't anywhere near this wire so for this situation i might use a bit like this this is a little bit too large this is a 7 8 inch bit i would probably use a half inch bit somewhere in that size so you can comfortably run it through but you don't want to weaken the joist i could just come straight in through the the drywall hole put it in where i need it to go and then drill through so at this point i could use my fish tape go in through the hole that i made in the drywall
12:41 come up through the hole feed the wire in through that first can light opening pull it down with my fish tape and then pull it out on the first opening there at the top of the wall at this point i could then either fish down into the box or come up through the box now both of those might be hard so you might actually have to open up another hole right in front of the box but then you can just get that in and then make your connections to the switch and then you've got your completed circuit for the lights all right so now it is time to install the lights and again i'm using these led wafer lights and you might notice it has this little pigtail on it and that connects to this little guy here which is basically a little junction box but they make it super easy with these little push in wire connectors so all you have to do is strip the wire plug that in all the greens go in one all the blacks on another and all the whites on the last one and then you
13:28 can just screw these two together and you're all good and the great thing about these is that they are very inexpensive i got a pack of 12 for i think 60 bucks they are 3000 kelvin and they are ic rated which means insulation contact so if you have insulation in your ceilings that is fine make sure that you get their proper rating for your situation but compared to the old school can light i mean there's not even a difference these are so much easier to install and you don't have to worry about any obstructions so now i'm going to reach up and cut the wire so i can pull that down to start the first run of the lighting so now when i'm ready to wire it up on this end i can just connect the output of the switch to the red wire and the input for the power
14:16 to this black wire and we'll be good to go so to prep the boxes for install it's really easy they just have little knockouts you just take a screwdriver and push it out then just use some little push in knockout connectors these little knockout connectors protect the wire from getting cut on the sharp edges of the metal box and it also holds it from pulling back so it's kind of a strain relief as well all right and note to self uh don't leave anything up in your ceilings i just spent about 10 minutes looking for my wire strippers and i remembered i left them in the ceiling do not strands tools in the ceiling so i'm just going to strip these wires and then i can put them into the box make the connections and then move on to the next light now i know it's a bit hard to see with the camera angled
15:02 from down below but you want to make sure you do a good job getting the wires seated into these push connectors because if you don't then they won't be able to pass it through but once you get the wires in there you can just put them back into the box close that up you can also connect the boxes to the joists up there to make sure they are firmly in place but i'm gonna go around and wire all the boxes first and then come back and make all the connections for the lights all right now it's finally time to put the lights in so there's some little plastic on here i'm gonna go ahead and take that off it's always a nice satisfying sound they do come with a little gasket on them i've seen some people take them off but uh i'm gonna keep it on there because it'll keep a nice tight seal and when people are opening the front door i could feel air drafts and also wearing gloves is a good thing so that you don't mark up all
15:49 the front of this and also so you don't get a bunch of dirt on the ceiling even though i'm sure i've touched it a bunch of times wearing gloves at this stage will just help keep things a little more clean so with everything wired up there all i've got to do is make that connection of this little pigtail here and then just thread that all the way down so it is fully compressed now these clips just slide right in here and this is nice because i've also got the joist right up top that i'm not going to have to worry about once i let go it should just suck it right up in there yeah that looks great i'm gonna put these last couple in then wire up the switch and then we'll find out if i made the right decision and a four is enough light
16:35 we'll just make the connections here and then we can test the room's cleared out let's see how it turned out oh yeah this is a huge improvement over our old stand lamp we are going to plan on adding a ceiling fan which will add a little bit more light for fill if you wanted to really do a lot of fine detail work i would probably go with six four inch lights maybe even eight four inch lights on a dimmer because it could be a bit brighter in here but for what we want it's great if you want to check out some more home renovation and improvement projects i've got a playlist queued up for you right there and i want to give a huge shout out to all the folks that have been joining the ftbt builders club you can check out more information about that down below and i'll catch you guys on the next episode where we're going to build something awesome
Automatically transcribed from the source video.
More from the Oak Valley Designs DIY Hub
Read the guide Browse all guides
Planning this project? Shop Oak Valley Designs.

Subscribe for exclusive updates
Be the first to know about promotions, new products, and sales.