
How To Install Cap-A-Tread Stair Renewal System | The Home Depot
Video by The Home Depot · 8 moments used in Oak Valley Designs's DIY guides · 2:08 long
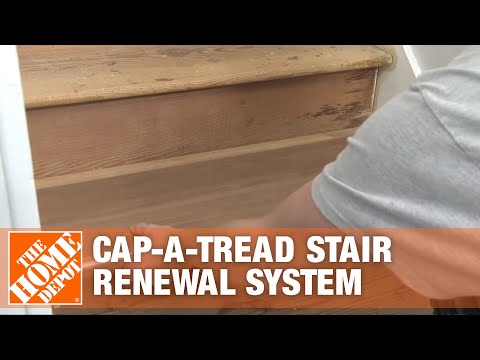
Moments in this video
- 0:57–1:16 Measure Treads and Mark Laminate
From How to Install Carpet Treads on Concrete Basement Stairs, Step 2: Measure and Mark Treads
Using your measuring tape, accurately measure the width and depth of each individual stair tread. The depth measurement is taken from the very edge of the bullnose (the rounded, protruding part of the stair tread) to the face of the existing riser (the vertical board at the back of the step). It is crucial to measure each tread separately, as stairs are rarely identical in size or perfectly square. Once measurements are taken, record them on a notepad. Then, transfer these precise measurements onto the Cap-A-Tread laminate material, marking the cut lines clearly with a pencil.
- 0:57–1:16 Measure Treads and Mark Laminate
From How to Install Treads on Stairs with a Mid-Stair Landing, Step 2: Measure and Template Treads
Using your measuring tape, accurately measure the width and depth of each individual stair tread. The depth measurement is taken from the very edge of the bullnose (the rounded, protruding part of the stair tread) to the face of the existing riser (the vertical board at the back of the step). It is crucial to measure each tread separately, as stairs are rarely identical in size or perfectly square. Once measurements are taken, record them on a notepad. Then, transfer these precise measurements onto the Cap-A-Tread laminate material, marking the cut lines clearly with a pencil.
- 0:57–1:16 Measure Treads and Mark Laminate
From How to Measure Stair Tread Depth and Nosing Overhang, Step 1: Measure Stair Tread Depth
Using your measuring tape, accurately measure the width and depth of each individual stair tread. The depth measurement is taken from the very edge of the bullnose (the rounded, protruding part of the stair tread) to the face of the existing riser (the vertical board at the back of the step). It is crucial to measure each tread separately, as stairs are rarely identical in size or perfectly square. Once measurements are taken, record them on a notepad. Then, transfer these precise measurements onto the Cap-A-Tread laminate material, marking the cut lines clearly with a pencil.
- 0:57–1:16 Measure Treads and Mark Laminate
From How to Measure Stair Tread Depth and Nosing Overhang, Step 3: Measure Total Tread Depth (Including Nosing)
Using your measuring tape, accurately measure the width and depth of each individual stair tread. The depth measurement is taken from the very edge of the bullnose (the rounded, protruding part of the stair tread) to the face of the existing riser (the vertical board at the back of the step). It is crucial to measure each tread separately, as stairs are rarely identical in size or perfectly square. Once measurements are taken, record them on a notepad. Then, transfer these precise measurements onto the Cap-A-Tread laminate material, marking the cut lines clearly with a pencil.
- 0:57–1:16 Measure Treads and Mark Laminate
From How to Measure Stair Tread Depth and Nosing Overhang, Step 4: Record Measurements
Using your measuring tape, accurately measure the width and depth of each individual stair tread. The depth measurement is taken from the very edge of the bullnose (the rounded, protruding part of the stair tread) to the face of the existing riser (the vertical board at the back of the step). It is crucial to measure each tread separately, as stairs are rarely identical in size or perfectly square. Once measurements are taken, record them on a notepad. Then, transfer these precise measurements onto the Cap-A-Tread laminate material, marking the cut lines clearly with a pencil.
- 0:57–1:16 Measure Treads and Mark Laminate
From How to Choose and Install Wool vs Synthetic Carpet Treads, Step 2: Measure Staircase Dimensions
Using your measuring tape, accurately measure the width and depth of each individual stair tread. The depth measurement is taken from the very edge of the bullnose (the rounded, protruding part of the stair tread) to the face of the existing riser (the vertical board at the back of the step). It is crucial to measure each tread separately, as stairs are rarely identical in size or perfectly square. Once measurements are taken, record them on a notepad. Then, transfer these precise measurements onto the Cap-A-Tread laminate material, marking the cut lines clearly with a pencil.
- 0:57–1:16 Measure Treads and Mark Laminate
From How to Protect Hardwood Stairs from Wear with Removable Treads, Step 1: Measure Stair Treads
Using your measuring tape, accurately measure the width and depth of each individual stair tread. The depth measurement is taken from the very edge of the bullnose (the rounded, protruding part of the stair tread) to the face of the existing riser (the vertical board at the back of the step). It is crucial to measure each tread separately, as stairs are rarely identical in size or perfectly square. Once measurements are taken, record them on a notepad. Then, transfer these precise measurements onto the Cap-A-Tread laminate material, marking the cut lines clearly with a pencil.
- 0:57–1:16 Measure Treads and Mark Laminate
From How to Update Rental Stairs with Removable Carpet Treads, Step 1: Measure Stair Dimensions
Using your measuring tape, accurately measure the width and depth of each individual stair tread. The depth measurement is taken from the very edge of the bullnose (the rounded, protruding part of the stair tread) to the face of the existing riser (the vertical board at the back of the step). It is crucial to measure each tread separately, as stairs are rarely identical in size or perfectly square. Once measurements are taken, record them on a notepad. Then, transfer these precise measurements onto the Cap-A-Tread laminate material, marking the cut lines clearly with a pencil.
Guides that use this video
- How to Install Carpet Treads on Concrete Basement Stairs
- How to Install Treads on Stairs with a Mid-Stair Landing
- How to Measure Stair Tread Depth and Nosing Overhang
- How to Choose and Install Wool vs Synthetic Carpet Treads
- How to Protect Hardwood Stairs from Wear with Removable Treads
- How to Update Rental Stairs with Removable Carpet Treads
More from the Oak Valley Designs DIY Hub
Read the guide Browse all guides
Planning this project? Shop Oak Valley Designs.

Subscribe for exclusive updates
Be the first to know about promotions, new products, and sales.