
Handrail Installation | Wall Mounted Handrail | By SHEMSS
Video by SHEMSS · 7 moments used in Oak Valley Designs's DIY guides · 1:56 long
Moments in this video
- 0:23–0:47 Plan Placement and Mark Handrail Height
From Stair Handrail Installation, Step 1: Determine Handrail Height and Location
Begin by deciding which side of the staircase the handrail will be installed on. Using a level and a pencil, mark the desired height for the handrail on the wall. Building code requirements typically mandate a handrail height between a 34-inch minimum and a 38-inch maximum, measured from the tread nosing to the top of the rail. For this project, a height of 36 inches is chosen as it falls within the acceptable range. When marking, account for the height of the mounting brackets and the thickness of the handrail itself to ensure the top surface of the finished rail is at the intended height.
- 0:23–0:47 Plan Placement and Mark Handrail Height
From Install Outdoor Handrail, Step 2: Determine Handrail Placement
Begin by deciding which side of the staircase the handrail will be installed on. Using a level and a pencil, mark the desired height for the handrail on the wall. Building code requirements typically mandate a handrail height between a 34-inch minimum and a 38-inch maximum, measured from the tread nosing to the top of the rail. For this project, a height of 36 inches is chosen as it falls within the acceptable range. When marking, account for the height of the mounting brackets and the thickness of the handrail itself to ensure the top surface of the finished rail is at the intended height.
- 0:23–0:47 Plan Placement and Mark Handrail Height
From How to Add a Second Handrail to Stairs for Seniors, Step 1: Determine Handrail Height and Placement
Begin by deciding which side of the staircase the handrail will be installed on. Using a level and a pencil, mark the desired height for the handrail on the wall. Building code requirements typically mandate a handrail height between a 34-inch minimum and a 38-inch maximum, measured from the tread nosing to the top of the rail. For this project, a height of 36 inches is chosen as it falls within the acceptable range. When marking, account for the height of the mounting brackets and the thickness of the handrail itself to ensure the top surface of the finished rail is at the intended height.
- 1:13–1:22 Install End Rail Brackets
From How to Add a Second Handrail to Stairs for Seniors, Step 3: Install Handrail Brackets
Locate the wall studs along the marked handrail line. Using an impact driver, securely fasten the rail brackets to the wall, making sure that each bracket is anchored directly into a wall stud. This is crucial for stability and safety. Install the brackets at both ends of where the handrail will run first, as shown in the video. The space between the installed bracket and the wall needs to be sufficient for a hand to grip the rail, typically no less than 1.5 inches to comply with safety standards.
- 1:22–1:36 Mount the Handrail to Brackets
From Stair Handrail Installation, Step 6: Attach Handrail to Brackets
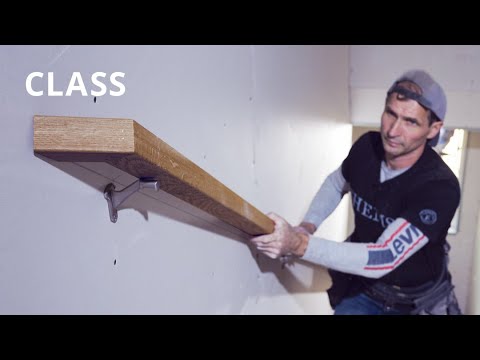
Align the prepared handrail with the installed end brackets. Mount the handrail to these end brackets first, ensuring a snug and secure fit. Use a drill to drive screws through the brackets and into the handrail, making sure they are firmly attached. Once the ends are secured, proceed to install any additional center brackets along the length of the handrail, aligning them with studs and then attaching the handrail to these central brackets as well. This provides continuous support and stability for the entire handrail.
- 1:22–1:36 Mount the Handrail to Brackets
From Install Outdoor Handrail, Step 7: Attach the Handrail to Brackets
Align the prepared handrail with the installed end brackets. Mount the handrail to these end brackets first, ensuring a snug and secure fit. Use a drill to drive screws through the brackets and into the handrail, making sure they are firmly attached. Once the ends are secured, proceed to install any additional center brackets along the length of the handrail, aligning them with studs and then attaching the handrail to these central brackets as well. This provides continuous support and stability for the entire handrail.
- 1:22–1:36 Mount the Handrail to Brackets
From How to Add a Second Handrail to Stairs for Seniors, Step 4: Attach Handrail to Brackets
Align the prepared handrail with the installed end brackets. Mount the handrail to these end brackets first, ensuring a snug and secure fit. Use a drill to drive screws through the brackets and into the handrail, making sure they are firmly attached. Once the ends are secured, proceed to install any additional center brackets along the length of the handrail, aligning them with studs and then attaching the handrail to these central brackets as well. This provides continuous support and stability for the entire handrail.
Guides that use this video
More from the Oak Valley Designs DIY Hub
Read the guide Browse all guides
Planning this project? Shop Oak Valley Designs.

Subscribe for exclusive updates
Be the first to know about promotions, new products, and sales.