
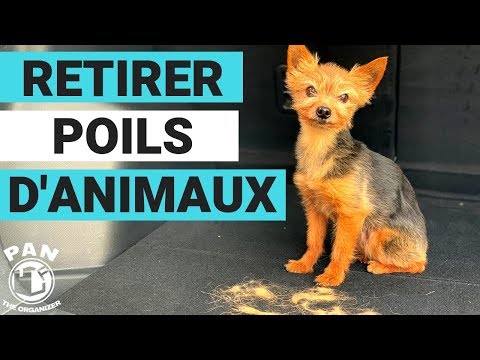
Comment enlever les poils d'animaux dans une voiture !!
Video by Pan The Organizer · 3 moments used in Oak Valley Designs's DIY guides · 4:43 long
Moments in this video
- 1:23–2:29 Employ Specialized Pet Hair Brushes
From How to Remove Pet Hair from Carpeted Stairs and Treads, Step 4: Post-Treatment Grooming
Once the loose hairs have been vacuumed, transition to using a specialized pet hair removal brush. The video demonstrates two common types: a long-bristled rubber brush and a smaller, hand-held rubber squeegee-like tool, exemplified by the 'Lilly Brush'. Apply short, fast, and firm strokes across the affected fabric surfaces, varying the direction (straight, diagonal, or against the grain) to maximize agitation. These brushes are specifically designed with rubber or silicone bristles to grip and pull embedded hairs out of the fabric fibers, gathering them into small, manageable clumps without causing damage to the vehicle's interior components like plastics, leather, or chrome.
- 2:37–3:27 Apply Fabric Softener Solution
From How to Remove Pet Hair from Carpeted Stairs and Treads, Step 3: Fabric Softener Spray Treatment
For instances where pet hair remains deeply embedded or is particularly stubborn, prepare a diluted fabric softener solution. The recommended dilution ratio is one part fabric softener to seven parts water (1:7). Pour this mixture into a clean spray bottle, such as the Chemical Guys branded bottle shown in the video. Liberally spray the affected areas of the carpet or upholstery, ensuring the fabric becomes damp but not oversaturated. Allow the solution to dwell on the surface for approximately two minutes. This action serves two primary purposes: it effectively neutralizes the static electricity that often causes pet hair to cling tightly to fabric fibers, and it helps to relax and loosen the individual hair strands, making them significantly easier to extract in the subsequent steps.
- 3:27–3:45 Re-brush and Final Vacuum
From How to Remove Pet Hair from Carpeted Stairs and Treads, Step 4: Post-Treatment Grooming
Once the two-minute dwell time for the fabric softener solution has passed, revisit the treated areas with your specialized pet hair removal brush. The static elimination and hair-loosening effects of the solution will now allow the brush to gather even the most deeply embedded hairs with greater ease, forming them into distinct clumps. Following this re-brushing, use the vacuum cleaner to suction up all the newly collected hair clumps, ensuring a clean and hair-free surface. This final, comprehensive step guarantees maximum pet hair removal, leaving your vehicle's interior restored.
The guide that use this video
Transcript
0:00 So, hello everyone, welcome to another edition of Pan The Organizer. So, in today's edition, I'm going to show you how to remove the skin of your vehicle, either on the hoods, the hoods, or even on the hoods. So, we all love our dogs, our dogs. This is my little friend Mia, speaking of it, so I love it a lot. But, obviously, in a vehicle, it brings a lot of skin, so, to maintain our own vehicles, you have to know how to remove the skin of your vehicle. I'm going to show you simple and fast things. So, without further ado, and let's start the show. So, hello everyone, I'm Pan, I hope you're doing well. So, today I'm going to show you how to remove the skin of your vehicle or the hoods,
0:48 either on the hoods, the hoods, the hoods, the hoods, and even on the hoods. So, as we know, most of the time, the people are just used to an aspirator and it's not enough because often the skin of your vehicle are used to remove the skin of your vehicle. So, I'm going to show you a few simple and fast steps in order to remedy the problems and to remove all the skin of your vehicle. So, step number one, you're going to be able to think of the aspirator. This is going to help you remove the majority of the skin that are loose on the surface. Then, what you're going to do, you're going to use a brush for the skin of your vehicle. So, these are the brushes, there are different styles. These are often cut off brushes, so in the end, do not damage the surfaces in the vehicle's interior.
1:35 So, the plastics, the colors, the chrome, etc. So, as you can see here, these are either hairs in the hood, so they are going to help you remove the hair, or even a brush like this one, of the company Lily Brush, which is going to help you remove the hair on the edge of these edges here, once again, in cut off material. I'm going to paint the lines for the brushes in the description below the video with alternatives depending on the country you come to. So, you can check that out a little bit later. So, what you're doing, you're going to brush quickly with small, fast and hard cuts and in different directions, so either on the right side or diagonally, to bring all the hair in a nice little cloth that will be much easier to remove
2:23 with the respirator on the top. So, this kind of brush is really going to remove the hair, and another little piece of cloth, if you really have hair that are deeply interested in the interior of the fibres, well, the little piece of cloth is to use a solution like this one in a spray bottle. It's a solution that contains a drop of water and also additional adhesive. So, yes, the same additional adhesive you used for your clothes. So, you make a solution, one in seven, or one part of a drop of water for seven parts. You put the mixture in the spray bottle, then you vaporize generously on the surface to be treated. You let the product last about two minutes. It will help, therefore, to make the hair more loose,
3:10 first, in eliminating the static change, which exists between the hair and the fibres, the hair on the top or on the top or on the top. And it will be easier, therefore, to remove the hair from your hair, and the hair on the top, etc. And so, once the two minutes have passed with the product, you come back with your hair brush, you make a little step with all the hair, and once again, you end up breathing everything. And that's it, that's it! So, you know, now, as you remove the hair from the hair, in the interior of your vehicle, once again, to help you, I'm going to include the links, therefore, to brush your hair in the description section below the video, in fact, you can follow the tips. If you liked the video, show me your tutorial on the button.
3:56 Also, if it's not already done, take an instant and click on the button. Subscribe, and if you subscribe to my channel, and don't miss my next videos. So, thank you for being present every week. Thank you for having been faithful to the post-pan The Organizer. And I remind you that a well-organized life will help you reach the top. That's it, I wish you a great day, and see you next time. Bye!
Automatically transcribed from the source video.
More from the Oak Valley Designs DIY Hub
Read the guide Browse all guides
Planning this project? Shop Oak Valley Designs.

Subscribe for exclusive updates
Be the first to know about promotions, new products, and sales.