
Cable Railings DIY - How to build your own cable rails for the house
Video by Tool Review Zone · 1 moment used in Oak Valley Designs's DIY guides · 12:52 long
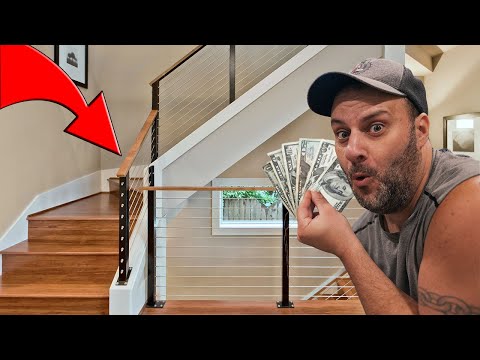
Moments in this video
- 8:35–9:31 Tighten Cable Tensioners
From How to Tension and Adjust Stair Cable Railing, Step 3: Install Tensioning Device at Opposite End
With one end of the cable securely crimped to an end fitting, feed the other end through the corresponding tensioner on the opposite post. Use the crimper tool to secure this end of the cable to the tensioner's crimping sleeve. Once both ends are secured, begin tightening the cable. This is done by turning the body of the turnbuckle tensioner. As you turn it, the cable will gradually become tighter. Continue turning until the cable is taut and firm, removing any slack. After achieving the desired tension, locate the locking nut on the tensioner and tighten it down with a wrench to prevent the tensioner from loosening over time. This ensures the cables remain securely tensioned.
The guide that use this video
Transcript
0:02 So today we're going to work on a really cool project. It's super easy, super cheap. It's going to save you so much money doing it this way instead of already having these things built for you. It's really going to spruce up your room or your finished basement. And for some reason, these seem to be really in style right now and anybody can do this. It is so easy. So let's just get this video started. So a couple weeks ago, I did a video about refinishing my basement, how much it cost me, and how much it was going to cost you for 2022. I'll put that video at the end of this one. But a lot of people, the subscribers, asked me if I could actually do a video showing them how I built my cable bullet rail style railing. If you buy these prefab, they will run you around $1,500. That's a lot of money. So, of course, when the subscriber base asked me to show them how to make these, I said, "Yes, because
0:50 I love you." So, today in this video, I'm going to show you how I handbuilt a bullet cable style railing. way cheaper than anything you're going to find online. Now, listen, let me state this before we get this video going. Also, this is my way of doing it. I liked this style, and if you don't, I'm sorry. There are a few different ways to doing this, and I figured this is the most cost effective, cheapest, and easiest way for you to do this in your own home. Let's get it going. All right, so what you going to need? Well, this is like a 3 and 1/2 by 3 and 1/2. It's actually a 4x4 piece of pinage. I bought this at Home Depot. You can find them at Lowe's or any basic hardware store that carries lumber. Don't worry, I'll put all of the hardware and the materials that I use in the description below for you to find
1:36 them. So, you're going to need two of these. And the length of this, well, that was, [snorts] you see, I needed four posts all together. Buy two post, cut them in half, you got four posts. I know I'm genius. The next thing I needed to buy was, well, this steel cable. This is stuff that you would buy and put it on the outside of your house, right? your cable railings. This is mostly an outdoor type of deal, but it looks really nice indoors. A lot of people are doing it. It's like the new fashion statement, I guess, or whatever. And this is what people are using. So, this is 1/8 steel cable. Again, I'll put a link in the description below for you to check this out. You can go larger, thinner, whatever you want to do. But this is what I use. It's 1/8 of an inch. By the way, the steel cable cost me [snorts] way cheaper on Amazon than what you're going to find at Home Depot, Lowe's, or
2:22 wherever. Way cheaper. The next thing I had to do is get a new tool. Now, this ran me about $32. Again, I'll put everything in the description below. This is not only a cable cutter, but it's also a crimper. And you're going to need that, and I'll show you why, cuz we're going to put it together. This is a cool tool, and it's only 32 bucks. Now, the next thing you're going to have to pick up at your hardware store, your Home Depot, your Lowe's, wherever you go, my nards. It's funny, is your handrail. Now, I used popler and it was actually a lot cheaper than the red oak or the harder woods, which is fine because I'm just going to stain this up anyway and then put some type of shellac on top of it and it's going to look just great. So, these right here cost me. Now, cost is really determined by how much of this you need. I needed two
3:08 10-ft sections. If you went with oak or some other exotic material, it's going to cost you way more. But this popler was actually a pretty good deal and it stained real nasl like. Now, the next thing you're going to need is your hardware. Now, you can find these every once in a while in Minards or Home Depot, but really, it's a lot easier to find online on Amazon. Again, link in description below. These are awesome. And if you're planning on building this like how I'm going to build it in this video, you're also wanting to pick up these brackets here, depending on how many you need, but I picked up four for $55. You got the swivel head. You're going to need these for the top handrail. But this is so much easier and I think it looks really cool because I love that hardware look. It literally takes only a couple minutes to hook up one of these cables. And then obviously
3:53 you're going to need an impact driver or a drill because you definitely want to make sure that when you drive these into your post that they are secure. They're not going to come out because you're putting some tension on these with that steel wire. All right, enough of the blah blah blah. Let's get over there. I'm going to show you how to do this. All right, so here's a railing system on my deck that I'm going to rip out within the next month or two. So, we're just going to use this and uh yeah, I don't need it no more. All right, so how do you get that sweet sweet pitch with those railings? Well, I'm going to show you. So, the first thing you need to do is figure out how many cables you want to put in here. Now, with this length, I'd probably go at least five. You know, the thicker cables, you can go maybe four. Thinner cables, you want to go maybe seven. But all I'm going to do is figure out where I'm going to start up here. I'm going to measure from here to there. And I'm going to divide. If this
4:38 is 35 in from here to here, divide 35 by five and that's how many inches you should space that apart. And to find your pitch, it's rather simple. Well, you're looking at this right here and you're looking at this right here. Just start right here and run that. Match the pitch. Measure it from here to there and make sure that it's even. And then every other one measured down should be exactly the same pitch. That's real nice. All right. So, this one right here, I would put on the bottom, but for you to have a better viewer experience, I'm actually going to put it up on the top. That way, you can actually see how this thing works. Remember, these two pieces work in conjunction. So, it doesn't really matter which way you put them. But, I like this on the bottom. This will go on the top, but we're just going to reverse it for this video. Now, altogether, I should have four screws, but I dropped one in the grass. Don't
5:25 worry, though. I'll find it with my riding mower tires later this spring. So, on this one, you got two holes right there. Now, if I were you and you're going to put this into some nice woodage, well, I would definitely pre-drill those holes, but this is just demonstration purposes and I'm taking this off anyway, so I ain't going through all that. All right, so we're just going to go with the impact. Like I said, I don't care about the pre-drilled. And what I'm going to do is I would find where I measured. I would obviously mark that, but I'm just going to take this right here, and I'm just going to drill that or drive that in like so. Now, what's nice about these is you can straighten these out. You put the one screw in, find out where that is plum, and then put your second screw in there. All right. So, this is really important.
6:10 You can see on these that these things here turn like so. I'm not so much worried about this one. So, I'm going to bring this one actually in all the way down. This is the one I'm concerned about. We have to make sure that we tighten these rails, right? Or these cables. So, you can see this screws in like so. That is how you tighten the cable. So, we're going to bring this as far out as we can. Bring that nut up with it. Okay, we're good to go right there. Now, of course, the next piece that we need goes right there. Mind you, I'm not trying to be all exact. I'm just trying to show you how these things hook up, but we'll just put it like right here. I'm just going to put a temporary cheap screw in here cuz I don't want this coming off and smacking me in my face.
6:57 So, this is where the fun part begins right here. You see, we're going to slice and dice some of that cable right here. And this is how I do it right here. All I'm going to do is I'm going to take this, run that out through like so. And this is going to go into that like so. See that? Problem is, if I don't crimp this right here, well, it's just going to come out like so. We don't want that. So, that's where our tool comes in. Now, what's cool about this tool is a twoin one. Got your cutters right here. So, you put your cable in, cut it. Works great. And you also have different sizes for different cables. All right. So, let's do it real quick. We're going to take it. We'll just run it up through like so. It doesn't matter if I'm running through these right here cuz I got to cut the bottom piece off. And then you just take your tool and crimp it.
7:45 Now, you're going to want to crimp this at least one more time. You want extra safety right there. Push all the way down. Crimp it. Bring it back up. Ain't going anywhere. All right. So, we're good to go right here. And now all we got to do is connect it to the other one. So, what I'm going to do is I'm going to measure this down. I'm going to bring this down like this. Bring this out like so. And I'm just going to mark it right here. You don't even need a tape measure. Remember that right there? Well, we're just going to cut it. So, put that in there like so. Bring it down. It's easier to do with two people, one helping you. But that's all you got to do. This is done. And now, all I'm going to do is I'm going to take this. I'm gonna put it in there. And I'm gonna crimp this like we did the other one. Start down here. It's easier. And then move one up a little bit. Give it a
8:30 little bit of spacing. Crimp again. Okay. Cool. All right. So, right now we got a problem. Look how loose that is. We don't want that like that right now. So, what we got to do is tighten this up. But remember that last part that I told you had to un loosen? Well, this is why we loosened this up like that so we can tighten this cable. If that makes sense. We're not worried about this down here. But if I tighten this up like so, watch what happens to that cable. Uhhuh. Uhhuh. Oh, it's tightening. It's tightening up. Yeah. So, this cable right here now has some nice tension. I can make it even tighter if I wanted to simply by turning this. Or you can get maybe an Allen wrench, put it in that hole right there, and then tighten it up like that. But I noticed handtight just fine. And when you do get this tightened
9:16 up like so, you have to make sure that this nut right here, you have to tighten it down really hard with a wrench so it doesn't loosen up on you. And there you go. Nice and snug. You don't have to worry about me falling off the steps and hitting my face. I don't want this on there no more. But what about the post right here? How did I attach those to the stairs or the treads, whatever you want to call them? Well, that's even easier. Let me show you. Only if you smash that like button first. Go on right now. All right. So altogether the tools that I used was a miter saw, a table saw, and that's really about it to cut this. But here's the thing, you don't need either one of those. If you want to go cheap, you can use a Japanese pull saw, which I'll put a link in description below as well, and you can make these cuts with that. Only cost you a couple bucks. All right, so here's my dilemma. I didn't want the post sitting right on the treads. I
10:03 didn't want it to make the stairs too narrow, and that was an issue for me. So what I had to do is make a couple cuts. And let me show you how I did it. All right, I still need to add some caulking on this, but you can see it wraps around that bottom plate. It also wraps into the stair right there. And this is how you can do this. So, all you do is find out which stair or step or tread you want to put your post on. You're going to run this up to here, like so. And you're going to cut out a little notch to go up on these steps. You see these treads stick out about 2 in right here. So, all I'm going to do is mark this with a pencil. Go straight across. Go up underneath. Mark that where this is at. And then I'm going to measure back two inches and cut that out. So now you can see everything is blacked out right here. You're just going to cut that out with whatever saw that you have, but it's going to be notched out. And
10:49 there's not going to be anything where those black drawings are. Now, once you cut this out, you're going to be able to slide this back into the tread and get your second measurement. All you have to do once you get that notched out and it's all the way back up against that back end of the stairs, you're going to bring it up like this, you're just going to take your pencil, slide it down like so. And now you have a mark on the bottom of this thing right here. You're going to cut and then you're going to cut this right in half up to here. So instead of this one part being 4 in around, it's only going to be about 2 in, which is going to allow you a lot more room on your tread. So again, right here, you're going to cut down. Right here, you're going to cut up and take this whole section out, leaving you just this part right here. And then
11:36 everything fits into place just perfectly. Put a couple screws or a couple lag bolts in there, lag screws, whatever. And that's going to stay firm. And now all you got to do is cut your benders the length that you need them. Again, mine are 10 ft. You get the adjustable head brackets like I showed you. Bend it down, just screw it in, do the next one on the top, and that is it. Now, if you say to yourself, do you absolutely have to have steel or stainless instead of your wood post? I would say go to a metal yard. You can find it way cheaper than you're going to be able to on Lowe's or Home Depot, and fabricate it yourself with a couple holes. These brackets right here that come for the cables that hold them in place, which I showed you, they actually come with bolts that you can use to secure that into metal instead of wood. That's real nice. But all in all, you can do this stuff so much cheaper than
12:22 what you can do when you go out and try to look for these things already pre-made. It's very simple. Anybody can do it. And I just told you, you don't need the most expensive tools in the world to pull this off. You can get away with a pull saw, a drill, an impact driver, and that's really about it. I believe in you. Hopefully, you believe in me and get subscribed. Hit that bell notification so you don't miss any future videos like this one right here. I always appreciate you stopping by. With that, we'll be back with more videos soon.
Automatically transcribed from the source video.
More from the Oak Valley Designs DIY Hub
Read the guide Browse all guides
Planning this project? Shop Oak Valley Designs.

Subscribe for exclusive updates
Be the first to know about promotions, new products, and sales.