Tired of staring at dull, worn-out stairs that drag down the look of your home?
To get a professional finish, learning how to stain stair treads involves proper prep, choosing the right stain, and sealing the wood for durability.
This guide walks you through every step to transform your stairs with lasting color and protection.
You’ll also discover how to pair your stained stairs with carpet stair treads for added comfort, grip, and style.
We’ll cover everything from material selection to application tips that save time and money.
By the end, you’ll feel confident tackling this project and upgrading your staircase with ease.
Why Stain Stair Treads?
Stair treads take the brunt of everyday life.
Kids racing up and down, pets slipping around, shoes tracking in dirt—it's no surprise the finish on your stairs wears down quickly.
Staining brings out the natural beauty of the wood while adding a layer of protection against that daily wear and tear.
It also gives your home a custom, high-end look—without the high-end price tag.
Whether you're installing brand-new treads or refreshing old ones, stain gives them life and character.
Should You Stain Stair Treads Before or After Installation?
One of the most common questions is: do you stain stair treads before or after installation?
Here’s the answer—it depends.
If you're working with unfinished, pre-cut treads, staining before installation is often easier.
You’ll have full access to all sides, and you don’t have to worry about masking surrounding surfaces.
However, staining after installation works just as well, especially for touch-ups or refinishing jobs on an existing staircase.
Just take the proper steps to protect your risers and walls with painter’s tape and drop cloths.
Both methods work—as long as you’re careful and patient.
The DIY Advantage: Why Do It Yourself?
When you handle staining yourself, you save money and gain control over the final look.
More than that, there’s real pride in running your hand along a smooth, satin-finished stair tread and knowing you did that.
DIY also lets you:
-
Choose the exact stain shade that works with your space
-
Customize the finish (matte, satin, gloss)
-
Schedule the job on your timeline
-
Add your own finishing touches—like carpet stair treads for warmth and traction
Now that you're ready to roll up your sleeves, here's what you'll need to get started.
Before You Begin: What You’ll Need
Gather all your tools and materials ahead of time.
Here’s a checklist of what to have on hand:
-
Stain (oil-based recommended for durability)
-
Polyurethane or varnish (for sealing)
-
Wood filler (must be stainable)
-
Sandpaper (medium and fine grit)
-
Tack cloth or vacuum
-
Clean rags
-
Staining pads or natural bristle brush
-
Drop cloths or plastic sheeting
-
Painter’s tape
-
Safety gloves and eye protection
-
Respirator mask (especially for oil-based stains)
Take your time setting up—it saves time in the long run and makes your workspace safer.
Prep Like a Pro: Surface Matters
Before applying stain, your stair treads need to be clean, smooth, and ready to soak in color.
Start by:
-
Cleaning the surface – Remove dust, dirt, and debris with a vacuum or damp rag.
-
Filling gaps or nail holes – Use stainable wood filler and allow it to dry fully.
-
Sanding the wood – Begin with medium-grit paper to smooth rough spots, then switch to fine grit for a sleek surface.
-
Removing sanding dust – Use a tack cloth or vacuum; any leftover dust can ruin your finish.
If your treads are pre-installed, be sure to mask off areas around the stair with painter’s tape and cover the floor below with a drop cloth. With your workspace prepped, it’s time to think about the look and longevity of your stair
Choose Your Stain Wisely
Not all stains are created equal—and not all wood reacts the same.
Here’s what to consider:
-
Oil-based stain – Offers rich color and deep penetration; takes longer to dry.
-
Water-based stain – Dries faster and has fewer fumes, but may not be as durable.
-
Gel stain – Thicker, great for vertical surfaces or trickier woods.
Also, think about your wood type.
For instance, pine absorbs stain differently than oak.
You might need to test several stains on sample pieces before committing to a full application. For stain type comparisons, Minwax offers a comprehensive guide (source).
Pick a color that fits your home’s style.
Natural, warm tones like American Walnut create a cozy, timeless look.
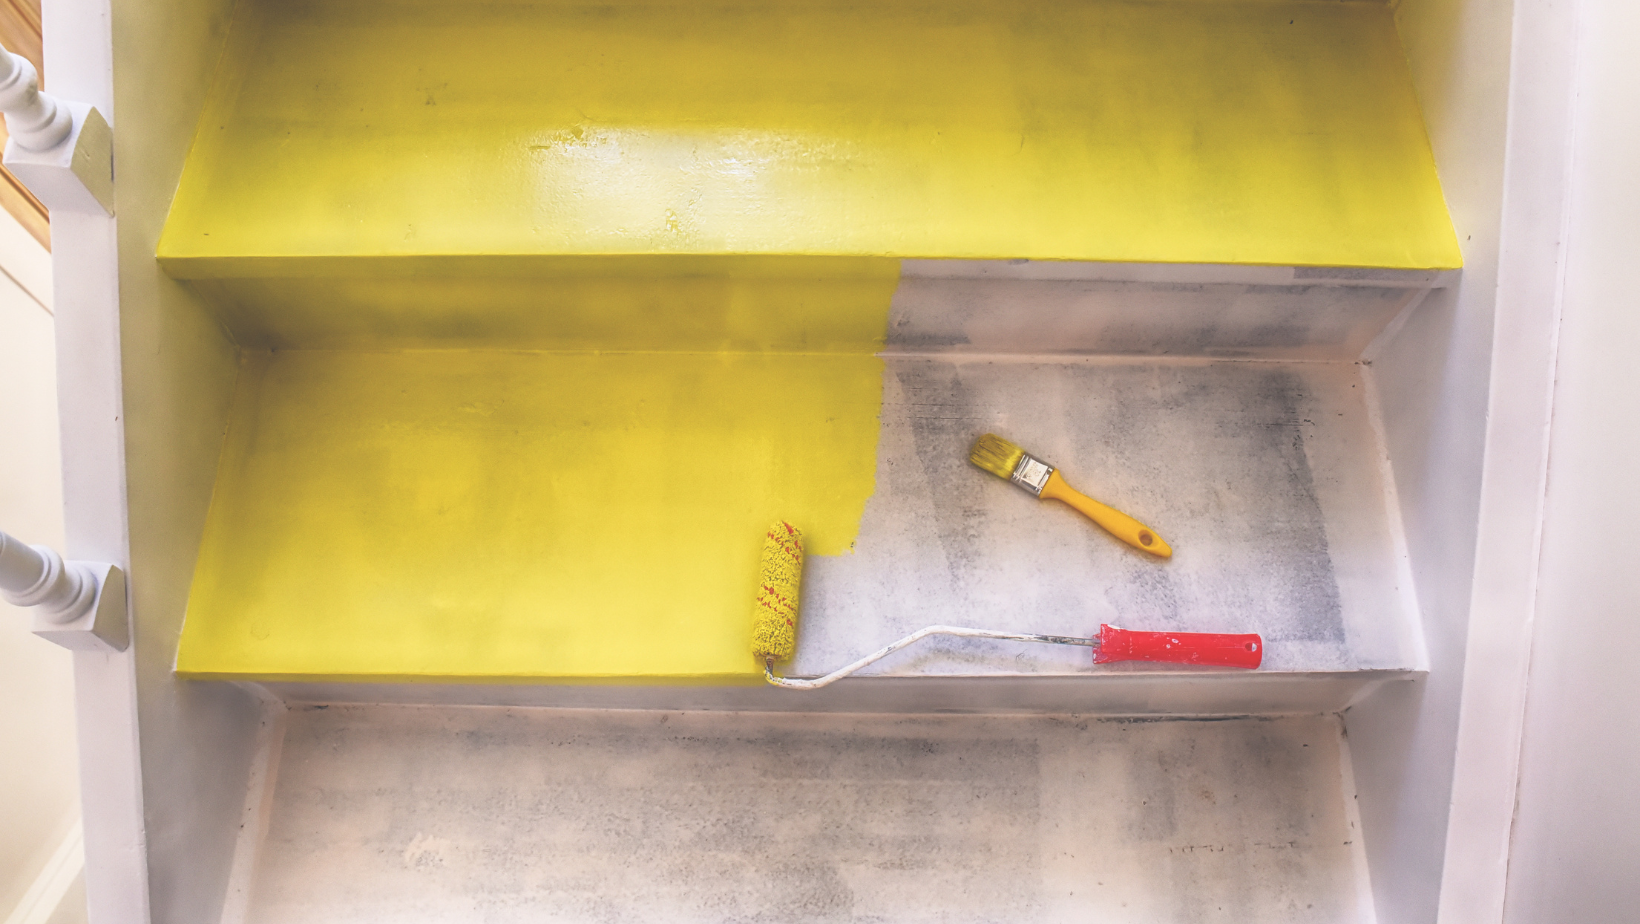
How To Stain Stair Treads: Step-by-Step Instructions
Once your prep is done and your stain is selected, it’s time to bring those stairs to life.
Follow these steps:
-
Stir the stain well (don’t shake).
-
Apply stain in the direction of the grain using a staining pad or brush.
-
Work one tread at a time to keep coverage even.
-
Allow the stain to soak in for 5–10 minutes, depending on the richness of color desired.
-
Wipe away excess stain with a clean cloth.
-
Let the stain dry fully—at least 24 hours is ideal for oil-based products.
-
Repeat with a second coat if needed, following the same process.
The goal is an even, natural-looking finish that enhances the wood, not hides it.
Tips for Achieving a Smooth, Professional Look
Staining isn’t hard, but it does take finesse.
Here are a few tips to get it right:
-
Test your stain on a scrap or inconspicuous area.
-
Always keep a wet edge when applying stain to avoid blotches or streaks.
-
Don't rush—let each coat dry completely before moving on.
-
Use natural light when possible to spot uneven areas or missed spots.
When to Apply a Protective Finish (And Why It Matters)
Once your stain is dry, it’s time to seal it.
A protective finish like polyurethane or varnish guards against scratches, moisture, and wear.
For stair treads, a water-based polyurethane is a good choice if you want fast drying and low odor, but oil-based polyurethane provides a warmer tone and extra durability.
Apply the finish with a brush in long, even strokes.
Allow it to dry, then lightly sand and repeat if a second coat is needed.
This step is key to long-lasting results—don’t skip it.
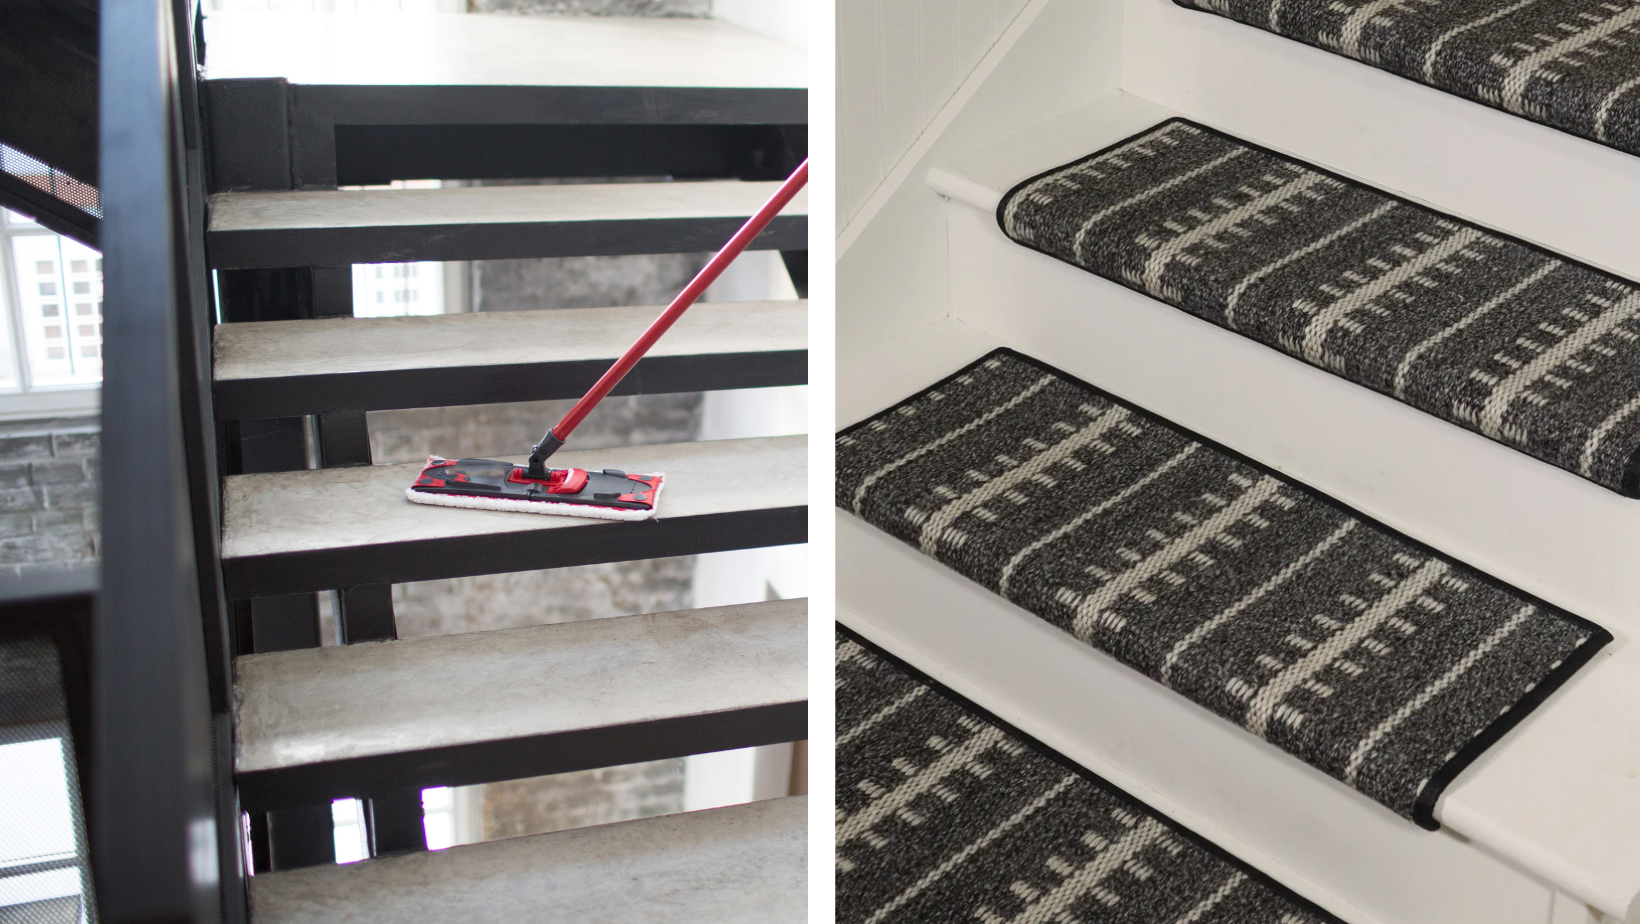
What If You Want to Add Carpet Stair Treads?
Many homeowners love the look and feel of stained wood—but still want added comfort, especially in homes with kids or pets.
That’s where carpet stair treads come in.
These soft additions protect your new finish while adding grip and style.
They're easy to install and remove without damaging the stain or wood underneath.
Just make sure the stain and finish are fully cured (not just dry to the touch) before applying any adhesive pads.
This usually takes about 72 hours, depending on the humidity and finish used.
Long-Term Maintenance for Stained Stair Treads
Once your project is complete, a little maintenance goes a long way.
Here’s how to keep your stair treads looking fresh:
-
Sweep or dust stairs regularly to prevent grit from scratching the surface.
-
Use a mild wood cleaner for spills or smudges.
-
Avoid abrasive scrubbers or harsh chemicals.
-
Consider adding carpet treads in high-traffic homes for extra protection.
With just a bit of care, your stained stairs will stay beautiful for years.
Troubleshooting Common Staining Mistakes
Even pros run into trouble from time to time.
If your first coat looks uneven, don't panic.
Let it dry completely, then sand lightly and apply a second coat.
If your stain looks too dark, try wiping it sooner on your next coat—or switch to a lighter formula.
If you see blotchy areas, it may be due to uneven sanding or missed dust.
For your next project, be extra thorough during prep.
Always remember: wood is a natural material, and slight variation is normal.
Recap: Do You Stain Stair Treads Before or After Installation?
As mentioned earlier, do you stain stair treads before or after installation depends on your situation.
If you’re working with new, unfinished treads and have space to work, stain before installation to save yourself some cleanup.
If the treads are already in place—or if you're refinishing—just take your time masking off surrounding areas and work carefully tread by tread.
Both approaches lead to great results when done right.
Stepping It Up
Learning how to stain stair treads is one of those projects that feels intimidating—until you do it.
And when you’re done, you won’t just have upgraded your staircase—you’ll have added value, warmth, and character to your home.
To take it even further, add a layer of comfort and safety with our stylish carpet stair treads, proudly made right here in the USA.
Whether you’re restoring what’s old or finishing something brand new, Oak Valley Designs is here to help you every step of the way.
-
Website: https://oakvalleydesigns.com/
-
Phone: 706.331.0315
-
Email: info@oakvalleydesigns.com
-
Address: 30 River Ct SW Bldg E Cartersville, Ga 30120