
How To Replace Caulking On A Bathroom Countertop (Easy Beginner DIY Steps)
Video by Abbotts At Home - DIY & Home · 1 moment used in Oak Valley Designs's DIY guides · 8:14 long
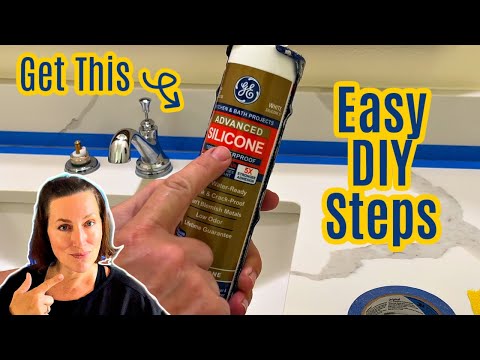
Moments in this video
- 3:37–4:12 Apply painter's tape
From How to Caulk Gaps Along Stair Skirt Boards, Step 2: Apply Painter's Tape
Apply painter's tape along both sides of the gap where the caulk will be applied. This creates crisp, straight lines for the caulk bead and protects the surrounding surfaces.
The guide that use this video
Transcript
0:01 hi guys my name is Stephanie and I am back today with another video today we're going to be going over how to remove and replace the caul on your bathroom vanity countertop the caul behind my husband's sink has been looking grungy and falling out for months now so it's time to get this job off my studio list but no worries guys this job is actually pretty easy it took me about 10 minutes from start to finish for an area of this size I started by removing these handles just so that I could get them out of the way and get to that area behind the faucet better but it's completely unnecessary there are ways that you can get around it and if you have an older faucet that might be held in place by a lot of corrosion you probably don't even want to mess with it anyway so only remove the faucets or the handles if you know for sure that you can get them off easily and put them back on I decided to remove the caul
0:48 behind the bathroom sink with a utility knife they do make caul removing tools but most of those caul removing tools don't really go past the surface level when it comes to removing the caul and I need to get all of the wet mildew covered out from between the two surfaces here the backsplash made from the countertop and the countertop itself to remove the COA behind the bathroom sink you're going to want to cut away all of the COA that's already in there so the first thing I do is run that utility knife along the countertop to cut free the bottom of that COA line then I hold the utility knife angled down while I cut across the top of that line just be sure to be careful with the utility knife so that you don't scratch your countertop or your tile work or any woodw that you have behind
1:35 your bathroom sink once I've cut along the top in the bottom of that grout line I then have to use my utility knife to sort of pick out all of the COA that's inside there so this is probably the part that takes the most amount of time and it's the most frustrating part because it does take a while to get all of the COA that's in between that joint or in that joint out of there I end up going over the same area multiple times with the utility knife until I'm sure that I've gotten the majority of the caul out of the joint you want to remove that old cocking because it can be covered with water and mildew and create a problem with your new caul it can also leave little bits of the old caul in your new caul and you won't get a perfectly smooth pretty line after removing most of the old cocking with that utility knife I move on to an old toothbrush so I'm just going to scrub
2:21 that opening between the two surfaces and make sure that I get out any of the little tiny bits of cocking residue that might still be left behind that the ply knife cannot get after cleaning everything out with that old toothbrush I move on to cleaning and prepping the surface with rubbing alcohol so the rubbing alcohol is going to clean the surface and it's also going to remove any oils that's going to prevent the new caulking from sticking to your countertop I clean about an inch below and above the new COA line to be sure that that caul is going to have a nice surface to stick to after prepping the surface with rubbing alcohol I moved on to using my blow dryer to dry out that open joint now between the countertop and the backsplash like I said before I have been getting mildew back there so I know moisture is a problem and I don't
3:06 want to trap that behind the new cocking so I'm using my blow dryer on a high heat setting high air high heat to dry out that opening and if you pay attention you can see I'm actually blowing little bits of water out from inside of that opening so this is critical you want to make sure everything's dried out before you put new cocking down if you do not have a blow dryer try to find a fan something similar or at least leave it open and don't use that sink for a few days to try to let that dry out before you put new cocking in after drying out that opening I was ready to move on to taping and replacing the caul behind my bathroom sink you want that painters tape as close to the Gap as possible without actually covering up any of the opening don't be afraid to use smaller
3:52 pieces of tape to get that line looking perfect you want it to look really nice before you apply the clocking this is going to last a while so you want it to look right the first time you do it here's a closer look at the gap between my pieces of painters tape Don't Be Afraid again like I said to use multiple pieces of painters tape go over different sections to make sure you've got your line looking nice and tight now we're ready to actually replace the caul so I'm using ge's Advanced silicone so you want to use 100% silicone cocking for this job it comes in either white or clear I think with white countertops white always looks best if you're clear you're probably going to have to use it for most other colors whenever I'm cutting setting a new tube of cocking I try to make sure that the opening is as small as possible that way you're not going to have huge amounts of Gloppy caul left behind that you're going to
4:38 have to try to clean up and I also try to cut the tip at an angle it just makes it easier to apply it with an angle cut this cocking does have an inner seal in it so I usually use a really long skinny screwdriver to poke and break that open here's a closer look at that cocking container so you know exactly what to buy at the store again it's non- paintable so you cannot use this on your trim is just for tile countertops bathtubs toilets surfaces like that not for paintable areas so for this job you want to put enough cocking in to fill in that opening between the two pieces of pains tape but you don't want so much extra cocking left behind that it becomes too messy for you to clean up so you'll get a feel for this as you're doing it if this is your first time the main thing that you want to remember here is that this is going to dry within
5:24 30 minutes so it's actually going to start drying within like four or 5 minutes of you putting it down so you want to have it cleaned up and looking nice before it starts to dry you want to work in small sections again so just do a couple feet of the cocking clean up that area and move on to do the next couple of feet of the cocking I ran that yellow rag under the faucet before I started working to make sure it was nice and wet I need that wet rag so that when I am smoothing the line with my finger my finger is wet enough so that the line looks really smooth but also that cocking isn't sticking to my skin too much and and I use that rag for cleaning off all of that excess cocking after I've smoothed out the line you can see here how the extra cocking is all over that painters tape so that painters tape is working for us to
6:10 prevent all of the cocking from being on your countertop so you don't have to clean it off later again the professionals don't have to do things like this but they do this every day we're doing this like once a year so we need all of the extra help we can get after you've smoothed out the cocking in one area if it looks like it's underfilled don't be afraid to go back and do that area again with a little bit more cough use the a wet finger to smooth it out again and make sure it's looking really nice and pretty before you move on to another section again it only took me about four or 5 minutes to apply all the cocking behind the bathroom sink so I'm removing the tape right away so I don't want that caulking to dry before I remove the tape I'm going to carefully remove the tape make sure I don't get any of that leftover that's on the tape anywhere so I'm
6:56 going to carefully remove it not let it get all over the counter top while I'm doing it and without messing up the line I just made in the cocking after removing that painterest tape I grab my wet rag again to wet my finger down and run it across that caul one last time to make sure it looks perfectly smooth and professional before it starts to dry I'm wiping my finger again on that wet rag every 5 to 6 inches to make sure I get any excess onto the rag and it's not spread around on the counter top I want to keep my nice straight clean line so this cocking like I said dries in about 30 minutes so here's a look at that new finished line as you can see the lines are nice and crisp the lines are really small they're not like the giant lines that you see some people leave behind while I was waiting for the
7:41 behind that sink to dry I went ahead and did the behind the other sink in my bathroom and here's a look at the finished line on that sink again you want your nice tight thin lines you don't want your COA to be a feature on your countertop you want it to be sort of something you're not even thinking about or seeing but you want it to fill in the apps so that it's protected from mold and M growing in between those areas all right well I hope this helped you guys if you have any questions as always leave them in the comments below I do try to answer them when I get a chance all right good luck with your project guys
Automatically transcribed from the source video.
More from the Oak Valley Designs DIY Hub
Read the guide Browse all guides
Planning this project? Shop Oak Valley Designs.

Subscribe for exclusive updates
Be the first to know about promotions, new products, and sales.