
How to Apply Sealant to Trim and Baseboards
Video by TwoFeetFirst · 1 moment used in Oak Valley Designs's DIY guides · 4:54 long
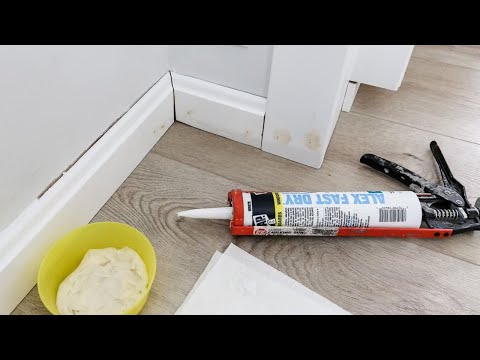
Moments in this video
- 4:09–4:48 Apply and Smooth Caulk
From How to Caulk Gaps Along Stair Skirt Boards, Step 4: Apply the Caulk
Load the prepared caulk tube into the caulk gun. Position the angled tip of the caulk tube against the seam or gap you wish to seal. Apply steady pressure to the caulk gun trigger while moving the gun smoothly along the gap to create a continuous bead of caulk. Once the caulk is applied, immediately use a wet finger (or a damp paper towel wrapped around your finger) to smooth the caulk bead, pressing it firmly into the gap and wiping away any excess. Continue this process along all necessary seams and gaps.
The guide that use this video
Transcript
0:00 Today I'm going to share my tips to give you a smooth clean finish of the flying cock to a baseboard trim or any other type of thing. I wanted to show you the gaps that I'm talking about that I'm going to fill. So see how this is in a very clean, smooth finish. You've got gaps here, gaps along the trim. And as you go along here, you can see my gaps as I go along. So I'm going to show you how to give you a smooth clean finish with your baseboards or trim to make it look just a finished look. So that's what I'm talking about today. So this is the kind that I use. I also use another kind. These are the two that I like to use.
0:48 Just depends on what you want. This is the premium and this isn't both are paintable. They're paintable. This one I'm using in my cabinets. This one I use for exterior stuff because it is a premium one. So it is a better long lasting one. So I do use this one outside or around bathrooms or something where I want more protection. So this is what I'm going to use today because it is paintable. So to cock, you're going to need that. You're going to need some paper towels. You are going to need a gun. And I like to have a bowl. So what I like to do is I'm going to water up two things at paper towels. I'm going to stick it in here. And then I'm going to fill this up and tell it is wet with water.
1:36 Tell all the paper towels wet the water. Not so that it's drenched. Look, if I pick this up, you can't see like a pool of water. Okay, so I've wetted this. As you can see, I pick it up. It's not a pool of water, but it's wet. So that way it'll work. I like to take two pieces of paper towel, folded together, and then I'll use this. And I'll fold it and use it again, fold it and use it again. But you have to prep the cock tube. And there's little markings on this. You can tell just depending on the size that you are going to be needing. I like to try to happen at the one eighth mark. So what you're going to do is take a razor blade. And you're going to take it and you're going to cut it so that it's about.
2:25 So it's at a 45 degree angle about right there. So I'm going to take this and cut it like that. Then I have this angle too. And then what I'll do is you'll take this little part of your tool on your cock gun. You'll take it and you'll poke it in. And this just opens up your tube. Fold that back down. Put your tube into your gun. You can see mine's seen lots of use. And then now you're ready. So this part is already cocked.
3:14 Seemed. So this one is the one that I'm going to show you. I have put in some of that tubing to still have this bigger gap. From all this back to rod, which is going to fill in the gaps in some of my corners. So I'm just going to take it from the different sizes. This is the bigger size. So here's the difference. This is for small gaps, for medium gaps. Fill in these gaps. All it takes to put it in and push it. And then I'm going to try to cut it to the bottom.
4:05 And now when I go to cock it, it's going to be easier to fill that in. Now I'm going to take this.
Automatically transcribed from the source video.
More from the Oak Valley Designs DIY Hub
Read the guide Browse all guides
Planning this project? Shop Oak Valley Designs.

Subscribe for exclusive updates
Be the first to know about promotions, new products, and sales.