

how to measure stairs for carpet stair treads
About This Guide
Ready to elevate your staircase with beautiful, safe, and custom-fit carpet treads? This DIY-friendly guide walks you through the essential steps to accurately measure each individual step of your straight staircase. Precision is key! We'll cover how to get exact width and depth measurements, especially crucial for those charming older homes where steps can vary. Follow our expert advice to record and label your measurements for a truly custom fit, ensuring your new Oak Valley Designs treads bring both safety and style to your home.
Tools & Materials
Steps
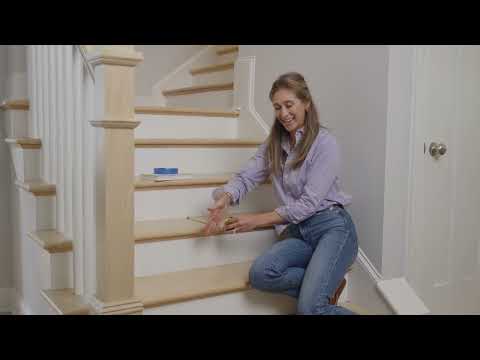
Get Ready to Measure: Count Your Steps & Gather Your Toolkit
Before you dive in, let's get organized! Begin by counting the number of treads on your staircase. It's a simple start, but crucial for planning. (Pro-tip: the number of risers will always be one more than the number of treads!) Next, gather your essential toolkit for precise measurements. You'll need a rigid tape measure for accuracy, a carpenter's square to ensure everything is perfectly straight, a level for flatness, masking tape for clear marking, and a trusty pencil for recording your data. Having these on hand will make your measuring process smooth and DIY-friendly.
Precise Depth: Measuring Each Tread from Back to Nosing
Now, let's get to the heart of it – measuring the depth of each individual tread. Place the end of your tape measure firmly against the vertical riser at the very back of the step. Extend the tape measure straight over the front edge of the tread, ensuring it covers the nosing (the part that slightly overhangs). This is where precision matters most: keep that tape measure flat and perfectly level throughout! It's vital to avoid measuring over any existing carpet, flooring, or adhesive residue, as this can lead to inaccurate depth readings and compromise your custom fit. Record the depth measurement for every single step as you go.
Getting the Width Right: From Wall to Wall or Edge to Edge
Next up, we'll tackle the width of each tread. Run your tape measure across the very front edge of the tread, making sure it's perfectly parallel to the back edge where the tread meets the riser. If your staircase is embraced by walls on both sides, measure from wall to wall. If you have an open staircase on one side, measure from the exposed edge of the tread to the opposite side. Remember, for a clean, design-conscious look, standard residential treads typically allow for about a 1-inch space on each side. This means a 36-inch wide stair generally accommodates a 34-inch tread, giving your installation that polished, custom-made to fit appearance.
The Details Matter: Record, Label, and Double-Check for a Custom Fit
As you complete the width and depth measurements for each step, it's time to meticulously record these dimensions (width × depth) in your notebook. This step is crucial for achieving that perfect, custom-made to fit result! If you discover that some steps have slightly different dimensions – which is quite common, especially in charming older homes – be sure to number each unique step clearly. For custom carpet stair treads, taking a photograph of each individual step, particularly those with varying measurements, is highly recommended to ensure absolute accuracy. To guarantee peace of mind and avoid any frustration, always double-check all your measurements before recording them. As we always say, 'Measure twice; write it down once!'
Find the Right Fit for Your Oak Valley Designs Carpet Tread
You have your numbers, so now let's turn them into the right tread size. A carpet tread should never match your step exactly. That small amount you take off is precisely what gives you a snug, safe, finished-looking fit. Start with depth: subtract 1/4 to 1/2 inch from the depth you recorded. That bit of clearance lets the tread sit flat and tight instead of buckling at the nosing, which is what keeps it secure underfoot. Now for width: subtract 2 to 4 inches from your measured width. How much you take off here is purely a style choice. A smaller deduction gives you a fuller, more carpeted stair, while a larger one leaves more of your beautiful wood revealed on each side. Oak Valley Designs treads come in three standard widths: 27 inches, 31 inches, and 35 inches. Compare your adjusted width against those three and choose the closest fit. If your stairs land between sizes, vary from step to step, or you are simply not sure which way to go, reach out and our team will help you land on the right size before you order.
Questions about your project or which product fits? Oak Valley Designs's team is happy to help. Mon–Fri 9–5 ET

Subscribe for exclusive updates
Be the first to know about promotions, new products, and sales.