Tired of outdated, slippery stairs that clash with your home’s style?
Prefinished retrofit stair treads are pre-measured, ready-to-install stair covers designed to fit over existing steps, offering an instant upgrade without the need for full demolition.
They come in wood and carpet stair treads, giving homeowners flexible options for comfort, safety, and design.
This guide will walk you through how to choose the right material, measure accurately, and install each tread with confidence.
You'll learn how to transform your stairs into a safer, more stylish focal point—without hiring a contractor.
Whether you're a seasoned DIYer or just starting out, we’ll help you step up your space with ease.
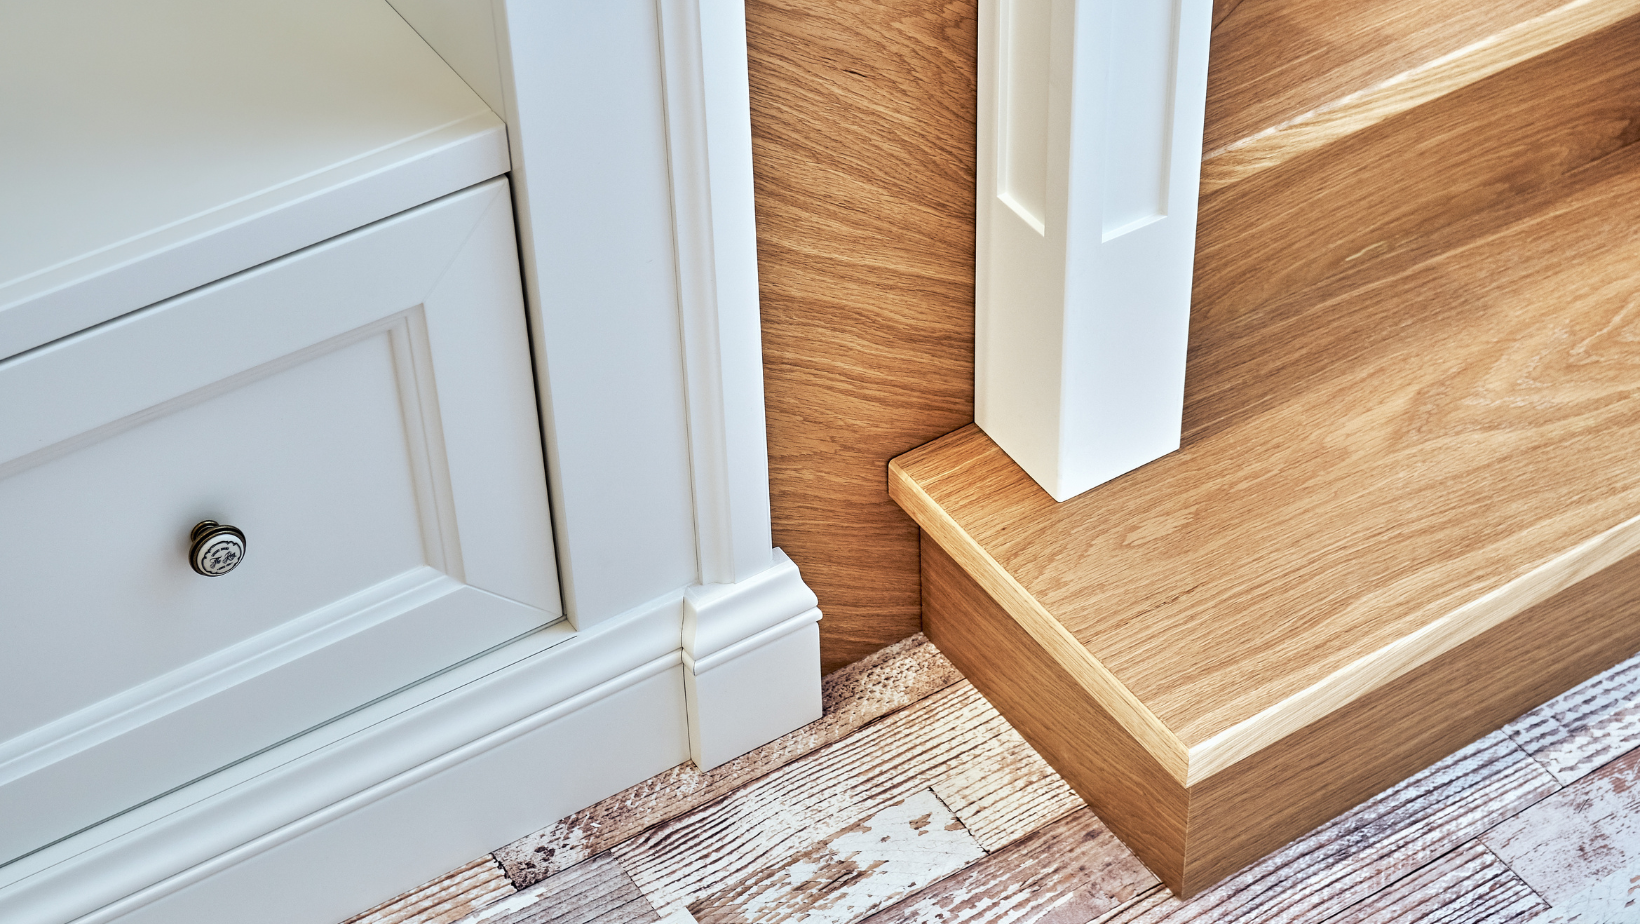
What Makes Prefinished Retrofit Stair Treads So Different?
Prefinished retrofit stair treads are specially designed overlays that sit directly on top of your old steps.
They come pre-cut, pre-sanded, and pre-stained.
That means no waiting, no messy sanding, and no need for sealant.
They're ready to install right out of the box.
This makes them a favorite among homeowners who want a fast, clean upgrade that looks like it came straight from a designer’s showroom.
What Are Retrofit Stair Treads?
If you’re wondering what are retrofit stair treads, the answer is simple.
They’re stair covers made to go over your current stairs, typically during a renovation or design upgrade.
Unlike traditional treads that require removing the old stairs or building from scratch, retrofit treads are made to “fit over” the old surface.
This makes them an ideal solution for anyone wanting to upgrade their staircase with less cost, less time, and fewer tools.
Why Choose Prefinished Versions?
The beauty of prefinished retrofit stair treads is that all the finishing work is done for you.
Each piece is already sanded smooth.
It’s been stained or colored to match your home’s style.
And it’s protected with a durable finish that resists scratches, wear, and daily foot traffic.
This saves homeowners hours of work—and creates a better, longer-lasting result.
The Benefits at a Glance
Here are just a few reasons Oak Valley customers love this product:
-
No messy construction
-
Ready-to-install
-
Durable and long-lasting finish
-
Easier to clean than carpet
-
Child- and pet-friendly
-
Custom look without the custom cost
You don’t need to be a contractor.
Just a little time, the right tools, and you’ll be walking on your beautiful new staircase in no time.
Choosing the Right Wood for Your Retrofit Treads
When selecting your stair treads, wood type matters.
Some woods offer a warm, traditional look.
Others provide a sleek, modern feel.
Here are the most popular options:
-
Red Oak: Classic grain, warm tones, durable. Great for most homes.
-
White Oak: More modern in color. A bit more durable than red oak.
-
Maple: Smooth and light in tone. Offers a clean, soft look.
-
Cherry: Deep red hues and rich character. Adds elegance to any space.
Each wood species has its own charm.
Consider your floor color, wall tones, and furniture style when picking the right one for your stairs.
Matching Treads to Your Home’s Design
Your stairs are one of the first things people notice when they walk in.
They connect your levels—and your style.
That’s why it’s important to pick a tread finish that fits your overall look.
If you’ve got a farmhouse vibe, go with a warm oak or distressed wood look.
If your home is modern, something smoother and lighter may feel more fitting.
Want something timeless?
Cherry or deep walnut tones can bring a high-end feel that works in any setting.
Measurements Matter: Getting the Right Fit
Before placing your order, take time to measure everything.
Width. Depth. Length. And especially the shape and slope of your stairs.
Some staircases have curved edges or custom angles.
Others may vary in depth from top to bottom.
Measure each step to be safe.
And if you’re not sure, Oak Valley offers custom sizing support to help you get it just right.
Types of Prefinished Retrofit Stair Treads to Know
There are three main kinds of treads that homeowners typically consider:
1. Wood Stair Tread Overlays
These are the most popular and versatile. They provide a sleek, durable surface that mimics hardwood flooring. Easy to clean. Great for homes with pets or kids.
2. Carpet Stair Treads
These are often installed for added grip and softness. They’re especially helpful for households with older adults or little ones. They come in different textures and colors for style flexibility.
3. Rubber Stair Treads
Most common in commercial buildings, basements, or high-traffic areas. They offer slip resistance and durability, but less warmth and visual appeal.
Key Considerations Before You Buy
Before choosing your new stair treads, think through these key questions:
-
What’s your home’s style?
-
What kind of foot traffic do your stairs get?
-
Do you have pets or children?
-
Is safety or appearance your top priority?
-
Are you comfortable with installation—or would you prefer a professional?
The answers will help guide your decision and ensure your stair upgrade is both beautiful and practical.
How to Install Retrofit Stair Treads and Risers
Once you’ve selected your stair treads, it’s time to install them.
If you’re asking how to install retrofit stair treads and risers, here’s a step-by-step guide tailored to homeowners like you.
Step 1: Remove the Old Surface
Start by removing any carpet, padding, or tack strips.
If your stairs are painted or stained, give them a quick sanding to remove any shine.
Make sure the surface is smooth and clean.
Step 2: Gather Your Tools
You’ll need:
-
Measuring tape
-
Construction adhesive
-
Wood glue
-
Nails or screws
-
Nail gun or hammer
-
Level
-
Caulk (optional, for seams)
-
Safety gloves and eye protection
Step 3: Dry Fit Each Tread
Before gluing anything down, place each tread on the step to make sure it fits.
Make any adjustments with a saw if needed.
Step 4: Apply Adhesive
Apply a generous bead of construction adhesive to the underside of the tread.
Place it firmly on the step.
Use your level to ensure it sits evenly.
Step 5: Secure in Place
Use nails or screws at the edges of the tread to hold it tight while the glue dries.
Add wood glue at the joints for extra hold.
Step 6: Add the Riser (Optional)
If you're also replacing the riser (the vertical part of the step), install it now.
Measure carefully.
Apply adhesive.
Press it into place.
Secure with nails or screws if needed.
Step 7: Finishing Touches
Wipe away any excess glue.
You may want to run a bead of caulk between the tread and wall for a clean finish.
Let everything dry fully before walking on the stairs.
Cleaning and Caring for Your New Treads
Once your new prefinished retrofit stair treads are in place, keeping them clean is simple.
Just sweep or vacuum regularly to remove dust and dirt.
For deeper cleaning, use a damp cloth with a gentle wood-safe cleaner.
Avoid harsh chemicals or soaking the treads with water.
Place rugs or runners nearby to reduce grit and wear from shoes.
With basic care, your new treads can last for years and still look like new.
A Great Choice for DIY-Minded Homeowners
If you're someone who likes the feeling of finishing a home project yourself, this is a win.
Installing prefinished retrofit stair treads doesn’t require a lot of fancy tools or years of experience.
Just careful measuring, patience, and a little bit of elbow grease.
You’ll be amazed at the difference a stair upgrade can make.
And you’ll feel proud knowing you did it yourself.
Steps to Success
From answering what are retrofit stair treads to learning how to install retrofit stair treads and risers, you’re now equipped to take on one of the most worthwhile upgrades for your home.
These treads bring together beauty, safety, and simplicity—without the big price tag or hassle.
And for a family-focused home like yours, that’s a win worth stepping into.
Ready to Transform Your Stairs?
At Oak Valley Designs, we’re proud to serve homeowners who care about quality, comfort, and creating spaces where families feel safe and proud.
We offer a wide range of custom options, helpful advice, and top-notch customer support—because your home deserves the very best.
Got questions? Need help choosing your style or size? We’re just a call or click away.
Let’s create something beautiful together.
-
Website: https://oakvalleydesigns.com/
-
Phone: 706.331.0315
-
Email: info@oakvalleydesigns.com
-
Address: 30 River Ct SW Bldg E Cartersville, Ga 30120