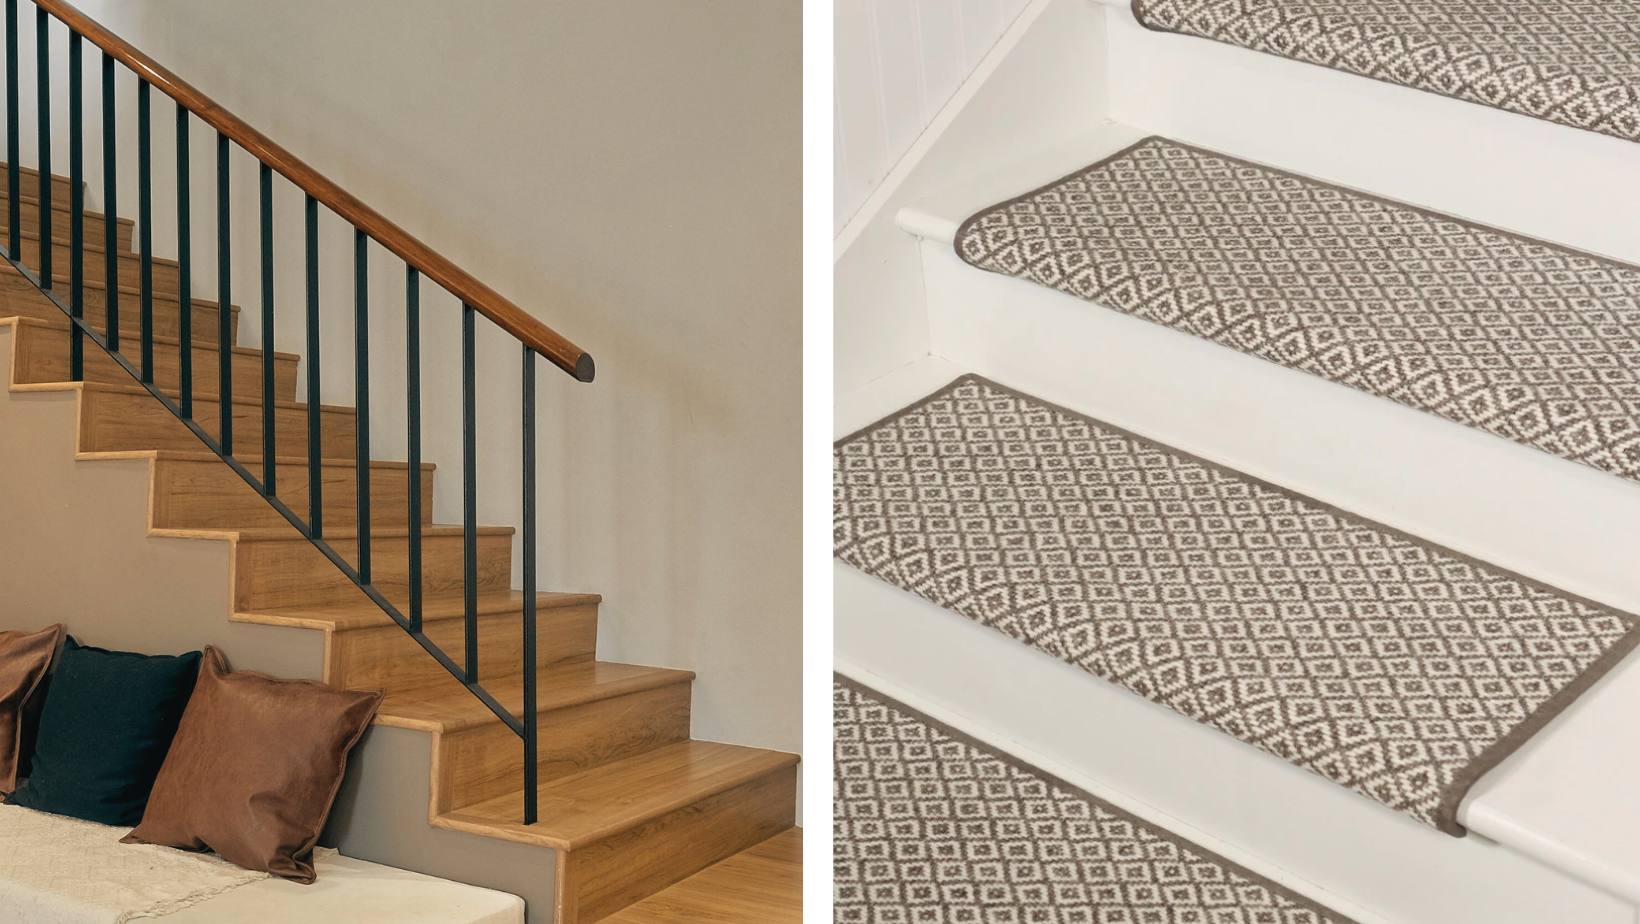
Upgrading your stairs?
Start by learning how to measure stair treads accurately—it’s the first and most important step to ensuring a safe, stylish fit for your carpet stair treads.
To do it right, measure the width from edge to edge and the depth from riser to nosing on each step individually.
These numbers give you the exact dimensions you’ll need for a custom or standard stair tread fit.
In this guide, you'll learn how to take precise measurements, avoid common mistakes, and prep for a smooth installation.
Whether you're doing it yourself or ordering custom pieces, measuring properly ensures your treads stay secure and look great.
“These stair treads are INCREDIBLE! They are like walking on clouds. Blown away how padded and comfortable they are. Buy them...you will not regret it!” — Lauren
Read on to take the guesswork out of the process and transform your staircase with confidence.
Why It All Starts With Measurement
Before you start picking colors, patterns, or materials, you need to know your stair dimensions.
That one step—measurement—impacts everything else.
When you know how to measure stair treads correctly:
-
Your treads will stay in place without shifting
-
You’ll avoid returns and fitment issues
-
The overall appearance of your staircase will feel clean and intentional
For homeowners trying DIY stair treads, accurate measurement is key to making sure your effort pays off.
No one wants to peel off poorly fitted treads and start over. Good measurements make installation smoother—and safer.
How to Measure Stair Treads: A Step-by-Step Guide
This process isn’t hard, but it does require attention to detail.
Let’s walk through it together.
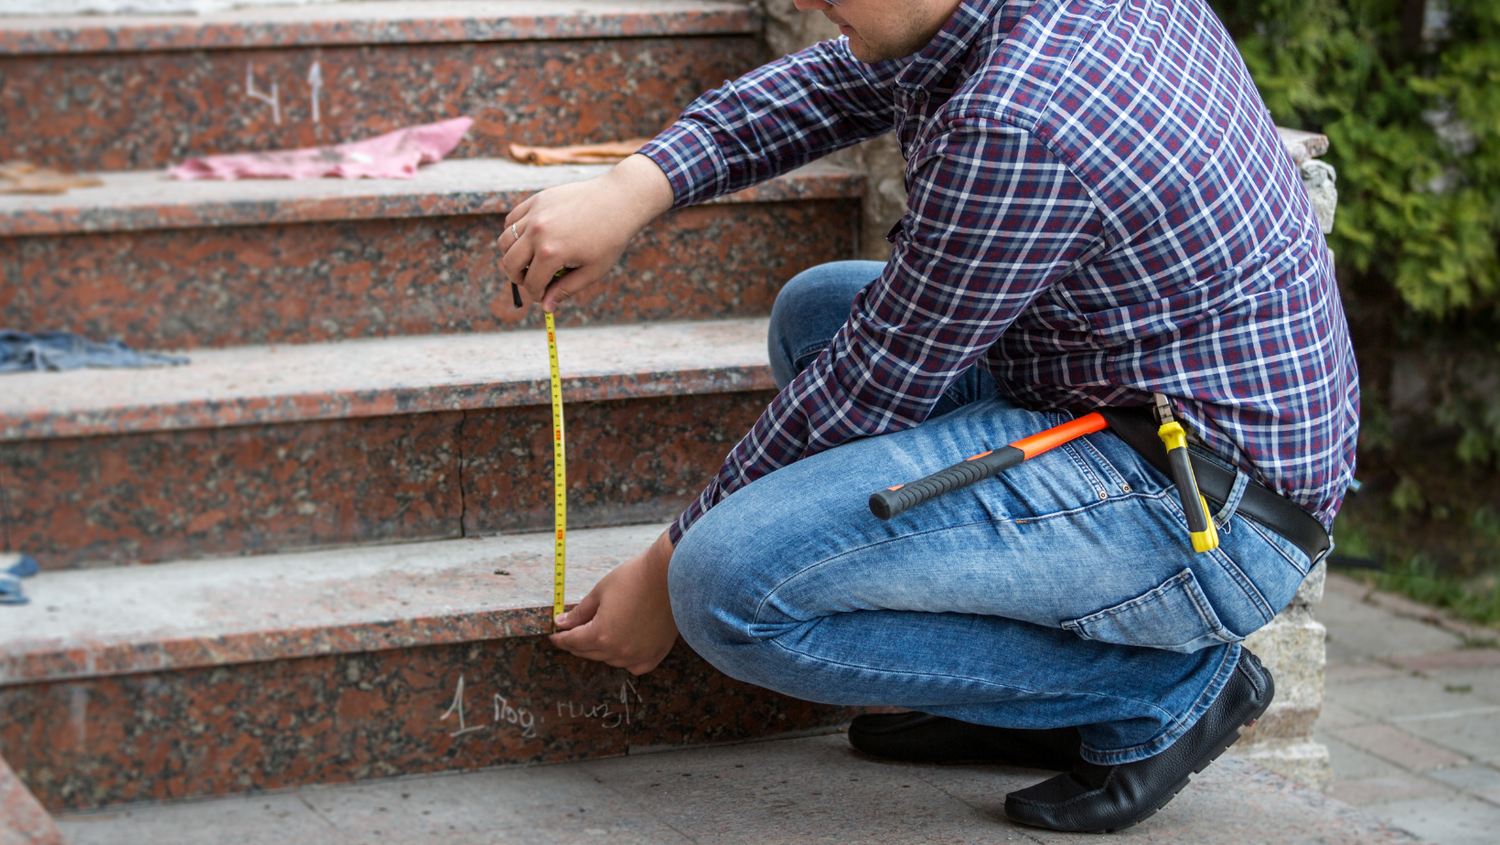
1. Measure the Width of the Stair Tread
Start by placing your measuring tape across the front edge of the tread—from the left side to the right.
Make sure it’s straight and parallel to the back edge (where the step meets the riser).
Standard treads often leave a 1-inch space on both sides.
So, if your stair is 36 inches wide, a 34-inch tread would provide that bordered look.
2. Measure the Depth from Riser to Nosing
This is the front-to-back distance—also called the run.
Place your tape measure against the vertical back of the step (called the riser) and extend it over the front rounded edge (called the nosing).
Accuracy here ensures your treads lay flat and don’t curl or lift at the front.
3. Measure Each Individual Step
No two stairs are exactly alike. Especially in older homes, small variances can create big problems.
It may sound tedious, but it’s worth it.
Measuring each stair individually is the best way to ensure a uniform fit across your staircase.
4. Record and Label
Keep your notes organized.
Write down width and depth for each step and number them if they vary.
This becomes especially helpful if you're ordering custom or DIY stair treads.
Mistakes to Avoid When Measuring
Even the most detail-oriented DIYer can overlook a few things.
Watch out for these common measuring mistakes:
-
Only measuring one stair and assuming the rest are identical
-
Measuring over existing flooring (old carpet, vinyl, or adhesive) which can throw off your depth
-
Forgetting the nosing (rounded edge) and just measuring a straight line
-
Not writing down your measurements and having to remeasure later
If you're unsure at any point, take a second pass.
It’s always better to double-check now than to fix a problem after installation.
Tips for Getting the Most Accurate Measurements
-
Use a rigid tape measure with clear inch markings
-
Measure twice, write it down once
-
Mark each step with masking tape and a number if they’re different
-
Take photos and notes if you're ordering custom pieces
Precision is peace of mind—especially when it comes to safety.
Understanding Stair Treads and Risers Dimensions
While stair treads are the horizontal surface you step on, stair treads and risers dimensions go hand in hand.
Standard residential stairs typically have:
-
A tread depth between 10 to 11 inches
-
A riser height between 7 to 8 inches
But that’s just a baseline.
Always measure your stairs directly, because even a quarter-inch difference can affect comfort and safety.
Consistency is key—irregular stair heights can lead to trips, stumbles, and discomfort.
When ordering carpet stair treads, knowing these dimensions helps ensure the treads don’t interfere with foot placement or stick out too far over the edge.
Adding Customization: Why One Size Doesn’t Fit All
Off-the-shelf stair treads can work fine for some, but many homeowners find that their stairs require a bit more flexibility—especially if you want a cohesive, stylish look.
Custom carpet stair treads allow you to:
-
Match your home’s interior (think hardwood tones, wall colors, or pet-friendly fabrics)
-
Get an exact fit for uniquely shaped or sized stairs
-
Choose from various textures and patterns to suit your lifestyle
At Oak Valley Designs, we offer DIY stair treads that are custom cut and shipped right to your door.
It’s perfect for families who want high-end design without high-end hassle.
Plus, we offer $1 sample swatches so you can feel the difference for yourself before you buy.
How to Secure Stair Treads the Right Way
Now that you’ve measured and selected your perfect treads, it’s time to install.
But the job isn’t done until they’re installed securely.
Wondering how to secure stair treads?
There are a few methods that work well, depending on your surface and material:
-
Adhesive Backing: Many of our stair treads come with a pre-applied adhesive that sticks directly to wood stairs without damaging the finish. Just peel, place, and press.
-
Double-Sided Carpet Tape: For added hold or rental-friendly installs, this option gives strong grip without nails or glue.
-
Brad Nailer: If you’re after permanent, high-traffic installation, brad nails can help reinforce the adhesive. Just be sure to space them evenly and check your building codes.
Proper installation doesn’t just make your stairs look good—it makes them safer for pets, kids, and anyone moving quickly through your home.
Preparing for Installation
Before applying any adhesive or tape, make sure your stairs are prepped:
-
Clean thoroughly with a vacuum and damp cloth
-
Remove any dust, debris, or residue from past flooring
-
Let them dry completely before placing your treads
Taking this step ensures the adhesive bonds properly, reducing the risk of lifting or curling later on.
Best Practices for DIY Stair Treads Installation
If you’re planning to install the treads yourself (and we love that DIY spirit!), here are some quick tips to make it smoother:
-
Start from the bottom stair and work your way up. It prevents dragging and uneven placement.
-
Use a level to align each tread before pressing it into place.
-
Apply firm, even pressure across the surface to help the adhesive stick well.
-
For corner stairs or landings, make sure to measure twice and trim with sharp scissors or a utility knife if needed.
Installing DIY stair treads is incredibly doable with the right preparation.
And unlike traditional runners, they’re low-commitment—easy to remove, update, or reposition as needed.
Budgeting for Quality
You might be wondering how much you’ll spend outfitting your stairs.
Good news: DIY solutions often come at a fraction of the price of full runners—and with fewer long-term headaches.
Standard sets start around $10–$20 per tread, depending on size and material.
Custom orders will vary based on:
-
Total number of stairs
-
Material (wool, sisal, synthetic blends)
-
Finishing options (serged edges, premium adhesives)
The biggest value?
You’re getting a personalized, made-in-America product that not only looks beautiful but adds safety and warmth to your home.
When in Doubt, Ask for Help
We’re all about making things easier for families and homeowners.
Whether you’re:
-
Unsure of what measurements to send
-
Confused about your stair shape
-
Wondering if your install plan is solid
Just reach out. Our team is happy to walk you through the process and help you choose a product that fits your home and your life.
Steps to Success
You don’t need to be a contractor to upgrade your stairs—you just need the right plan and the right product.
By learning how to measure stair treads properly, avoiding common mistakes, and choosing secure installation methods, you’ll create a staircase that’s safer, cozier, and uniquely yours.
So go ahead—start measuring.
And when you’re ready for beautiful, made-in-the-USA carpet stair treads that fit your style and your life, we’re here to help.
-
Website: https://oakvalleydesigns.com/
-
Phone: 706.331.0315
-
Email: info@oakvalleydesigns.com
-
Address: 30 River Ct SW Bldg E Cartersville, Ga 30120