
How To Install Baseboard
Video by HouseImprovements · 1 moment used in Oak Valley Designs's DIY guides · 17:59 long
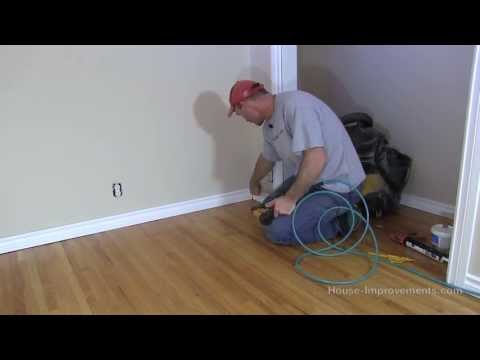
Moments in this video
- 0:49–2:35 Prepare the Room and Measure Baseboard Lengths
From How to Install Baseboard Along a Staircase Wall, Step 1: Measure and Plan Baseboard Layout
Begin by confirming that all door and window casings are already installed, as baseboards will butt up against them. Create a rough sketch or floor plan of the room on paper to serve as a guide. Proceed to measure each section of wall where baseboard will be installed. Measure directly from one point to another, for example, from the edge of a door casing to an inside corner, or from one inside corner to another. Record these precise measurements onto your sketch. If corners are not perfectly square, utilize an angle finder or protractor to determine the exact angle, as this will be crucial for accurate miter cuts later. For this particular room, the corners are noted as being fairly square, reducing the need for an angle finder for the miter saw settings.
The guide that use this video
Transcript
0:02 hi I'm Shannon from house improvements.com and I'm just going to show you a video on how to install cut and install uh baseboards for your room you can see here we've got hardwood floor and uh no baseboards installed yet we've got the casings on which you can see the video for installing the window and door casings you need those on in order to measure for your baseboard in most cases so we've got that on we're going to be installing a baseboard that is just like this it's a painted MDF it's about 3 and a/4 in is tall and uh profile looks something like that anyways you can get all all kinds of different ones so uh really doesn't matter what you're using the basic idea is all the same so we're going to measure and cut it all and install it so that we can finish this room off um so to start with uh for measuring
0:50 what I like to do is draw myself out a little floor plan of the room just a quick sketch it doesn't have to be a scale or anything like that so I've got my little sketch just showing where my Corners are so I remember once I get to the saw this is an inside corner this is an outside corner and uh and all that sort of thing so anyways I got my little sketch there my road map and uh I've also got this protractor if you're not real sure you know if your Corners are square or you know maybe they're off angles or something you can use this protractor in the corners put in there and then you can read it divide your measurement in half and uh figure out what your Corners are this room here everything's fairly Square so uh I'm not
1:36 going to need that but sometimes things are a little out of whack so you may may want to use that okay so to measure up my corners or my uh lengths I mean uh I just simply go around the room measuring from point to point recording that on my piece of paper and uh then I'll go to the saw and cut it so I've got my map I'm going to measure right tight right into the corner right tight to the casing and record that number so I've got 10 and 1/4 okay so that's my first piece now I'm going to measure this wall and again I'm just sliding my tape right down to the end butting into the far wall right into this corner I got 103 and
2:23 78 write it on my road map okay so same thing I'm just going to do that all the way around the room and then we're going to pick up in the shop and I'll show you how to cut them okay so we're back in the shop and I've got a few pieces sitting here ready to go what I've done is just roughly cut them to length so that they're easier to handle right now with the camera here I don't want to knock it over so uh I'm going to start out with a couple of these pieces show you how to cut them then I'll finish cutting them up we'll go back in and get them nailed into place so for measuring these uh this one piece here it's going to be flush cut up against the register these registers in this home are uh mounted on the wall they aren't really in the floor a little bit older style so just going to be a straight cut
3:10 on this end which I've got already I've got to measure over to an inside corner uh to 49 and 1316 so I'm going to hook right on the top come over to 49 and 1316 and give myself a mark okay so I've got that marked right on the very top here as you can see and that's going to be my cut location the this is going to come to a point the angle's going to be in this direction and this is this is going to be the point back here okay so I can take that to the saw Now set it right on the saw um I I showed you which way that angle had to go so I know right now by
3:55 looking at that that I need to turn the saw this direction and and then I need to roughly get my blade lined up to the edge of that Mark so I'm just going to eyeball that up right now it should be right about there okay I'm going to hold my trim firmly in place against back against the fence and down to the base keeping my thumb arm and loose clothing out of the way start the saw up and make the cut okay so now if anything when you're making these cuts on your first uh pass or whatever you if anything if you're not sure cut it just a little bit longer because you
4:40 can always slide it over a little and and trim it off again uh in this case I'm right on my mark there so we don't need to recut that so that's one of our pieces okay this next piece I'm going to show you is uh this piece goes all the way along one wall and uh I've got two inside Corners at each end so I need to start out with cutting a corner on the end uh so I can measure from it uh something that's probably probably a good thing to mention is uh you should probably be wearing uh safety glasses possibly ear protection uh maybe even a dust mask this is MDF it's fairly Dusty stuff um I don't have the dust collector on right now just because of the noise when we're
5:26 filming but uh most people aren't going to have that anyways so uh think about some of your safety items as well uh I've removed mine just for the ease of showing you what to do we'll we'll go with that okay so I'm going to cut an inside uh 45 on this [Applause] end just like so I'm just going to bring it back over to the actually I'm not I'm going to do this I'm going to lay it on this bench just like so so I can measure it so I've got my angle that I just cut right here which will be right in the corner okay and I want to hook right on there and the length of this piece was
6:13 uh 103 and 78 so I'm going to come right down to this end mark 103 7/8 right on the top again just like I was before this should be the other corner at the other end of the room okay so I've got that now I don't really want to cut with my good side against the fence like this for one thing it it may not be perfectly flat and uh the blade is going to chip out on this side so I just need to Simply turn this around so I always have the good side facing me but now when I do this I I know that this angle has to go the other way because I'm working on an inside corner so I've got to change the saw as well so I'm going to flip it back around to 45°
7:00 and I'm going to eyeball up the uh eyeball up the mark there okay holding the trim down and firm and I want to make the that okay so I've got those couple cut I'm just going to cut all the rest of the pieces there's I don't know six or eight pieces in this room just the way the layout is we'll get them all cut we'll take them back into the house and get them nailed on the wall okay so we're uh back inside and we're going to start here at this one outside corner that's in this room uh we're going to use brad nailer to
7:46 install this uh as far as the cutting and the fastening you know if you don't have the miter saw electric miter saw you don't have the brad nailer you could hand nail the trim on if you wanted um you could also cut the trim with a hand saw if you've got a a handheld miter box and a and a handsaw you could certainly do that if you have any amount to cut though I would recommend either borrowing buying leasing whatever renting the tools uh it'll just speed it up and uh make it a little more pleasurable so basically all I need here to do this I'm going to use 2in brad nails I'm using 18 gauge brad nailer with 2in nails uh a little bit of glue just for the outside corners inside Corners I don't really worry about and to be quite honest even for just a
8:32 straight 90° corner like this one is going to be I generally wouldn't even bother gluing that if you have a drywall Corner that's the chamford or 45 Dee corner where there's a a separate other little piece of a baseboard in here between between the two side pieces you definitely want to glue that in because they're really hard to uh to nail they usually split or something so it's better to nail that in uh but for right now I am going to glue this one outside Corner uh the other thing I like to do as well is I like to actually nail into the studs when I can you can always pretty much always nail along the bottom and hit the bottom plate of the wall but sometimes when you do that like you can see here the baseboard really pulls away from the wall and you get these ugly gaps uh it's hard to eliminate all those
9:18 gaps but sometimes by putting a nail in into the stud if there is one you can you know tighten everything up and make it look better another option you know if you if you find it really G happy or something uh you can use a latex cocking long there to fill that in um I have done that in the past Some People Want it I'm not a big fan of it because if you do that you pretty much have to cut your paint like repaint that top cocking because over time it'll turn a little bit yellow or discolor so if it's painted it doesn't do that so bad so it's just a little more work a little more labor but it definitely does make a nice job when you do that uh so anyways we've got the outside corner I plot my two pieces in here everything looks like it's going to match up really nicely so uh first I'm just going to
10:05 nail this first one on and like I said I'm using 2in Nails I'm going to throw a couple nails down in the bottom where it should hit the bottom plate like so and I don't imagine there's a stud in between here in this section oh I could be wrong looks like there is something right here so we're going to throw one in there that held that back a little better okay I'm going to throw a little bit of glue on here if I can get the glue to come out this glue is really thick it doesn't run really easy I like it that way so it doesn't make a mess so I've got a a little bit of glue
10:53 on there I don't want so much that just squirting out all over the place these baseboards are actually have two coats of paint paint sprayed on them already so I don't want to make a huge mess I will have to go back and touch up the paint anyways around the nails but I don't really have to don't have to paint the whole trim so I just get everything matched up there nice throw a couple Nails in the bottom like so we'll see if there is a stud in here I mean there definitely will be one right here at the corner I'm just seeing if there's one out in the middle which there isn't so what you can do even though there isn't a stud there sometimes if you uh instead of just nailing straight in if you just nail on a bit of an angle through the drywall that actual angle will give you enough strength that
11:38 it can't just pull right out right away so that's uh just one little trick that you can do sometimes your outside corners you might have to just take a knife or do a little bit of sanding just to touch them up a little bit this one isn't too bad actually and I'm just going to continue over to the other inside corner over here so we'll come over here now the inside Corners I would never glue there's really not a lot of point in it I don't think once they're in there nailed into place they can't really go anywhere so uh I've just made sure all my pieces are uh sitting there well they're it's tight against this trim fits nice in the corner I'll stick a couple Nails in the
12:27 bottom like so I'll have to set that nail it didn't really quite go in there might be a no there's no stud there either so we're just going to leave that one and I'm going to continue around the corner now you can see when I did that how this miter opened up down there in the bottom now part of that is this trim wanting to kick in a little bit when that nail went in and uh what I what I'll do after is just stick a bar back there and pry it out a bit but also I'm going to COA these Corners because this is paint grade you you can cheat a little bit I can these Corners up and then repaint it and uh it'll look as good as ever anyways but uh if you just stick a bar back down in here pry that bottom out a little bit it's just kicked itself in a little bit too far the the
13:13 drywall might be a little short there or something so that it could allow it to do that so I'm pushing the baseboard down to the floor tight to the wall I'm going to stick a nail in and I've lost my sound thingy there we go and I'm putting a nail about every couple feet or so should be sufficient so I'm pushing down hardwood floors you're going to get a little bit of space here you know it's pretty much tight there and a little space there you know the floor is a little bit up and down so okay so you'd go along nail all the way along the bottom like that then every second stud or so I'm just going to put a nail in just to hold the top back a little bit so I'll just find a stud here
14:00 so here's one here like so come over here about 3 4 ft away there's another stud here okay and I'm I'm using 2 in nails for all these all these spots so I'll just finish nailing around here and uh get this all nailed on then we'll go back and just show you how what I do to fill them fill the nail holes Okay so we've just move back to this inside corner I'm just going to show you I'm just using a silicone a paintable silicone or it actually is paintable
14:45 silicone isn't cocking but uh regardless as long as it's paintable doesn't matter what you use and uh you can see our corner here I had my bar in there PRI it out a bit and I actually broke the piece so I replaced it uh but we do still have that bit of a gap there there but like I said we're just going to that up and uh make that disappear so just simply start in down cocking not all silicons are paintable so make sure you if you're going to use one if you're going to use a silicone make sure it is paintable in this
15:32 case so I put it in there just use the finger to kind of tool it in there just like that and then once we uh give that a coat of paint uh nobody will even know so you do that on all your inside corners or anything like that that you want to do like I said you could put it along the tops here if you want um I'm not going to do that in this case and then as far as the nail holes or you know outside corners if you need a little bit of filler I just use this uh wall repair compound uh this particular one's bought at the local lumber store store and uh if you watched my window and door casing video you will have seen me do this already I just put a little bit on my finger wipe it into the hole wipe it off
16:19 with another finger just like so and if you wipe it clean enough smooth enough you really shouldn't have to go back and and sand it you could use a damp rag to clean that off instead of your other finger and uh it just cleans up nice and easy and you can go back very quickly it doesn't take very long for this stuff to dry within half an hour usually go back and uh touch your paint all up all the way along so so anyways uh not a lot to it uh this is one of the shorter videos that I've done and uh hopefully still gave you all the information that you needed um we do have if you search the rest of this YouTube channel you'll find that we have lots of other videos up there on
17:05 all kinds of different topics so go and check them all out and see what you think you can uh subscribe to it as well so that you get a notification every time we do put a new video up if you sub subscribe to our Channel you will get uh I believe it's an email that they send you out to uh notify you that uh there's a new video up there or a new comment or whatever uh you can also go to our website at uh ww. dasimprovement docomo so go check it all out see what you think uh go to The Forum read that I try to answer as much of that as I can as quickly as I can uh the odd time we
17:51 get other members in there that uh will answer some of your questions as well so thanks again for watching I hope it was informative
Automatically transcribed from the source video.
More from the Oak Valley Designs DIY Hub
Read the guide Browse all guides
Planning this project? Shop Oak Valley Designs.

Subscribe for exclusive updates
Be the first to know about promotions, new products, and sales.