Prepare Stair Tread for Installation
From how to install peel and stick carpet stair treads · Step 1 of 2 · Video by Oak Valley Designs
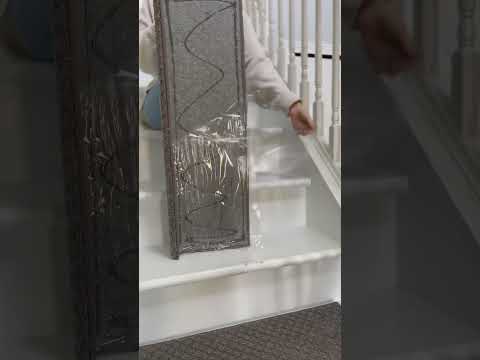
Showing 0:00–0:05 of the source video.
What happens in this clip
Begin by taking one carpet stair tread and positioning it so that the back, adhesive-covered side is facing upwards. Locate the edge of the clear protective plastic film that covers the adhesive. Carefully peel this film away from the adhesive backing. The adhesive is visibly applied in a wavy or zig-zag pattern across the back of the tread. Ensure the entire plastic film is removed to fully expose the adhesive surface, preparing the tread for immediate installation onto a stair.
Goal: Expose adhesive backing for attachment
What's used
Tools
- Carpet Stair Tread
- Anti-slip tape
- Paint with grit additive
About the full video
This project demonstrates the initial, crucial step of preparing and installing carpet stair treads that feature an integrated adhesive backing. The video focuses on efficiently removing the protective plastic film from the adhesive, a necessary action before securing the treads to a staircase for enhanced safety, comfort, and aesthetic appeal. Although the full installation is implied, the video specifically details the preparation phase.
Step 1 of 2: Prepare for Installation: Peel Away the Protective Liner
With care, begin to peel away the protective plastic liner from the adhesive backing of your Oak Valley Designs carpet stair tread. This simple 'clean, peel, and stick' action unveils our unique pressure-sensitive adhesive, specifically engineered to provide a strong, safe bond while protecting your underlying stair surface. Take your time with each tread to ensure it's ready for its new home.
Other videos for this step
how to install peel and stick carpet stair treads
Discover the 'Oak Valley Difference' with our DIY-friendly carpet stair treads! Designed with a unique pressure-sensitive adhesive backing, they provide a secure, non-slip grip without the need for nails or messy glues, ensuring your beautiful stairs remain pristine. This easy DIY stair remodel typically takes just about 20 minutes for a standard staircase, bringing safety and style to your home. Plus, for your peace of mind, our treads can be effortlessly removed or replaced, leaving no residue or damage behind.
Read the full guide Browse all guides
Planning this project? Shop Oak Valley Designs.