
Mop Entryway and Hallway Floors
From How to Protect Stairs and Entry Floors from Winter Salt and Slush · Step 1 of 5 · Video by Ashley Forbes
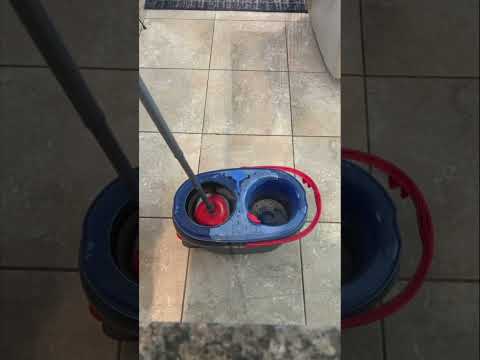
Showing 0:25–0:39 of the source video. Watch the full video with every moment.
What happens in this clip
After refreshing the mop head by wetting and wringing it in the solution, proceed to mop the entryway and hallway floors. These areas are typically high-traffic zones and can accumulate significant amounts of outdoor dirt, dust, and pet dander from foot traffic and pets. Use long, overlapping strokes to cover the entire floor surface, ensuring the hypoallergenic solution works to lift and trap allergens effectively. Pay special attention to corners and edges along baseboards and near the front door where debris often collects.
Goal: Continue mopping from the kitchen into the entryway and hallway, focusing on paths where outdoor contaminants and pet dander are frequently tracked in.
What's used
Tools
- Spin Mop with Hypoallergenic Solution
About the full video
This video demonstrates a routine floor mopping process using a hypoallergenic cleaning solution, aimed at reducing household allergens like dust mites and pet dander to improve indoor air quality. It covers preparing the mop bucket with solution, mopping various tiled floor areas, and properly disposing of the dirty water.
What's said in this clip
we currently live in West Texas and I love sharing your everyday real life messes with four kids I'm sure you can imagine my house is always dirty it's always getting messy and I also have two dogs and a cat the puppy you just saw her name is Stella she's a Cavapoo and then I also have a pug he's almost six years old and his name is Yoda so with
Automatically transcribed from the source video.
Step 1 of 5: Clean Entryway and Stairs
Sweep or vacuum the entry floor and stairs to remove loose dirt and debris. Then, use a damp mop or cloth with a mild cleaning solution to wipe down all surfaces. Ensure the area is completely dry before proceeding to the next step. For stubborn salt residue, a solution of equal parts white vinegar and water can be effective, followed by a clean water rinse.
Every video in How to Protect Stairs and Entry Floors from Winter Salt and Slush
Step 1: Clean Entryway and Stairs
- 0:30–2:29 Clean the Entryway Floor
- 3:48–4:50 Sweep Stairs and Entryway
- 0:25–0:39 Mop Entryway and Hallway Floors (this video)
Step 2: Apply Temporary Mats or Runners
- 0:04–0:09 Place Footmats at Entrances
- 0:09–0:16 Install Footmats in High-Traffic Areas
- 7:27–8:00 Strategically Place Entryway Rugs and Mats
Step 3: Install Peel-and-Stick Floor Protection
- 0:09–0:15 Install New Stair Treads
- 1:09–2:26 Install First Rounded Stair Tread
- 0:02–0:06 Apply Anti-Slip Strip
Step 4: Apply a Protective Coating or Sealant
- 1:13–1:15 Apply Protective Sealer
- 8:31–9:28 Applying Water-Based Sealer and Acrylic Floor Finish
- 1:11–1:14 Apply Protective Sealer
Step 5: Maintain Protective Measures
- 1:55–2:11 Establish a Mat Maintenance Routine
- 1:40–1:55 Deploy and Secure Floor Safety Mats
- 0:58–1:29 Vacuum Loose Debris
How to Protect Stairs and Entry Floors from Winter Salt and Slush
This project outlines methods to protect interior stairs and entry floors from damage caused by winter salt and slush, including temporary and semi-permanent solutions.
Read the full guide Browse all guides
Planning this project? Shop Oak Valley Designs.

Subscribe for exclusive updates
Be the first to know about promotions, new products, and sales.