
measure stairs for tread installation
About This Guide
Ready to transform your staircase but worried about a complicated installation? Our signature peel-and-stick system is the perfect solution. This guide walks you through our simple, two-step process to install your new Oak Valley Designs stair treads. It's a truly DIY-friendly project that provides a secure, stylish finish with no nails, no glue, no stress. You'll achieve professional-looking results in minutes, adding instant safety and warmth to your home.
Tools & Materials

Steps
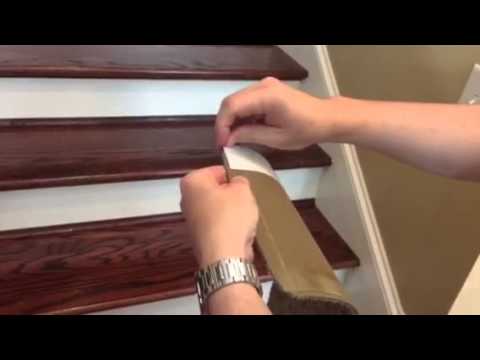
Peel the Protective Liner
This is the 'peel' part of our simple 'Clean, peel, and stick' process. Gently remove the entire plastic film from the back of the tread. This exposes the pressure-sensitive adhesive that provides a secure bond to your stair without damaging the beautiful wood underneath, giving you complete peace of mind.
Position and Press Firmly
With the adhesive exposed, carefully position the tread on the stair. We recommend leaving an even border of wood on all sides for a classic, professional look. Once you're happy with the placement, press down firmly across the entire tread, paying special attention to the edges. This activates the adhesive, creating a secure, non-slip surface where safety meets style. That's it—a beautiful, easy DIY stair remodel is that simple!
Questions about your project or which product fits? Oak Valley Designs's team is happy to help. Mon–Fri 9–5 ET

Subscribe for exclusive updates
Be the first to know about promotions, new products, and sales.