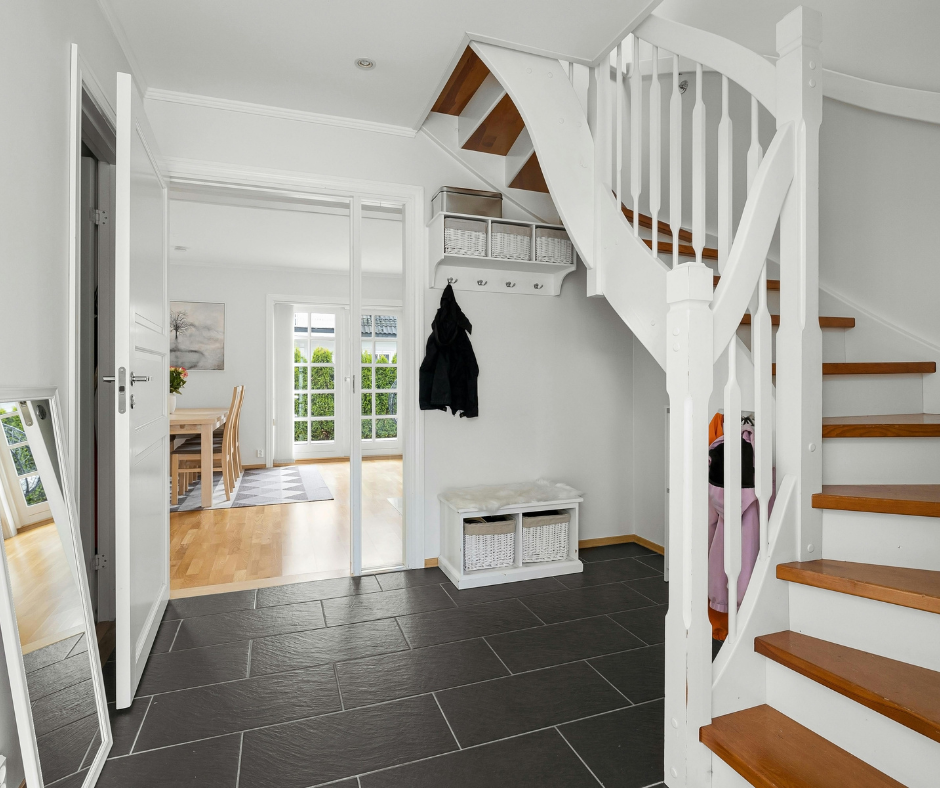
Building a beautiful staircase doesn’t have to feel overwhelming. With the right plan, you can create a design that saves space and adds lasting style. How to build circular stairs starts by marking your center point, cutting curved stringers, and securing each tread around a solid center post.
This process blends smart measurements with careful installation so your steps stay safe and sturdy. Keep reading to discover expert tips, common mistakes to avoid, and how carpet stair treads may add comfort and a polished look to your new staircase.
Understanding Circular Stairs
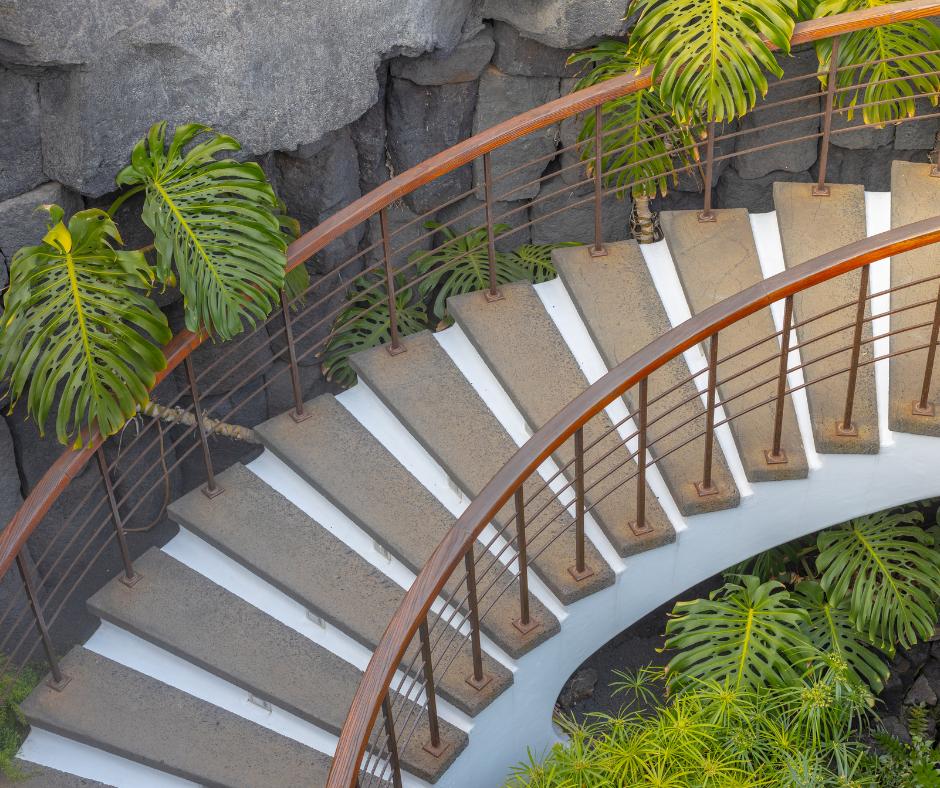
Circular stairs are a type of spiral stair, but they don’t always wind tightly around a single pole. They can curve gently to one side or form a wide, sweeping arc.
When you build them yourself, you control every detail—height, width, finish, and feel.
Before you pick up a tool, check your local building codes. These rules tell you how wide stairs must be, how tall each riser can go, and what kind of railings you need. Following these codes keeps your project safe and legal.
Why Choose Circular Stairs?
There are lots of reasons homeowners love circular stairs:
-
Space Saving: Perfect for small areas where straight stairs won’t fit.
-
Eye-Catching Design: They add a unique look to any room or outdoor deck.
-
Smooth Movement: The curved shape feels natural and easy to walk on.
-
Flexibility: You can use wood, metal, or a mix of materials to match your style.
If you care about the best stair designs for small spaces, circular stairs bring big style without using up big space.
Planning Your Project
Careful planning is the most important part of building circular stairs. Take your time here to avoid problems later.
Write down these details:
-
Total Rise: Measure from the lower floor to the upper floor.
-
Diameter or Width: Decide how big around your staircase will be.
-
Location: Be sure you have clearance above and around the stairs.
-
Materials: Choose treated lumber, metal, or both.
Materials and Tools Checklist
Here’s what you may need:
-
Treated lumber or steel stringers
-
Center support post (if needed)
-
Treads cut to size
-
Optional risers
-
Deck screws or lag bolts
-
Construction adhesive
-
Level
-
Tape measure
-
Drill and bits
-
Circular saw
-
Safety glasses and gloves
If you’re designing circular stairs for decks, use weather-resistant hardware and materials.
Steps to Build Circular Stairs
1. Measure and Mark the Space
Mark the center point where your stairs will curve. Tie a pencil to a string and draw the arc of each step. Double-check that the arc leaves enough walking space.
It helps to sketch a diagram on graph paper before you cut any wood.
2. Cut the Stringers
Stringers support each tread. For curved stairs, you’ll often cut them in sections and join them in place.
Use a jigsaw or bandsaw to follow your curve lines. If you’re not sure about cutting the curves yourself, you can have a local shop cut them to your specs.
3. Install the Center Post
Most circular stairs have a center post or support pole. Bolt this firmly to the floor joists below. Test that it’s level and secure before you build around it.
This post is what keeps the staircase from wobbling over time.
4. Attach the Stringers
Line up the curved stringers evenly around the center post. Use temporary supports or braces to hold them in place. Attach with brackets and heavy-duty screws.
Check the height of each step to be sure it stays consistent.
5. Add the Treads
Start from the bottom tread. Lay it across the stringers and center support. Secure with screws and adhesive.
Keep working up one tread at a time. Use a level to check each step before moving to the next.
6. Install Risers (Optional)
Risers are the vertical boards between each step. They help hide gaps and keep the stairs looking polished.
Attach them after you finish installing all treads.
7. Add Railings and Safety Features
Railings are essential. They help prevent falls and add strength to the staircase.
You can use wood spindles, metal balusters, or cable railing. Be sure the height meets your local building codes.
For outdoor stairs, add slip-resistant strips or texture to each tread.
Safety Checks Before Use
Before you walk on your new stairs, do a final check:
-
Treads: Firm and level, no rocking
-
Fasteners: All screws tight
-
Railing: Secure and steady
-
Clearance: Enough headroom to walk safely
If anything feels loose, fix it right away. A safe staircase is always worth the extra time.
Pro Tips for a Professional Finish
-
Sand All Edges: Rounded edges look nicer and feel smoother underfoot.
-
Seal or Paint: Protect your stairs from moisture and wear.
-
Add Lighting: A few small LED lights along the railing can make a big difference in safety and style.
-
Decorate: Runners or treads in your favorite color can warm up the look and feel underfoot.
Common Mistakes to Avoid
-
Skipping the Plan: A sloppy plan can lead to uneven steps. Measure everything twice.
-
Weak Center Support: Don’t trust drywall anchors—use proper bolts into framing.
-
Ignoring Codes: Height and depth rules keep you safe. Always check before building.
Design Ideas for Small Spaces
When you don’t have much room, try these smart ideas:
-
Choose open risers to let light through.
-
Pick a slim railing design.
-
Use light colors to make the area feel bigger.
-
Tuck the stairs in a corner to free up floor space.
The best stair designs for small spaces always balance style with comfort.
Designing Circular Stairs for Decks
Outdoor stairs get extra wear from rain and sun. Follow these tips:
-
Use pressure-treated wood or composite treads.
-
Install anti-slip tread covers.
-
Add drainage gaps between steps.
-
Seal all wood once a year.
If you’re designing circular stairs for decks, a little maintenance keeps them looking fresh.
Stepping It Up
Building circular stairs may take time, but the reward is worth it. Each step adds beauty, value, and function to your space. With planning and care, you’ll create a staircase that feels safe and looks amazing.
Let’s Make Your Stairs Shine
If you’re ready to build circular stairs you’ll love for years, Oak Valley Designs is here to help. From beautiful stair treads to expert advice, we’ll guide you every step of the way.
Reach out today to start designing a safer, more stylish staircase.
-
Website: https://oakvalleydesigns.com/
-
Phone: (706) 331-0315
-
Email: info@oakvalleydesigns.com
-
Address: 30 River Ct SW Bldg E Cartersville, Ga 30120