Curved staircases add elegance to any home, but installing treads on them can feel like a challenge.
To learn how to install curved stair treads, you’ll need to custom-fit each piece and secure it with strong adhesive—starting from the bottom and working your way up.
Whether you're using carpet stair treads for added comfort or hardwood for durability, the right approach ensures both safety and style.
In this guide, you’ll discover exactly how to measure, cut, and install treads that follow your staircase’s curve.
We’ll cover essential tools, prep steps, and installation tips to help you tackle the project with confidence.
By the end, you’ll have a beautiful, secure staircase that’s built to last.
Why Add Curved Stair Treads?
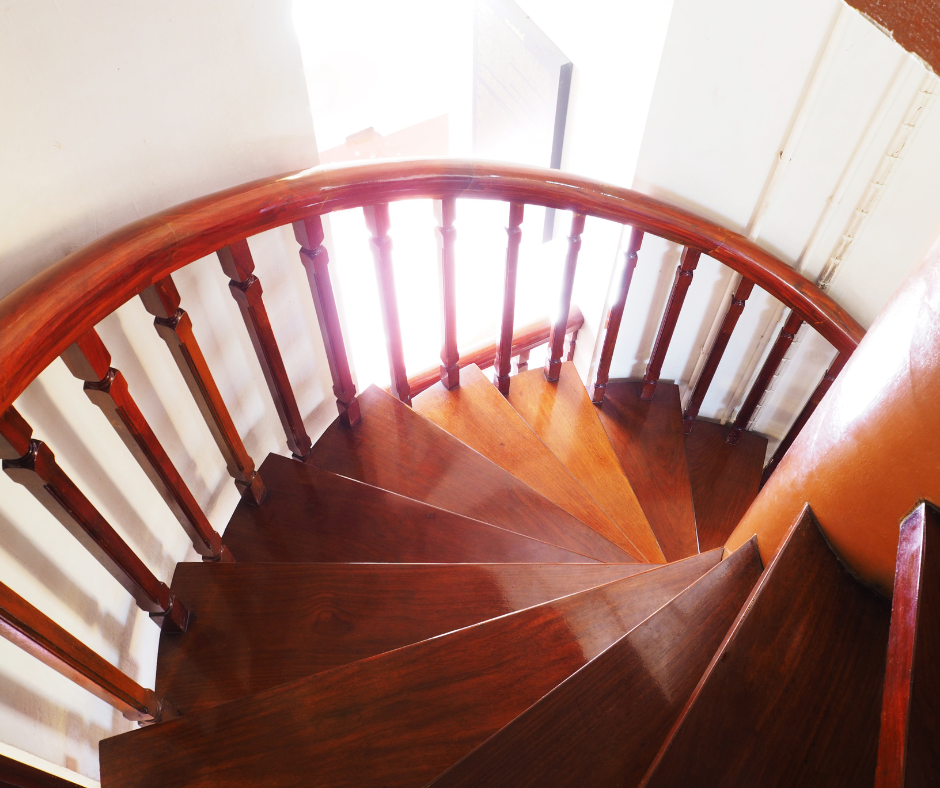
Curved staircases often serve as a visual centerpiece in the home.
But looks aside, the stairs are one of the highest-traffic areas of any house—and curved stairs, with their unique angles and step shapes, can also be some of the trickiest to maintain.
Adding treads offers several benefits:
-
Safety: Reduce slipping, especially if you have kids or pets.
-
Comfort: Carpet or soft backing adds cushion underfoot.
-
Protection: Preserve the surface of your hardwood steps.
-
Design: Add warmth and style that fits your home’s aesthetic.
Installing stair treads is a practical and design-smart decision—especially when working with curved stairs.
What to Know About Curved Hardwood Stair Treads
When we talk about curved hardwood stair treads, we’re referring to wooden stair coverings that are specially shaped to match the unique bend of each stair.
Unlike traditional treads, these aren’t uniform planks you can cut once and repeat.
Each tread may be slightly different in size or shape depending on how the staircase curves.
Oak and maple are popular choices because of their durability and timeless look.
The installation requires precision, patience, and the ability to adjust as you go.
Prepare Your Curved Stairs the Right Way
Before you even think about glue or nails, prep work is essential.
-
Clean each step thoroughly: Dust, debris, or sticky residue can interfere with adhesion. Vacuum and wipe down the steps with a damp cloth.
-
Inspect your stairs: Make sure each step is secure and level. If any step is wobbly or damaged, repair it first.
-
Label and measure: Use painter’s tape to label each stair (Step 1, Step 2, etc.), and measure them individually. On curved stairs, no two treads are exactly the same.
These first steps will ensure the rest of the process goes smoothly.
Picking Materials That Match Your Style
Choosing the right look and material for your treads will make a big difference in the end result.
-
Material: Go with hardwood for longevity and strength. Curved hardwood stair treads are durable and timeless.
-
Finish: Choose a tone that complements your existing floors. You can go natural, stained, or painted.
-
Backing: Some treads come with built-in non-slip backing. Others may require you to apply grip pads or adhesives.
Consider ordering sample swatches before committing to a full set.
This way, you can see how the treads look and feel in your home’s lighting and space.
Choose the Right Stair Nosing for a Smooth Transition
Stair nosing is the rounded edge that overhangs the step.
It helps to create a visual edge while also improving traction and protecting the wood beneath.
Here’s what to keep in mind:
-
Choose nosing that matches your stair tread material and finish.
-
Be sure it fits securely and doesn’t leave any gaps.
-
You want a soft curve that enhances the flow of your staircase.
Poorly installed nosing can ruin the look and safety of the stairs—take the time to get this right.
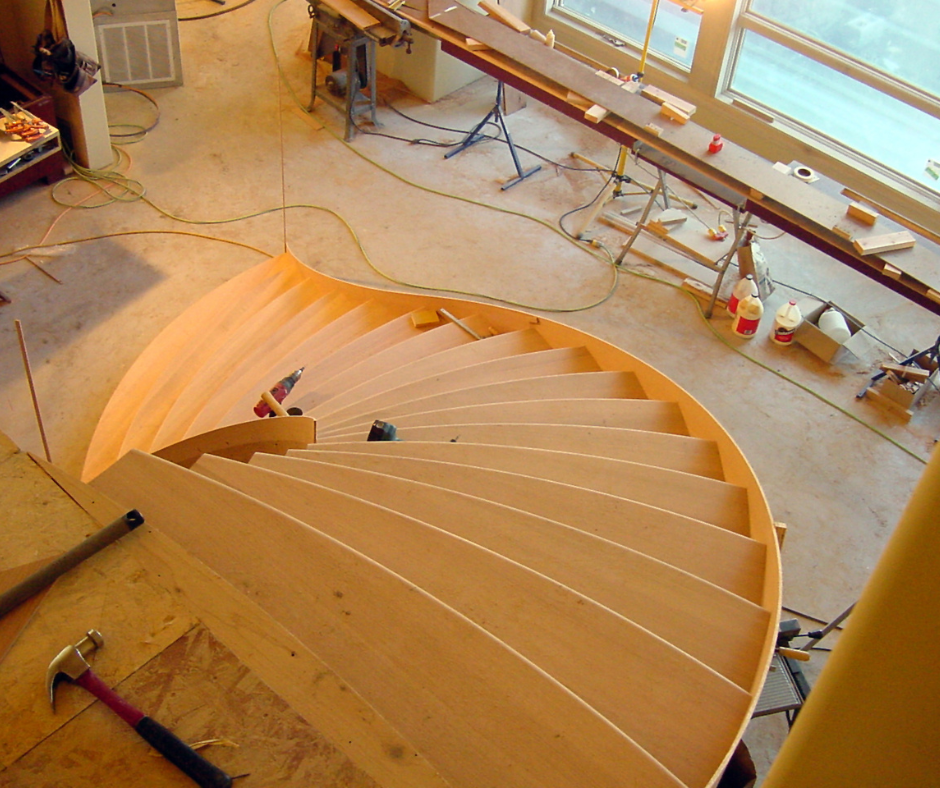
How to Cut Curved Stair Treads: A Step-by-Step Guide
This part is where precision truly matters.
Since every step has a slightly different shape, you’ll need to create a custom template for each tread.
-
Create a template Use thin cardboard or kraft paper. Lay it over the step and carefully trace the edge, including the curve of the nosing and any angles on the sides.
-
Transfer the shape to wood Lay the cardboard template on your tread board. Use a pencil to trace it carefully.
-
Cut along the line For those wondering how to cut curved stair treads, the tool matters. Use a jigsaw or band saw for curved cuts. A handsaw won’t give you the same flexibility or smooth lines.
-
Refine with sanding After cutting, smooth the edges using medium- to fine-grit sandpaper. This ensures a snug, polished fit on the step.
This step-by-step method is the key to getting each tread to sit flush and look like it was made for that exact stair—because it was.
Dry Fit Before You Glue
Don’t rush into installing right after cutting.
Dry fitting allows you to test how each tread lays before making anything permanent.
Place the cut tread on its corresponding step, and look for:
-
Gaps between the tread and nosing
-
Overhang or short edges
-
Uneven spots that may need more sanding
Make small adjustments until the fit is perfect.
Then move to the next step.
How to Install Curved Stair Treads with Adhesive
Once your treads are ready, it’s time to put them in place.
Start from the bottom step and work upward.
Apply Adhesive
Use a construction-grade adhesive suited for wood.
Apply it to the back of the tread in an S-shaped pattern to allow even spread when pressed down.
Press and Hold
Set the tread in place and press firmly, especially near the edges.
Make sure it aligns with the nosing and riser.
Secure With Finish Nails (Optional)
For extra strength, especially on hardwood, use small finish nails in discreet spots.
Just be sure they won’t affect the look or safety of the tread.
Repeat the Process
Move up the stairs one tread at a time. Don’t rush—every step deserves your full attention.
This slow-and-steady method ensures that every tread is positioned just right.
Trim, Caulk, or Touch-Up as Needed
Sometimes, even after careful cutting and installation, you may need to add finishing touches.
-
Use wood filler or color-matched caulk to fill in tiny gaps.
-
Touch up with stain or paint where needed.
-
Apply trim or molding if your project calls for a more decorative finish.
Once complete, give everything time to dry before allowing full use of the stairs.
Maintain Your Curved Stair Treads Over Time
Your treads are in place—but don’t forget about ongoing care.
Maintenance keeps them looking and performing their best.
-
Vacuum regularly to remove dust, especially around edges.
-
Spot clean spills quickly to prevent stains or damage.
-
Check for loosening every few months. If a tread shifts or lifts, reapply adhesive or replace as needed.
Proper maintenance helps extend the life of your investment.
Tips for Tackling Tough Curves
Here are a few tips for those tricky moments:
-
Use painter’s tape to secure templates before cutting.
-
Keep spare treads on hand in case of a mistake.
-
Check for symmetry between steps for a balanced look.
Installing stair treads on a curved staircase is like assembling a custom puzzle.
It requires patience, a good eye, and a willingness to go step by step.
But the payoff—a safe, stylish staircase—is well worth it.
Steps to Success
Taking on curved stairs might seem like a big job at first.
But with a little planning, the right materials, and a patient hand, you'll end up with a staircase that’s both beautiful and practical.
Just remember:
-
Measure carefully.
-
Cut with precision.
-
Install with care.
Now you know how to install curved stair treads, and more importantly, how to cut curved stair treads so they fit just right.
With the proper approach, your stairs won’t just be safe—they’ll be a highlight in your home.
Let’s Bring Comfort and Craftsmanship to Your Stairs
At Oak Valley Designs, we specialize in curved hardwood stair treads and custom solutions that make your home safer and more stylish—without the stress.
Our family-run business is proud to create American-made products with comfort, durability, and design at the heart of everything we do.
Whether you're ordering one sample or planning an entire staircase renovation, we're here to walk with you step by step.
Want expert support or need custom sizing?
We’d love to help you get started.
-
Website: https://oakvalleydesigns.com/
-
Phone: 706.331.0315
-
Email: info@oakvalleydesigns.com
-
Address: 30 River Ct SW Bldg E Cartersville, Ga 30120