Building floating wood stairs is like creating a functional work of art for your home.
These stairs, often referred to as cantilevered stairs, are designed to give the appearance of floating, thanks to their concealed support system.
They offer a sleek, modern look that maximizes light and space, making them perfect for contemporary interiors.
For added comfort and style, incorporating stair treads and landings can complement the wood’s natural beauty while improving safety.
This guide will walk you through how to build floating wood stairs and share inspiring design ideas to make your project truly one-of-a-kind.
What Makes Floating Wood Stairs Unique?
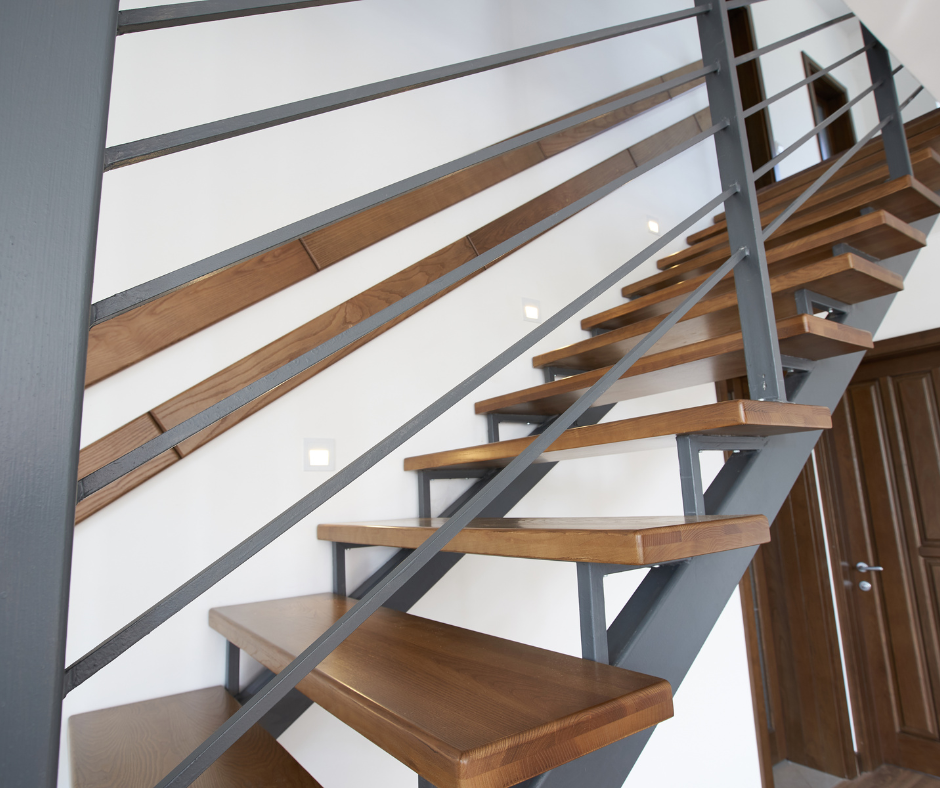
Floating wood stairs are designed to appear as though they’re suspended in mid-air.
This is achieved by anchoring each tread to a hidden support system, such as steel brackets or a central stringer, eliminating the need for risers.
The result is an open, airy look that allows natural light to flow freely, enhancing the sense of space in your home.
What Materials and Tools Do You Need?
Essential Materials
Hardwood treads, such as oak, maple, or walnut, are ideal for their durability and natural beauty.
Steel brackets, concealed anchors, or a central stringer provide the necessary support.
Heavy-duty bolts and screws ensure a secure installation.
Wood stain or varnish can protect the treads and highlight their grain.
Carpet stair treads and landings adds a soft, safe touch to complete your design.
Tools to Keep Handy
You’ll need a measuring tape, level, and drill for precision.
A saw, either miter or circular, is essential for cutting treads to size.
Sandpaper or a power sander will help smooth out the wood.
Always use safety goggles and gloves when working with tools.
How to Build Floating Wood Stairs
Step 1: Plan Your Staircase
Begin by measuring your space carefully to determine the staircase’s dimensions.
Sketch out your design and consider floating wood stair design ideas, like mixing wood with glass or metal for a striking effect.
Check local building codes to ensure your staircase meets safety requirements.
Step 2: Prepare the Support System
Install steel brackets or a wall-mounted stringer to anchor the treads.
If using a wall for support, verify you are securing to the foundational studs, and that it’s reinforced to handle the weight.
Double-check that each bracket is level and properly spaced.
Step 3: Install the Treads
Cut each hardwood tread to the correct size.
Sand the edges for a smooth finish that highlights the wood grain.
Secure each tread to the brackets or stringer, checking alignment and spacing as you go.
Step 4: Add Railings and Finishes
For safety, install railings that match your design style.
Glass panels or slim metal railings are great options for maintaining the minimalist look.
Adding a carpet stair landing at the top or bottom of the stairs can elevate the design while preventing slips.
Step 5: Final Touches
Apply a wood stain or sealant to protect the treads and enhance their appearance.
Inspect your work to ensure everything is secure and level.
How Do Floating Wood Stairs Fit Into Home Design?
Floating wood stairs are a versatile design feature that work well in modern and minimalist homes.
Pair them with bold lighting, natural wood finishes, or contrasting materials like steel or glass.
Carpet stair treads and landings are a practical yet stylish addition that can make the staircase more inviting and safer for daily use.
Steps to Success
Building floating wood stairs is a rewarding project that combines creativity with functionality.
Start with a well-thought-out plan and gather quality materials.
Follow each step carefully, paying attention to alignment and safety.
Incorporate a carpet stair landing to complete the design with a touch of comfort and luxury.
With patience and attention to detail, you can create a stunning and luxurious staircase that will last.