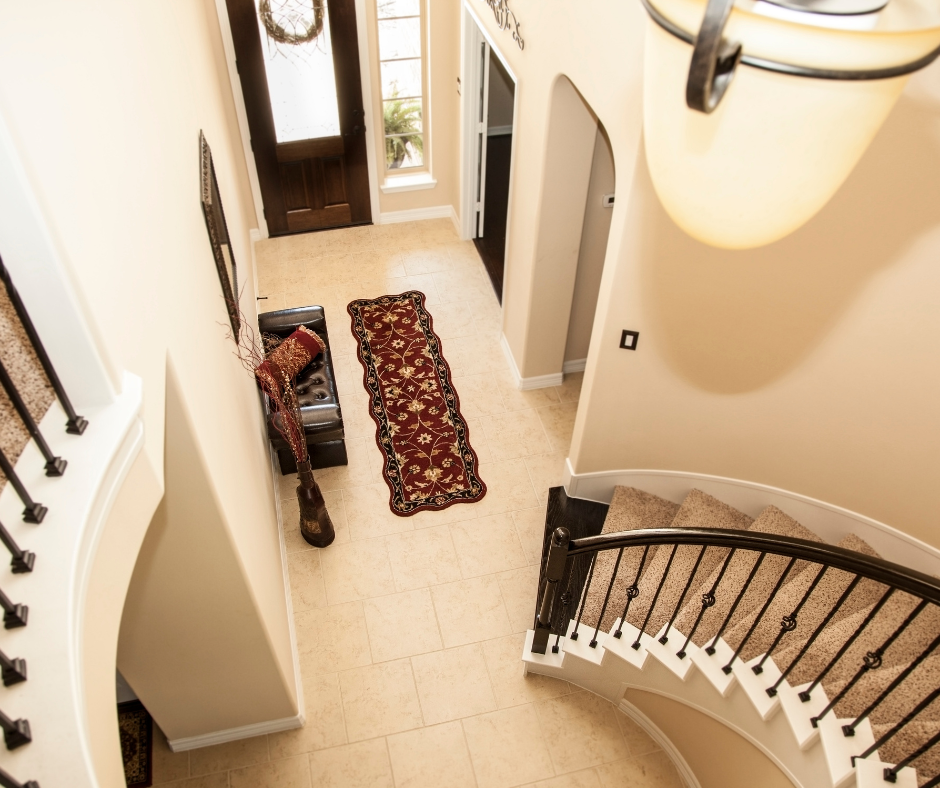
Curved staircases bring elegance to any home, but they can also be tricky when it comes to safety and style.
If you're wondering how do I install carpet stair treads on curved stairs, the answer is simple: measure each step individually, cut each tread to fit, and use self-adhesive backing to secure them in place.
This ensures a snug, non-slip fit that follows the unique shape of each stair.
By using carpet stair treads, you’ll make your staircase safer for pets and family while adding a custom look to your home.
In this guide, you’ll learn how to properly measure, cut, and install treads—even on tight curves.
We’ll also walk through finishing touches like moulding to help your stairs look polished and professional.
What Makes Curved Stairs Different
Curved staircases are not just a visual centerpiece—they're also a challenge when it comes to measurements and materials.
Unlike straight stairs, where each tread is typically the same size, curved stairs often have slight variations in shape, angle, and size.
This variation can be subtle or dramatic depending on the design.
Some stairs have a sweeping curve with long, shallow steps, while others twist more tightly, requiring custom cuts for nearly every tread.
You may be working with wood, stone, or finished materials like curved oak stair treads, which are popular for their rich grain and long-lasting beauty.
These natural materials benefit greatly from carpet protection to reduce scuffs and minimize slipping.
Know Your Stair Angles and Curves
Before cutting a single piece of carpet, you need to understand the geometry of your staircase.
Most curved stairs feature angles between 30 to 45 degrees, but this is not a fixed rule.
Measuring the angle and curve of each tread allows you to cut your carpet pieces with greater precision.
Visualize the staircase like a fan—wider on one end, narrower on the other.
If you look closely, each step flares out slightly more or less than the one before.
That’s why a one-size-fits-all approach doesn’t work here.
Instead, embrace the individuality of each tread.
With a measuring tape, paper templates, and patience, you can cut each piece of carpet to fit like it was custom-made.
How to Measure Curved Stairs for Carpet Treads
Taking the right measurements is the foundation of a successful install.
When it comes to curved stairs, a few extra minutes spent here can save you hours of re-cutting or repositioning later.
Here’s what to measure:
-
Width – Measure across the widest part of the stair tread, usually at the outer edge. This width can change from stair to stair on a curved staircase, so measure each one individually.
-
Depth – Measure from the front of the tread (nosing) to the back. Like width, the depth may vary slightly with the curve.
-
Riser Height – Although carpet treads don’t usually cover the risers, knowing the height between treads helps you center and place them more consistently.
-
Templates – For sharper curves, cut paper or cardboard templates that match the exact shape of each tread.
Use these templates as a guide when cutting your actual carpet pieces.
Templates are especially useful when working with premium stair finishes like curved oak stair treads.
Since you don’t want to damage or cover up too much of the wood, precise cuts ensure the carpet adds safety without overwhelming the design.
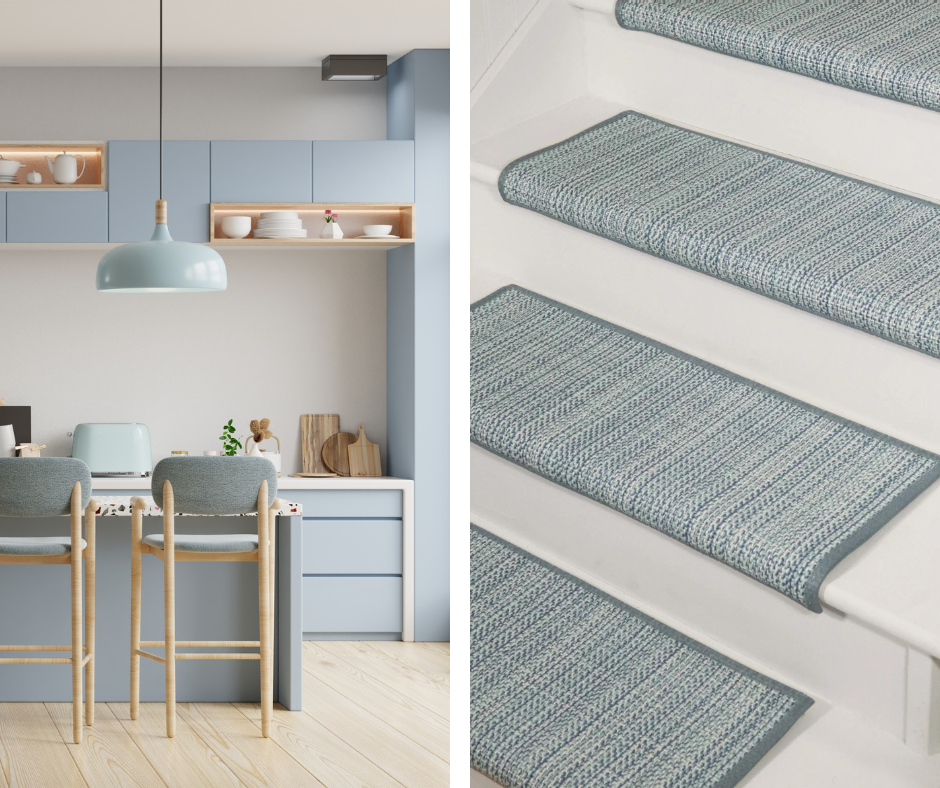
What Kind of Carpet Treads Work Best on Curved Stairs
Not all stair treads are created equal. For curved stairs, flexibility and adherence are key.
Look for carpet treads that feature a self-adhesive backing.
These are ideal because they can be trimmed easily, don’t require nails or staples, and adhere securely to curved surfaces without shifting.
Materials matter, too.
Low-pile wool, polypropylene, or blended fibers tend to cut and shape more easily than thicker, high-pile rugs.
They also mold to the curve better and are easier to secure.
Make sure the backing is compatible with your stair material.
If you’re installing over hardwood, especially curved oak stair treads, you’ll want an adhesive that doesn’t damage the surface and allows clean removal in the future.
Installing Carpet Stair Treads on Curved Stairs
Once your measurements and materials are ready, it’s time to install.
This step-by-step method ensures each carpet piece sits properly and stays in place over time.
1. Clean the Stairs Thoroughly
Before applying anything, clean each stair tread using a damp cloth or mild cleaner.
Make sure no dust, oil, or debris remains.
Even a small amount of dust can weaken the adhesive’s grip.
2. Trim the Treads to Match Each Step
Using your measurements and templates, cut each carpet piece to fit its corresponding stair.
Be patient here—accuracy is everything.
It’s better to cut a bit larger and trim down than cut too small and leave gaps.
3. Peel and Apply the Carpet Treads
Start at the center of each tread and press outward.
This reduces the chance of air pockets and ensures full contact with the surface.
Smooth the carpet with your hand or a flat tool as you go.
4. Secure the Edges
Check all edges to make sure they’re firmly pressed down.
If needed, use a roller to add extra pressure.
Well-installed carpet treads should feel flat, snug, and free of wrinkles.
5. Double-Check for Slippage
After installation, walk on each step with soft shoes to test for slippage.
If any piece shifts or lifts, re-press the edges or consider applying a stronger backing in high-traffic areas.
Enhancing the Look with Moulding for Curved Stair Treads
Want to take it one step further?
Adding moulding for curved stair treads is a great way to create a clean, professional finish.
Moulding helps visually anchor the carpet, hide uneven edges, and protect the sides of each tread from wear.
It also adds a high-end touch—especially when matched to your wood grain or stair color.
Here’s how to install it properly:
-
Choose the Right Moulding Material: Look for wood or vinyl moulding that has a bit of flexibility. Thin, unfinished moulding can bend more easily around curves, especially when combined with light scoring on the back side.
-
Cut the Moulding to Fit Measure: the length of the curve on each stair and cut accordingly. For tight curves, make small relief cuts along the back of the moulding so it bends more naturally.
-
Attach with Care: Use finishing nails or a strong construction adhesive to affix the moulding to the tread edge. Press gently into place, following the curve as you go.
-
Seal for a Seamless Look: Apply caulk where the moulding meets the stair to fill any gaps. Once dry, you can sand and paint or stain to match your staircase.
Whether you're working with hardwood, painted finishes, or curved oak stair treads, the addition of moulding gives your stairs a polished and unified look.
Common Mistakes to Avoid
Even with a good plan, there are a few common pitfalls you’ll want to avoid:
-
Skipping measurements – Every tread must be measured individually. Don’t assume they’re identical.
-
Using thick carpet – Thicker carpet is harder to trim and doesn't conform well to curves.
-
Poor surface prep – Dust or oils can ruin adhesion. Always clean the stairs first.
-
Inconsistent spacing – Use a measuring tool or spacer to ensure your treads are aligned evenly from stair to stair.
-
Ignoring safety – Make sure all treads are fully secured to avoid slips, especially in homes with kids, pets, or seniors.
Why Self-Adhesive Treads Are Ideal for Curved Stairs
Curved stairs demand flexibility in both the material and installation method.
Self-adhesive treads are designed to bend and hold their shape, adapting to slight irregularities in each step.
They also make installation cleaner—no staples, tacks, or rug pads needed.
For those working with hardwood or premium finishes like curved oak stair treads, self-adhesive backing is gentle enough to protect the original surface while still providing a solid grip.
And if you're ever ready to change styles or remove the carpet, the process is simple and won’t damage the wood underneath.
Can I Use the Same Process on Spiral or Helical Stairs?
Yes, the same method applies to spiral or helical staircases, which are types of curved stairs.
The key difference is that the curve tends to be tighter, which makes precise trimming even more important.
Templates become essential here, especially if your stairs taper sharply near the center.
Consider labeling each template and carpet tread (e.g., Step 1, Step 2, etc.) to avoid confusion during install.
Stepping It Up
So, how do you install carpet stair treads on curved stairs?
You start by measuring carefully, choosing the right carpet materials, and trimming each piece with the curve in mind.
You use high-quality self-adhesive backing for a no-slip grip, and you add finishing touches like moulding for curved stair treads to bring it all together.
The result is a staircase that’s safer, more stylish, and built to last—whether you're protecting curved oak stair treads or giving your home a fresh new look.
For homeowners who want to combine safety with elevated design, this project checks every box.
Contact Us Today!
Ready to upgrade your staircase with custom-fitted carpet stair treads?
Contact Oak Valley Designs—we specialize in high-quality, USA-made stair tread solutions that turn ordinary steps into extraordinary features.
-
Website: https://oakvalleydesigns.com/
-
Phone: 706.331.0315
-
Email: info@oakvalleydesigns.com
-
Address: 30 River Ct SW Bldg E Cartersville, Ga 30120