Stair treads looking worn, outdated, or unsafe?
The best way to remove stair treads—especially carpet stair treads—is to first identify how they’re attached, then use the right tools to lift them carefully without damaging the wood underneath.
Whether they're nailed, glued, or secured with adhesive, a strategic approach ensures clean removal and a smooth surface ready for your next upgrade.
In this guide, you’ll learn how to remove different types of stair treads step by step, including how to deal with tough adhesives and hidden fasteners.
We’ll also show you safer, smarter alternatives that make future updates easier.
Let’s help you tackle this project with confidence, clarity, and care.
Identify the Type of Stair Tread Before You Begin
Every stair tread removal starts with a bit of detective work.
What kind of treads are on your stairs?
Carpet?
Rubber?
Something custom?
More importantly, how are they held down?
If you skip this step, you risk using the wrong method—and possibly damaging your stairs.
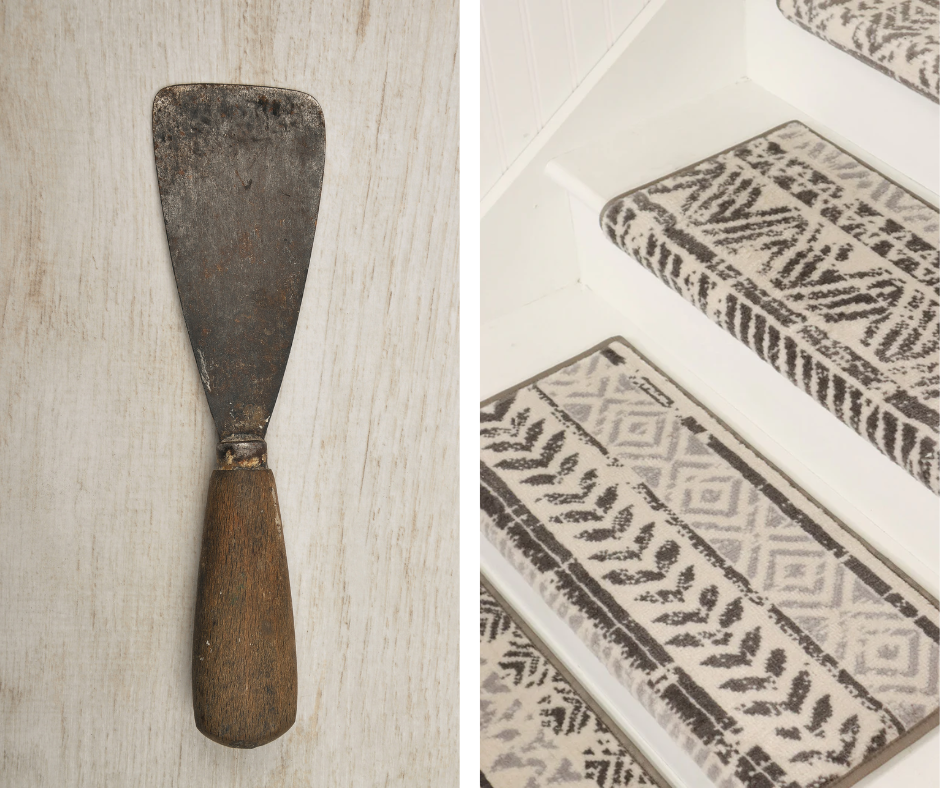
Start by lifting a corner with a flat tool like a putty knife.
If it lifts a little and stops firmly in just a few spots, you're likely dealing with nails or staples.
If it won’t budge at all, it’s probably glued all over.
And if it lifts off easily, you may be lucky enough to be working with self-adhesive styles or removable non slip stair treads—more on that later.
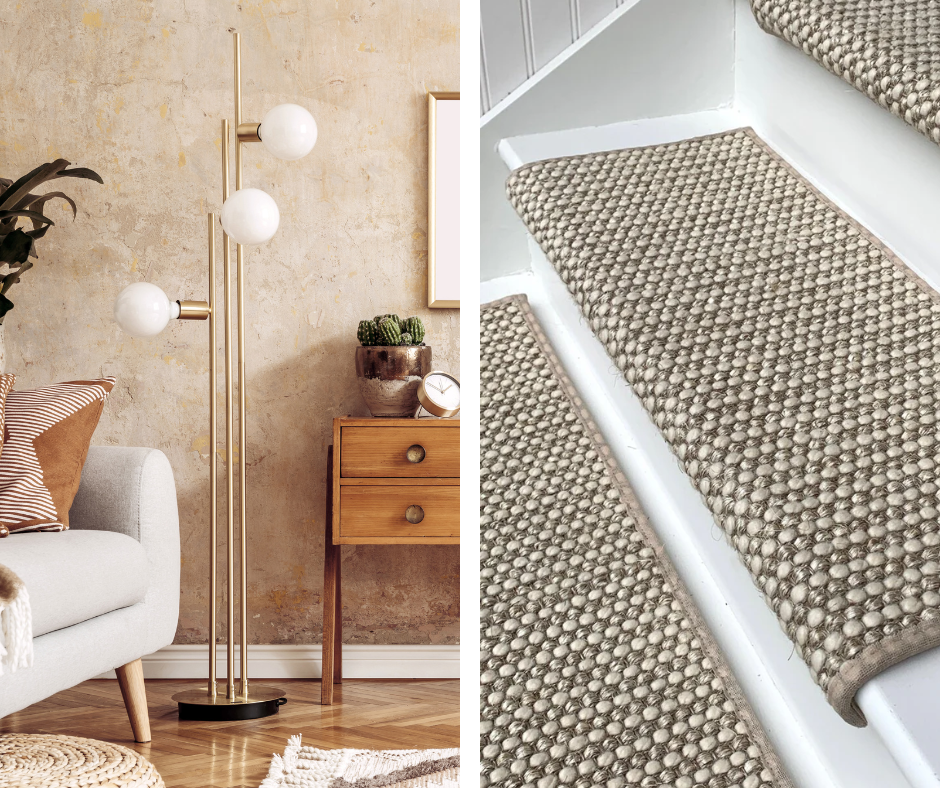
How to Handle Carpet Stair Treads (Nails vs. Glue)
Traditional carpet stair treads often use nails, tack strips, or construction adhesive.
Start with the corner test.
Then:
-
For nailed-down treads: Slide a flathead screwdriver or small pry bar under the edge and gently lift where you feel resistance. A staple remover tool can also help if you find staples along the edge. Work slowly to avoid splitting the wood underneath.
-
For glued treads: You’ll need to soften the adhesive before pulling up the carpet. Start with a steamer or heat gun and go section by section. Once softened, slowly peel up the tread using a putty knife. Scrape away residue as you go.
If you notice both nails and glue were used, take your time. Break it into zones: detach the nailed spots first, then tackle the adhesive with heat and scrapers.
Removing the Sticky Glue Left Behind
No matter what type of tread you’re dealing with, glue residue is a common frustration.
It sticks.
It flakes.
It grabs dirt.
Here’s how to remove it safely:
Step 1: Warm It Up
Use a heat gun, hair dryer, or steamer to gently warm the glue. This softens it, making it easier to lift without harming the wood underneath.
Step 2: Scrape It Clean
Use a flexible plastic scraper or putty knife to lift the adhesive. Metal tools can gouge your wood if you’re not careful. Work from one end to the other, applying even pressure.
Step 3: Wipe It Down
After the chunks are off, clean the area with adhesive remover, warm soapy water, or vinegar. Avoid harsh chemicals unless you know your stair finish can handle them.
Step 4: Dry the Area
Let the stairs fully dry before considering new installation.
Removing glue may take a little time, but it’s worth doing right to protect your wood and prep for your next style.
Can Removing Stair Treads Damage Hardwood?
This is one of the top concerns we hear from homeowners.
The short answer?
Only if you’re not careful.
Nails and heavy glue can absolutely damage stair treads if pulled aggressively or with the wrong tools.
But with a gentle approach, your hardwood will stay intact.
Avoid pulling too hard.
Go slow.
Use steam and soft tools to lift materials—not yank them.
Also, be mindful of using metal tools with sharp corners.
One wrong move and you’ve scratched your stairwell.
That’s why removable non slip stair treads are becoming a favorite.
They deliver grip and beauty—without long-term damage.
Old Rubber Stair Treads: How to Remove Them Right
Rubber stair treads, especially those installed in older homes, can be tricky.
They may be glued tightly and have become brittle or hardened over time.
But you can still remove them without tearing up your staircase.
Here’s how:
Cut the Rubber Into Sections
Use a sharp utility knife to divide the rubber into smaller, manageable pieces. This gives you better control and makes it easier to remove.
Lift Each Section Slowly
Start at one end and insert a flat tool underneath each piece. Use steady pressure to lift, being careful not to gouge the stairs underneath.
Clean the Residue
Rubber treads often leave behind a sticky film. Treat it like glue: use a heat source, scrape gently, and clean thoroughly afterward.
Some rubber treads may also be paired with metal nosing.
If you run into that, use a screwdriver to unscrew it before removing the rubber beneath.
What About Wood-on-Wood Stair Treads?
If your stair treads are made of hardwood, there’s a good chance they were nailed, screwed, or glued.
Hardwood treads that were refinished or replaced often require more attention.
Look for hidden screw covers (wood plugs) and use a drill to back out the screws.
If glue was used, follow the same heating and scraping process as above.
The key with wood-on-wood stair tread removal is to be patient and methodical.
The more careful you are now, the better your stairs will look when you’re done.
Why It’s Time to Consider Removable Options
After all the work of removing old treads, many homeowners are surprised to find that stair treads don’t have to be a permanent commitment.
Newer options are designed to give you comfort, style, and traction—without damage or hassle.
Take removable non slip stair treads, for example.
They stick securely with built-in adhesive backing that won’t damage your stairs.
They’re simple to install, stay put, and peel off clean when it’s time to switch up your look.
No glue.
No nails.
No tools required.
They’re a great solution if you have pets, toddlers, or older parents living at home.
They also make future upgrades easy—just peel and replace.
Thinking Ahead: The Smarter Way to Reinstall Stair Treads
Once you’ve finished removing your old stair treads, you’ll likely want to install something safer and more stylish.
But you probably don’t want to repeat the same glue-and-nail routine you just went through.
This is where easy remove fasteners for removable stair treads come in.
These small, smart clips or tabs let you lock your treads in place without damaging your stairs.
When you’re ready for a refresh, just lift the tread off and replace it.
You don’t need power tools, and you don’t have to worry about leftover residue.
They’re the perfect middle ground for homeowners who want stability—but not permanence.
Maintenance Tips After Removing Stair Treads
Once everything is off your stairs, take a few extra steps before installing new treads.
Inspect Your Stairs
Look for any damage from previous nails or glue. Sand down any rough spots or residue.
Polish or Refinish if Needed
This is a great opportunity to refresh your stairs. A light sanding and coat of finish can bring them back to life.
Test for Slipperiness
Bare stairs can be slick. Until you add new treads, use caution, especially if you have pets or children.
Stepping It Up
The best way to remove stair treads starts with knowing what you're up against.
Are they glued?
Nailed?
Rubber?
Carpet?
Once you identify how they’re attached, take it step by step—literally.
Use heat, soft tools, and plenty of patience.
The goal is clean stairs, not scuffed or scratched wood.
And when it’s time to add new ones, don’t go back to old methods that cause stress next time around.
Choose smarter options.
Removable non slip stair treads and easy remove fasteners for removable stair treads offer the same safety and style—but none of the damage.
No glue.
No nails.
Just comfort, grip, and Southern charm you can count on.
Whether you're styling for safety or updating for looks, we’re here to help you step up beautifully.
Ready to Upgrade Your Stairs?
Explore our full line of removable stair treads, landing rugs, and hallway runners made for real families, real pets, and real homes.
Let us help you create a stairway that’s safe, stylish, and easy to live with—start to finish.
-
Website: https://oakvalleydesigns.com/
-
Phone: 706.331.0315
-
Email: info@oakvalleydesigns.com
-
Address: 30 River Ct SW Bldg E Cartersville, Ga 30120