Want to upgrade your staircase without hiring a pro?
Here’s how to DIY stair treads quickly, safely, and with professional-looking results using carpet stair treads.
By following a few simple steps, you can enhance your home's style and safety in just one afternoon.
Learning how to DIY stair treads starts with choosing the right materials and installation method.
This guide will walk you through using velcro, adhesive, or built-in backing to install carpet stair treads with confidence.
Keep reading to get expert tips, avoid common mistakes, and find the best fit for your home and lifestyle.
Why Stair Treads Matter
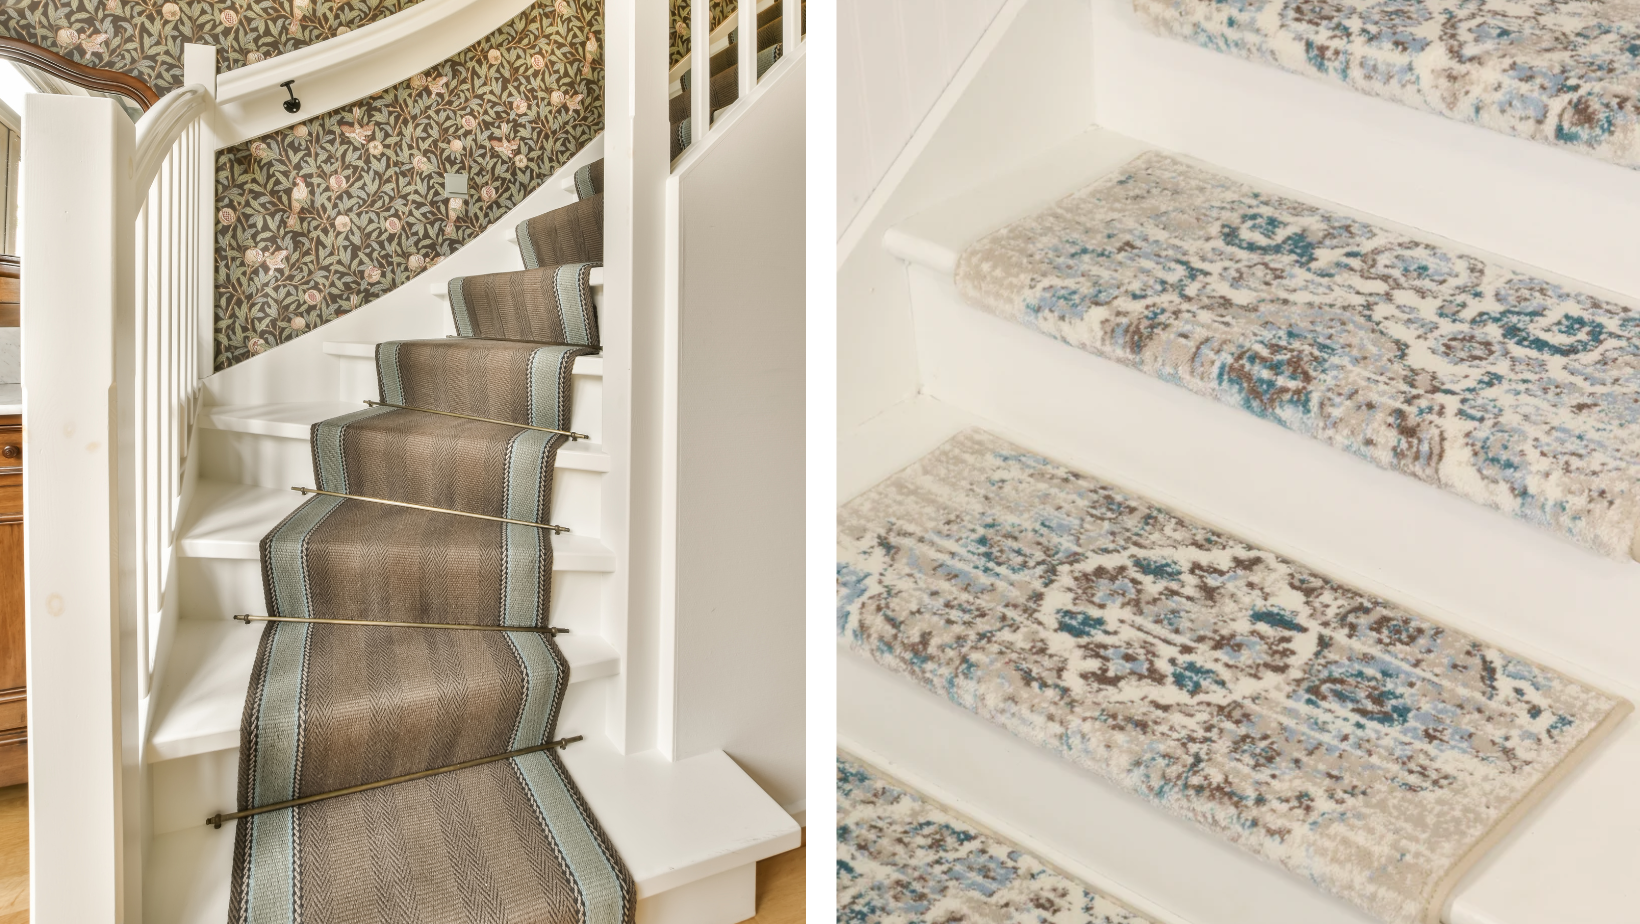
Stair treads do more than just look nice.
They help prevent slips, soften noise, and protect your hardwood stairs from everyday wear.
Especially in busy homes with kids or pups running up and down, they can make a world of difference.
If you’ve been browsing diy stair tread ideas, this is one of the easiest and most impactful weekend projects to tackle.
Choosing Your Stair Tread Type
Before installing anything, decide which type of carpet stair tread works best for your home and lifestyle.
Velcro-backed treads are easy to install and remove.
They’re great for renters or those who like to switch things up seasonally.
Adhesive-backed treads provide a strong, lasting hold.
They’re better for permanent installations and homes where treads won’t need frequent moving.
Built-in backing treads are the simplest.
They come with self-adhesive already in place—no tools or extras needed.
Oak Valley Designs makes a reusable version that won’t damage your floors and can be replaced as often as you want.
That’s one reason homeowners love this option when exploring diy stair covering ideas that are both stylish and safe.
What You’ll Need
Before you start, gather your supplies.
-
Measuring tape.
-
Utility knife.
-
Straight edge or ruler.
-
Paintbrush or roller (if using adhesive).
-
Screwdriver (optional, for securing velcro).
-
Your selected stair treads.
Step 1: Prep Your Stairs
Clean thoroughly.
Dust, dirt, or oil can weaken the hold.
Wipe down each step and let dry.
Smooth the surface.
Sand rough patches or remove splinters so the treads sit flat.
Measure and mark placement.
Use your measuring tape to center each tread on the step.
Mark lightly with a pencil so they line up straight.
Proper prep helps your treads look professional and last longer.
Step 2: Install with Velcro
If using velcro-backed treads, follow these steps.
Apply velcro strips to the back of each tread.
Press the tread down firmly onto the step.
Double-check alignment with your marks.
Secure with screws if extra hold is needed.
Avoid walking on the treads for at least an hour so the velcro can fully set.
Velcro is one of the most flexible diy stair tread ideas because it allows you to reposition easily and avoids any long-term commitment.
Step 3: Install with Adhesive
If you’re going for a stronger hold, here’s how to install adhesive-backed treads.
Brush adhesive evenly on the back of each tread.
Press the tread down firmly, using your markings as a guide.
Wipe away any excess glue before it dries.
Work in small sections to avoid the adhesive drying before the tread is in place.
Be careful with adhesive—it’s tough to remove once cured.
This option is often selected when looking for diy stair covering ideas that will stay in place long-term.
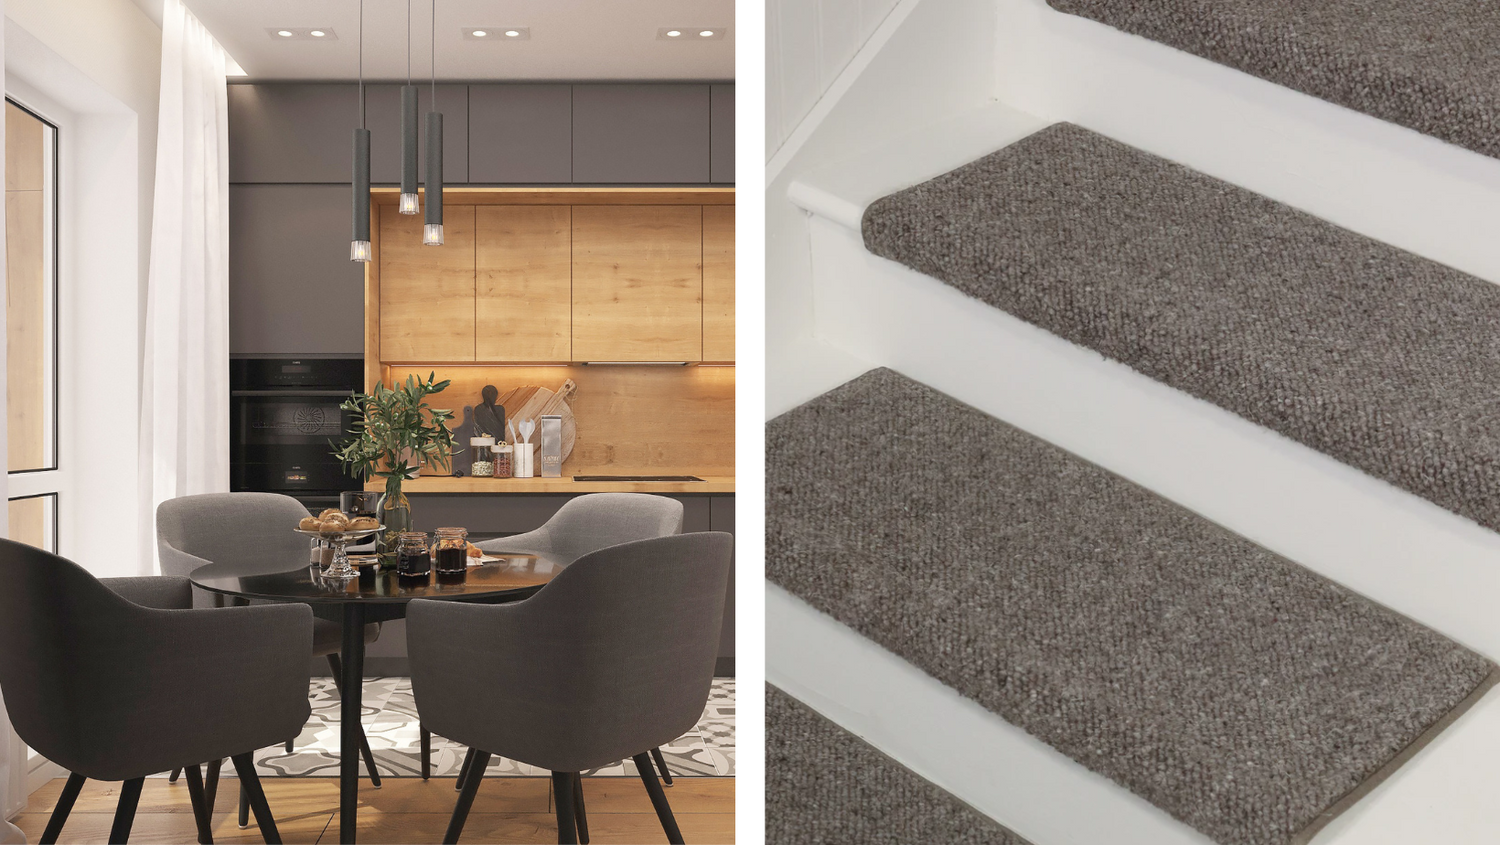
Step 4: Install Built-In Backing Treads
The easiest option is built-in backing.
It’s a favorite among homeowners who want quick results with minimal tools.
Peel off the protective layer from the back of each tread.
Line up the tread with your pencil marks.
Press it down firmly and smooth out the edges.
Oak Valley’s removable self-adhesive backing gives you peace of mind.
You can lift and reset your treads without damage, making this a great fit for both permanent and temporary needs.
If you're new to how to diy stair treads, this option keeps it simple and satisfying.
Tips for a Professional Finish
Don’t rush the measuring.
Even small misalignments can stand out once everything is in place.
Check your treads under different lighting to spot any edges that need adjusting.
Step back after placing a few treads and look at the full staircase to ensure everything flows evenly.
If you’re using a patterned design, line up the grain or pattern direction to keep a cohesive look.
Even DIY should look like a designer helped you.
Cleaning and Maintenance
Vacuum weekly to prevent dust and pet hair buildup.
Spot clean with mild soap and warm water when needed.
Avoid soaking the treads, especially if using adhesive.
Periodically check edges to make sure they’re still secure.
One great thing about reusable styles is you can easily lift, clean underneath, and reset—no mess, no damage.
This makes built-in backing a winner in both form and function when looking at long-term diy stair tread ideas.
Mistakes to Avoid When Installing Stair Treads
Don’t skip prep.
-
Installing treads on dirty or damp steps is one of the most common causes of failure.
-
Don’t guess your measurements.
-
Measure every step individually—even in older homes, steps may vary slightly in size.
-
Don’t walk on treads immediately.
-
Give velcro or adhesive time to fully bond before subjecting them to foot traffic.
-
Don’t forget about your finish.
-
Even a minor adhesive spill can affect the final look if not cleaned quickly.
-
And lastly, don’t buy cheap.
Your stairs get a lot of use—choose a quality product that’s made to last.
How To Choose the Best Option for Your Home
If you have pets or kids, go with something that’s soft, non-slip, and easy to clean.
Velcro is great for flexibility and temporary installs.
Adhesive is better for homes that don’t need frequent adjustments.
Built-in backing offers the most user-friendly experience.
It combines a secure hold with the ability to update or reposition when needed.
If you're unsure which route to take, Oak Valley Designs offers $1 swatches so you can touch, test, and compare at home.
When reviewing your diy stair covering ideas, always balance safety, style, and how long you want the treads to stay in place.
Why Homeowners Are Choosing DIY
Doing it yourself saves money on labor and gives you full control over the look.
It’s fast.
Most installations take less than an hour.
It’s forgiving.
You don’t need to be a carpenter to get it right.
And it’s satisfying.
You’ll feel proud every time you walk up those steps knowing you did it yourself.
Plus, it’s a great way to involve your kids in a weekend project or finally bring to life that Pinterest board you’ve been collecting.
How Oak Valley Designs Makes It Easier
Our treads are handcrafted in North Georgia with comfort, safety, and design in mind.
We use materials that are family and pet friendly.
Our self-adhesive backing won’t damage your floors and can be reused again and again.
We ship fast, offer easy returns, and make swatch ordering simple.
We’re not a big-box store—we’re a family brand that wants your family to feel at home, from the first step up to the last step down.
If you’re exploring diy stair tread ideas or comparing diy stair covering ideas, we’re here to guide you from start to finish.
Stepping It Up
Installing stair treads yourself isn’t just a budget-friendly upgrade—it’s one of the smartest ways to add style and safety to your home.
With a few simple tools and the right materials, you can transform your staircase in under an hour.
Whether you go with velcro, adhesive, or our removable built-in backing, we’re here to help you every step of the way.
Looking for guidance on which tread fits your stairs best?
Start with a swatch kit or reach out to us directly.
We’d love to help you turn this weekend project into something beautiful, functional, and safe.
-
Website: https://oakvalleydesigns.com/
-
Phone: 706.331.0315
-
Email: info@oakvalleydesigns.com
-
Address: 30 River Ct SW Bldg E Cartersville, Ga 30120