A well-maintained staircase enhances both safety and style in your home.
Learning how to caulk stair treads ensures a secure, polished finish by sealing gaps and preventing movement.
Whether you're installing carpet stair treads or upgrading existing steps, proper caulking helps extend durability and improves the overall aesthetic.
In this guide, you'll discover expert techniques for selecting the right caulk, applying it smoothly, and achieving professional results.
We'll also cover essential tools, step-by-step instructions, and maintenance tips for long-lasting performance.
By the end, you'll have the confidence to caulk stair treads effectively and enhance your staircase’s function and appearance.
Why Caulking Stair Treads is Essential
Staircases endure constant foot traffic, which can lead to gaps, movement, and potential hazards over time.
Properly caulking stair treads helps prevent these issues while also improving the overall appearance of the staircase.
When working on a staircase, you may ask, do you caulk stair treads?
The answer is yes—caulking plays a vital role in ensuring stair treads are stable, well-sealed, and visually appealing.
Importance of Caulking for Secure Installation
One of the primary reasons for caulking stair treads is to secure them firmly in place.
Stair treads and risers often develop small gaps due to the natural expansion and contraction of materials, especially in homes with wood flooring.
Applying caulk helps fill in these gaps, preventing movement and reducing noise caused by shifting wood.
Caulking also provides extra support for stair treads, particularly in homes with children, elderly individuals, or pets.
Even small gaps can create tripping hazards, making caulking an essential step for improving staircase safety.
Benefits of Caulking for a Polished Finish
Beyond its functional advantages, caulking enhances the appearance of your staircase.
Small gaps and imperfections can make even high-end staircases look unfinished.
A well-applied bead of caulk provides a seamless, polished look, concealing nail holes, uneven edges, and minor surface flaws.
For homeowners wondering, do you caulk around stair treads?—the answer depends on the staircase’s construction.
If there are gaps between the treads and the adjacent walls or risers, caulking around stair treads ensures a clean, cohesive look while preventing dirt and moisture buildup.
Preparing for Caulking
Before applying caulk, proper preparation is key to achieving a smooth and durable finish.
Skipping this step can lead to adhesion issues or an uneven appearance.
Tools and Materials Needed
Gather the following tools and materials before you begin:
-
High-quality, paintable caulk suitable for wood, laminate, or other staircase materials
-
Caulking gun or battery-operated caulking gun
-
Brad nailer (if securing loose treads)
-
Sandpaper or sanding block
-
Putty knife
-
Damp cloth or vacuum cleaner
-
Painter’s tape (optional for cleaner lines)
-
Acrylic paint and brush (optional for touch-ups)
-
Dust mask and safety goggles for protection
Preparing the Staircase for Caulking
-
Clean the Area Thoroughly – Use a vacuum cleaner and a damp cloth to remove all dust, dirt, and debris. Caulk adheres best to clean, dry surfaces.
-
Secure Loose Treads – If any stair treads or risers feel loose, use a brad nailer to secure them before applying caulk.
-
Sand Rough Edges – If there are splinters or uneven surfaces, lightly sand them to create a smoother surface for the caulk to adhere to.
-
Use Painter’s Tape (Optional) – If you want to ensure crisp, clean caulking lines, apply painter’s tape along the edges where you will be caulking.
Step-by-Step Guide to Caulking Stair Treads
Now that the staircase is prepped, follow these steps for professional-looking results.
Step 1: Remove Dust and Debris
Even after initial cleaning, dust may accumulate in cracks and crevices.
Use a damp cloth or a small brush to wipe down the area again before applying caulk.
Any remaining debris can interfere with adhesion and result in an uneven finish.
Step 2: Choose the Right Caulk
Selecting the right caulk is critical for achieving a long-lasting finish.
Look for a paintable caulk designed for interior trim and molding.
Silicone-based caulk is highly flexible and moisture-resistant, making it a good option for high-traffic staircases.
However, if you plan to paint over the caulk, opt for an acrylic or latex-based formula.
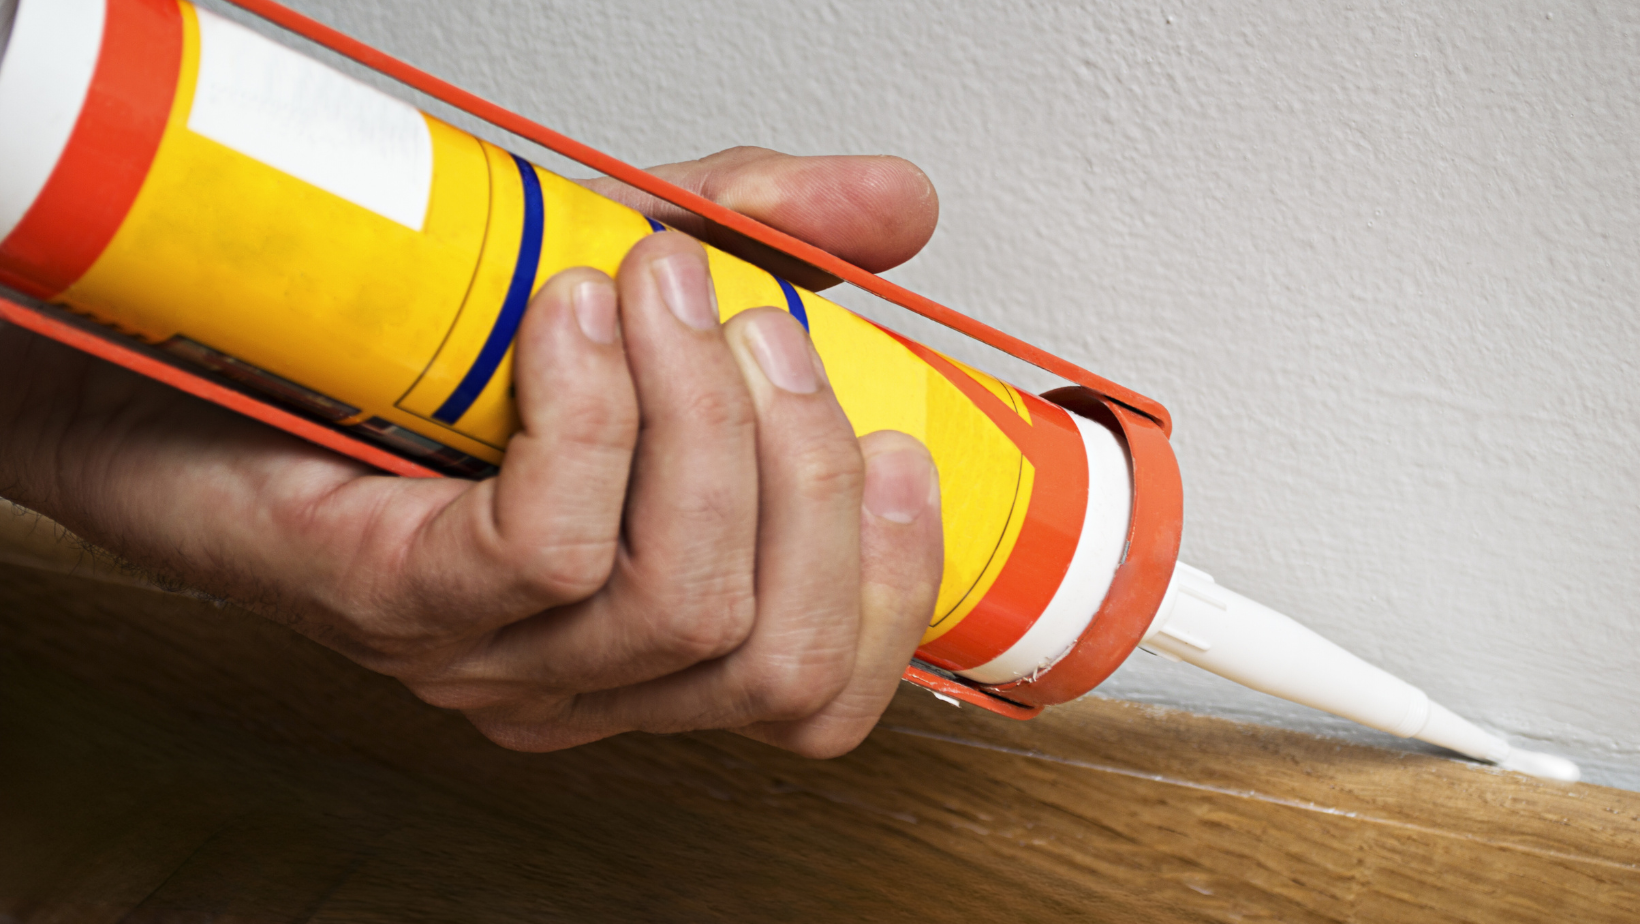
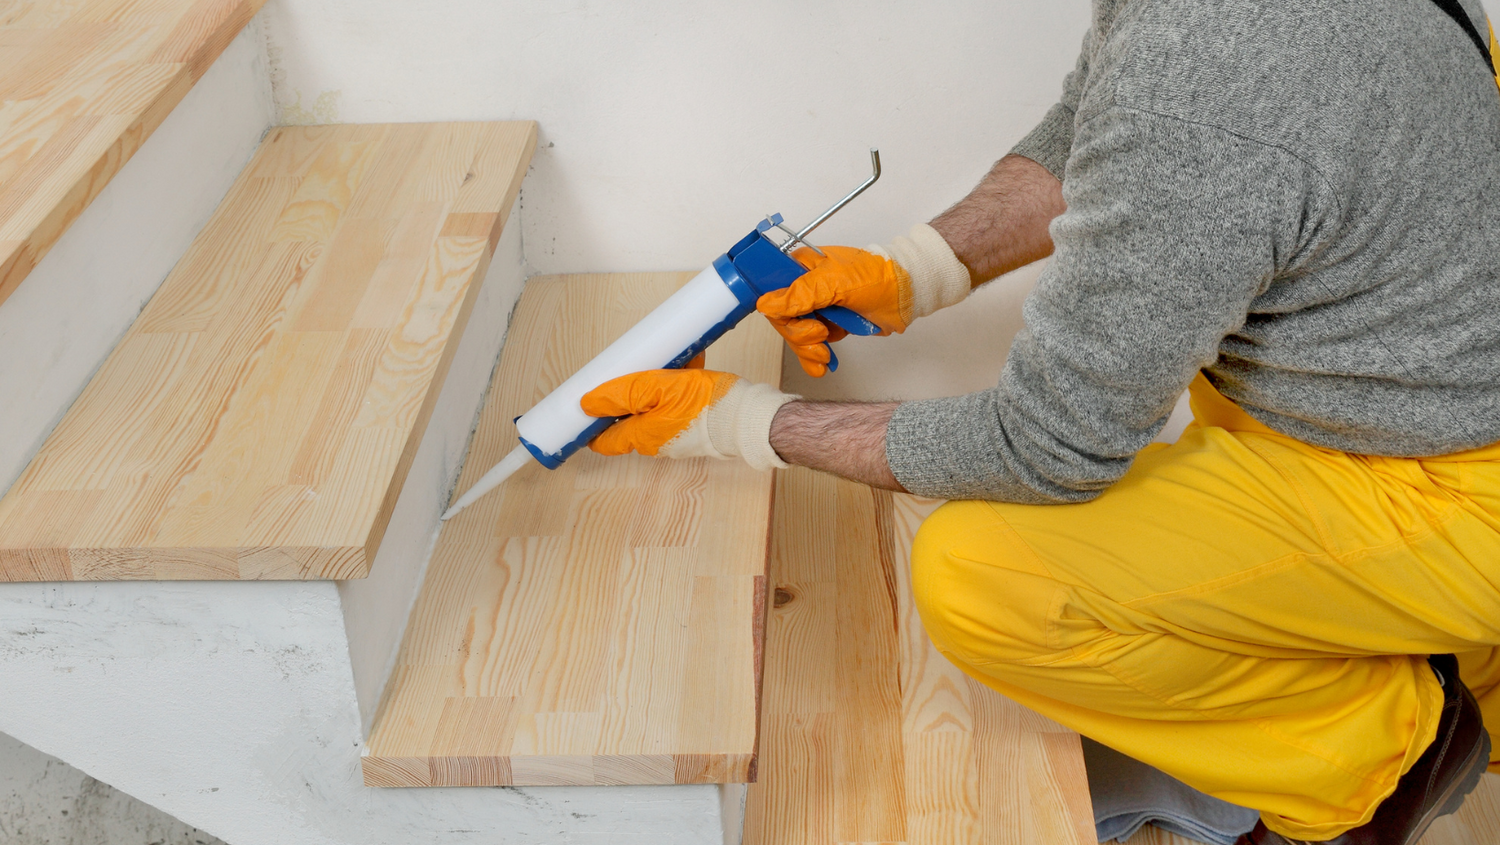
Step 3: Apply Caulk Along Stair Treads and Risers
Load the caulk into a caulking gun and cut the nozzle at a 45-degree angle for better control.
Hold the caulking gun at a similar angle and apply a steady, even bead along the gaps between the stair treads and risers.
For those still wondering, do you caulk stair treads?, this step ensures a secure fit and enhances durability.
Applying caulk correctly prevents movement and fills in any structural gaps.
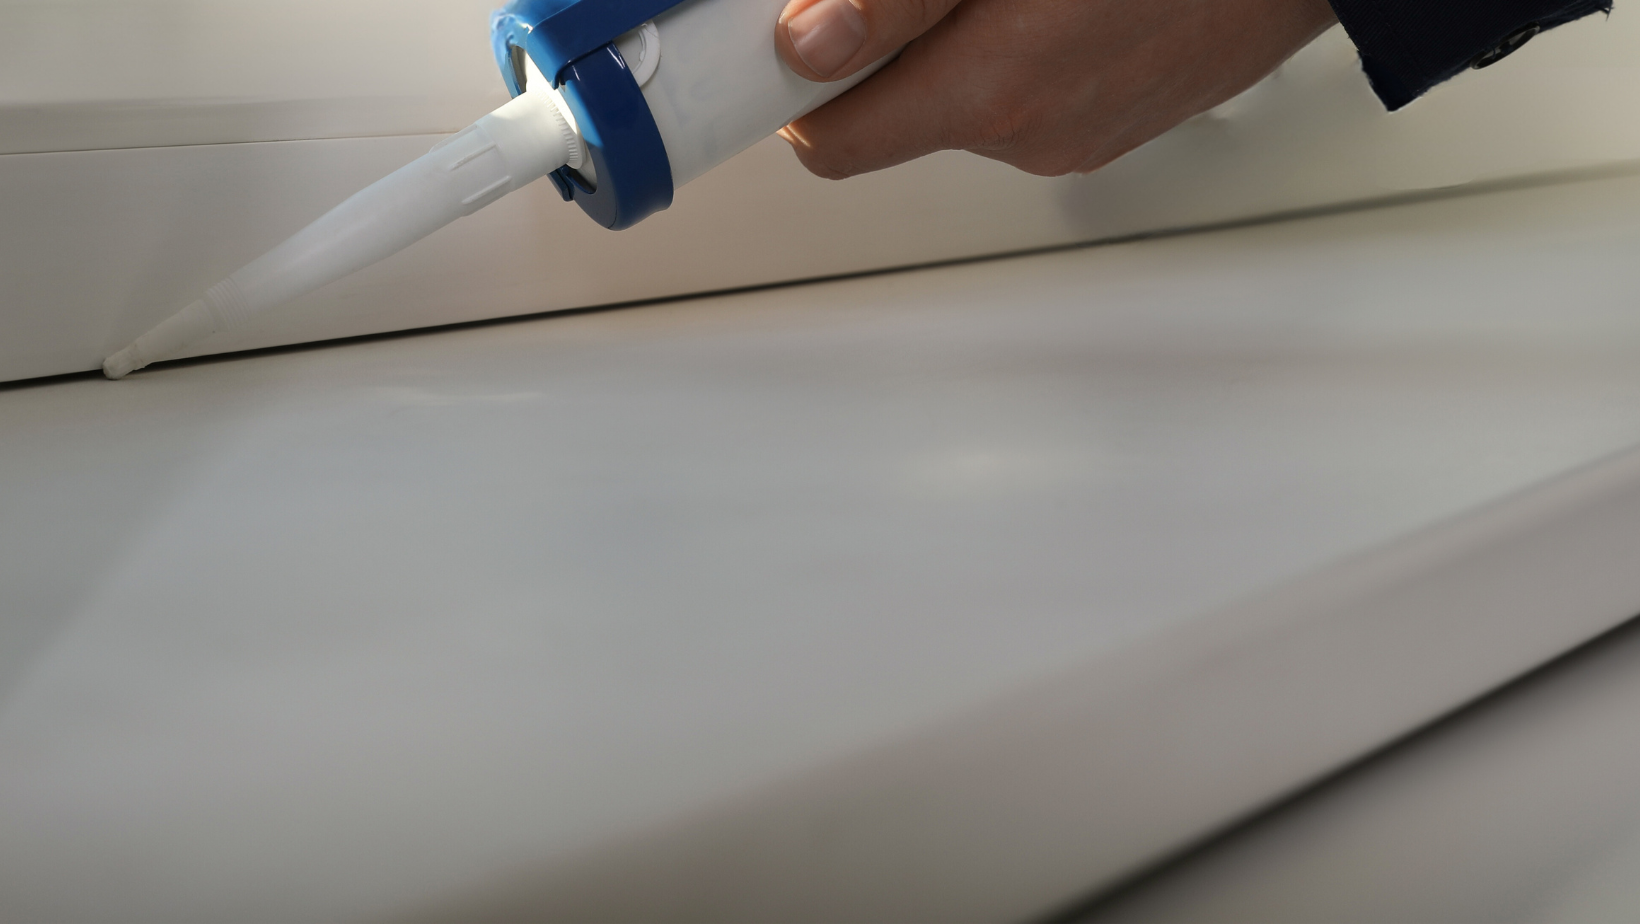
Step 4: Smooth the Caulk for a Professional Finish
After applying the caulk, use a putty knife or a caulk smoothing tool to press it into the gaps and create a seamless look.
If excess caulk appears, wipe it away with a damp cloth before it dries.
If you are also addressing gaps between the staircase and walls, now is the time to caulk around stair treads to create a clean, cohesive finish.
Step 5: Allow Drying Time and Inspect Your Work
Refer to the caulk manufacturer’s drying time before touching or painting over the caulk.
Once dry, inspect your staircase for any gaps or uneven areas.
If necessary, apply a second coat for added coverage.
Finishing Touches for a Seamless Look
Once the caulk has fully dried, inspect the staircase from different angles to ensure uniformity.
If any areas need additional smoothing, lightly sand them before applying touch-up paint.
Maintenance Tips for Caulked Stair Treads
Proper maintenance helps extend the life of your caulking and keeps your staircase looking its best.
-
Inspect Regularly – Over time, caulk may shrink or crack due to temperature changes and foot traffic. Check for signs of wear and reapply as needed.
-
Keep It Clean – Wipe caulked areas with a damp cloth to remove dust and dirt. Avoid harsh chemicals that could weaken the caulk.
-
Reapply as Needed – If gaps begin to appear again, apply a fresh bead of caulk to maintain stability and appearance.
Common Mistakes to Avoid When Caulking Stair Treads
Even with careful planning, mistakes can happen.
Avoid these common errors for a flawless finish:
-
Using the Wrong Type of Caulk – Ensure you select a paintable, flexible caulk suitable for staircases.
-
Applying Too Much Caulk – A thick bead can create an uneven look and take longer to dry.
-
Skipping Surface Preparation – Failing to clean or sand surfaces can prevent proper adhesion.
-
Neglecting Drying Time – Allow caulk to fully cure before painting or exposing it to heavy foot traffic.
Steps To Success
Properly learning how to caulk stair treads is essential for securing stair treads, preventing movement, and achieving a polished, professional finish.
By using the right caulk and applying it correctly, you can fill gaps, enhance durability, and improve the overall appearance of your staircase.
Whether installing new stair treads or maintaining existing ones, following the correct techniques ensures long-lasting results.
Mastering how to caulk stair treads not only improves safety but also adds a refined touch to your home’s interior.
With the right tools, preparation, and application methods, you can complete this project efficiently and with confidence.
Now that you understand the process, you can caulk your stair treads like a pro and enjoy a secure, beautifully finished staircase.
Contact Us Today!
If you're looking to add carpet stair treads to your newly calked treads, try Oak Valley Designs!
-
Website: https://oakvalleydesigns.com/
-
Phone: 706.331.0315
-
Email: info@oakvalleydesigns.com
-
Address: 30 River Ct SW Bldg E Cartersville, Ga 30120